VCloud.ai VCA Event management Operation manual
Contents
1.General description
The Event-manager is the manager for the creation of event handlers in the VCLOUD.AI VCA system for integration with third-party services.
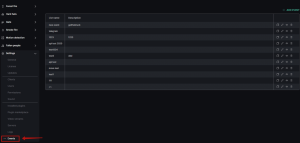
The list of events with the name and the short description is provided in the section Events.
2.Create event
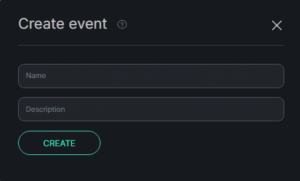
To create a certain event, go to the section Events and click on the ADD EVENT button.
Then fill in the fields Name and Description and press Create.
3.Edit Event
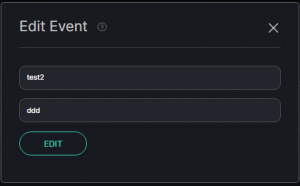
To edit an Event press the editing badge opposite to record with the name of the event on the page of the list of events.
The form of the event change opens. Change fields with the name and the description of the event.
4.Copy Event
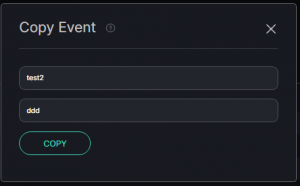
To make a copy of the event press the badge of copying opposite to record the name of the event on the page of the list of events.
The form of copying of the event opens. To make a copy it is necessary to change fields with the name of the event. Also, you can change the description.
Press the Copy button to save changes.
After copying a new event will be created which comprises the same scheme, as the event that was copied.
Remove Event
To remove an event press the removal badge opposite to record the name of the event on the page of the list of events.
It is possible to remove Event only if it is not used in analytics.
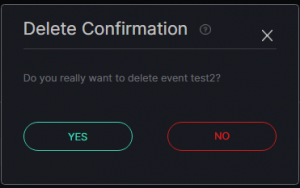
By pressing the badge of removal the window of the removal confirmation will open.
For removal press Yes. For cancellation, press No or close the window. If the event is not used in analytics, then it will be removed. If the event is used in analytics, then you will not be able to remove the event.
In this case, to remove the event, it is necessary to remove it from the analytics in which it is used.
5.View Event
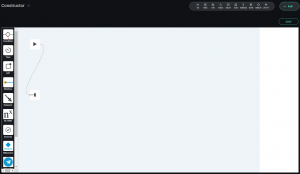
When you press on the badge of viewing the functionality of the Event-manager with structure and logic of events opens.
6.Event manager
The Event-manager is intended to create events at the accomplishment of which notices will come to the VCLOUD.AI VCA system or to other services (Modbus, Harpoon, Milestone, Nx VMS). Also, there is the possibility of sending notices on means of API.
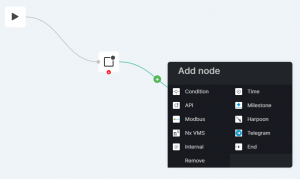
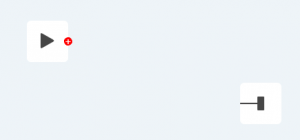
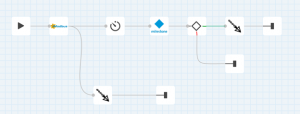
To add the new block it is necessary to guide the cursor at the line of connection of mainframes (the Beginning, the End). In the
middle of the line, the sign
appears.
By pressing this sign the window in which the necessary knot is chosen opens. After pressing the necessary block it appears on the main screen.
To remove the connection it is necessary to press Remove.
To create a connection it is necessary to left-click on red "+" and without releasing the left mouse button to stretch the line to another block.
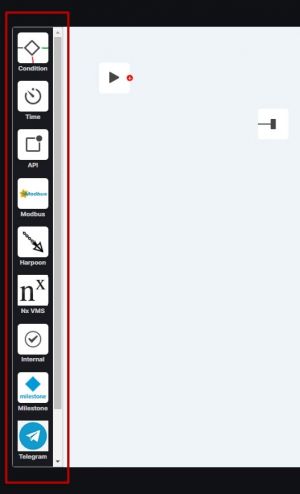
To add the block without using the line of connection it is necessary to draw the necessary block from the left part of the screen on working area.
For removal of the block from the working area it is necessary to press the corresponding block. After that to press the Remove Block button in the Right Part of the Screen. The initial block cannot be removed.
7. Condition block
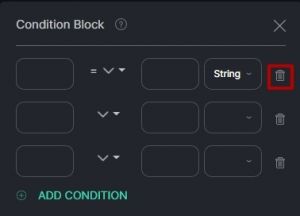
This block is intended for the creation of conditions on which notices will come. The block has two branches: Green and red. The green branch is responsible for the truthful condition, and red for false. For input of parameters of the condition, it is necessary to add the block to the working area and to press it.
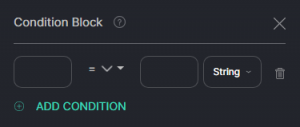
In the opened window it is necessary to fill fields.
In the field at the left the parameter for comparison registers. There are 4 conditions of comparison: equally, more, is unequal less (=!=,>, <) which can be chosen are more right than the writing field of the parameter.
On the right, it is necessary to specify values for comparison in the field. It is necessary to specify the type of value in the remained field: number (Number), line (String), logical value (Boolean).
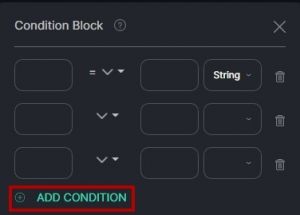
For adding one more condition it is necessary to press Add Condition button.
For removal of the condition, it is necessary to press the badge of removal in the right part of the condition.
Events can be used in different modules of the system and are caused by the block of events. Therefore, for different modules, different parameters on which events are created are used.
Additional parameters the user can specify own parameters which he will use at the creation of logic of the Event-manager in the block.
The VCLOUD.AI VCA system gives the following data for further integration into third-party services:
| NAME | VALUE |
|---|---|
| ID | Unique identifier of the notice |
| Detected | Recognizable object (number or name of the person) |
| detected_object | Way to the picture of the object (number or person) |
| detected_frame | Way to the complete picture of the shot |
| unix_timestam | Tag of time of Unix in ms |
| box | Relative (from 0 to 1) coordinates of detected_object on detected_frame |
8.Time block
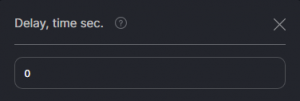
This block allows creating the delay between notices. To establish delay time add the block to the working area and press it.
Specify delay time in the opened window.
To remove the block press the Remove Block button at the bottom of the page.
9.API block
This block is intended for sending the notice on the specified API. To send the notice, add the block to the working area and press it.
In the opened window fill fields:
| FIELD | PARAMETER DESCRIPTION | VALUE FORMAT |
|---|---|---|
| Method | You will choose the method of sending the notice | Get, Post |
| URL | Specify the URL on which it is necessary to send the message | https://api.exmo.com/v1/currency |
| Content/Type | You will choose the type of content and type | aplication/json |
To remove the block press theВ Remove BlockВ button at the bottom of the page.
10.Modbus block
This block is intended for sending notices forВ Modbus. To send the notice add the block to the working area and press it. In the opened window fill fields:
| FIELD | PARAMETER DESCRIPTION | VALUE FORMAT |
|---|---|---|
| IP | IP address | 127.0.0.1 |
| Port | Port | 502 |
| Channel/Port | Channel | 255 |
| ON/OFF | Parameter shows the port is included or switched off | ON/OFF |
To add the additional channel press Add channel.
To remove the channel press the badge of removal.
To remove the block press theВ Remove Block button at the bottom of the page.
11.Milestone block
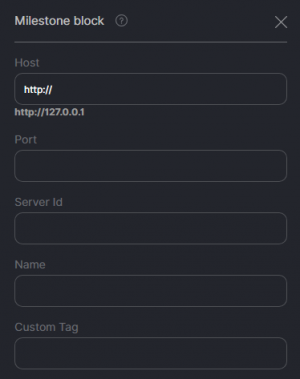
This block is intended for sending notices for Milestone. To send the notice add the block to the working area and press it.
In the opened window fill fields:
| PARAMETER | PARAMETER DESCRIPTION | VALUE FORMAT |
|---|---|---|
| Host | Enter host | http://127.0.0.1 |
| Port | Enter port | 9090 |
| Server ID | Enter the Id of the server | Id of the server |
| Object ID | Enter the Id of the object | Id of the object |
| Name | Enter the name of the notice | Name |
| Custom tag | Add the tag | #tag |
To remove the block press the Remove Block button at the bottom of the page.
Determination of the correct values
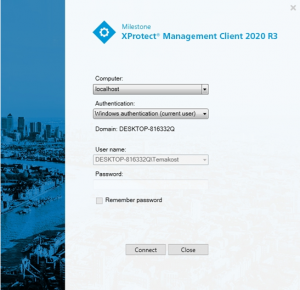
The correct values can be learned in Milestone Xprotect Management Client
Host
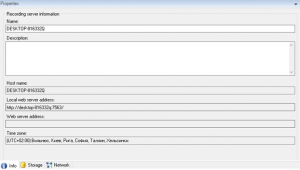
To enter correctly this field it is necessary to deliver in the beginning http:// and enter the address of the computer (can be learned when opening the program).
Port
The standard value of port: 9090
ServerId
To learn this value it is necessary:
Select the Server tab – the Server of record.
Two times press the record.
After pressing the window with information will appear.
To receive ServerId it is necessary to go to the other tab, for example, Storage.
After the transition, it is necessary to clamp the CTRL key and to left-click on the Information tab. In this tab, there will be ServerId which you can copy.
Name
This parameter can be added in the tab Rules and Events – User – defined Events.
For this purpose, select this tab. Right-click on User-defined Events. Press Add. Enter the name and the description.
Custom Tag
It is possible to enter any clear value into this field to make it search further.
12.Nx VMS block
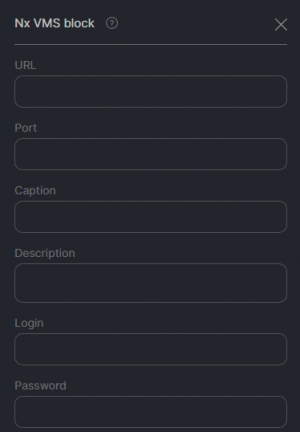
This block is intended for sending notices to theВ Nx VMSВ environment. To send the notice add the block to the working area and press it.
In the opened window fill fields:
| PARAMETER | PARAMETER DESCRIPTION | VALUE FORMAT |
|---|---|---|
| URL address | The address of the device on which Nx VMS is established | http://127.0.0.1 |
| Port | Port number | 9090 |
| Caption | Heading. It is entered for the possibility of filtration | Motion |
| Description | Description. It is entered for the possibility of filtration | Any lines |
| Login | The login in the environment of Nx VMS | admin |
| Password | The password in the environment of Nx VMS | Qwerty1234 |
To remove the block press the Remove Block button at the bottom of the page.
Determination of the correct values
The correct values can be learned in the environment of Nx VMS.
URL address and Port
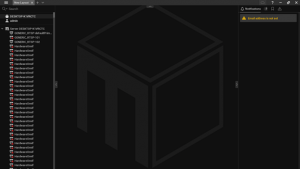
To learn the correct address and port it is necessary to open the Nx VMS environment.
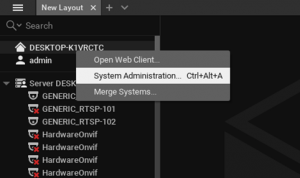
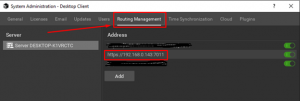
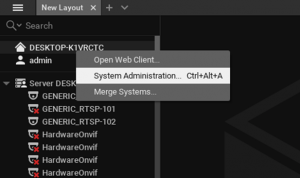
Right-click on the name of the computer and chooseВ System Administration.
In the opened window to go to the Routing Management tab. In this tab, it is possible to see the address and port. The address and port the sign ":" divides, all values to this sign - the address, everything that after - port.
Caption, Description
To these fields, it is possible to enter any values into the VCLOUD.AI VCA system. They are necessary for the filtration of notices. Filtration is performed during the creation of events. Filtration means that notices only with the specified parameters will come. To perform filtration it is necessary to:
Right-click on the name of the computer and choose System Administration.
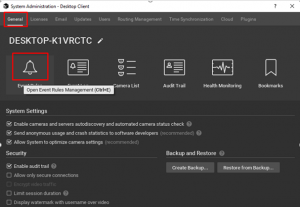
In the opened window chooseВ Event Rules.
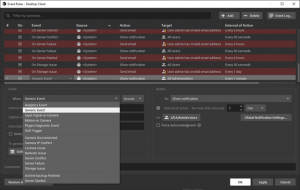
Press the button + Add. In opened in the section Event in the field chooseВ Generic Event.
In the section Event three fields will appear: Source contains, Caption contains, Description contains.
In the field Source containsВ it is possible to enter the name of the camera, notices only on the specified camera will come then.
In the Caption contains - can enter heading, notices, only with this heading will come then. The Caption containsundertakes from the event of value created in the system in the tab from the field of the Nx VMS block.
Similarly works theВ Description containsВ field.
All three fields are necessary for the filtration of notices.
Login, Password
These values the user at the installation of the Nx VMS environment establishes the login and the password of the user of the Nx VMS system.
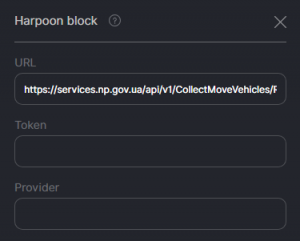
13.Harpoon block
This block is intended for sending notices to Harpoon. To send the notice add the block to the working area and press it.
In the opened window fill fields:
| PARAMETER | PARAMETER DESCRIPTION | VALUE FORMAT |
|---|---|---|
| URL | Specify the working reference | https://services.np.com/api/v1/CollectMoveVehicles/ReceiveMovementHarpoon |
| Token | Specify the key | 123456 |
| Provider | Specify the name of the provider | Harpoon |
To remove the block press the Remove Block button at the bottom of the page.
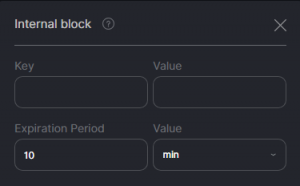
14.Internal block
This block is intended for preserving the entered parameters for a certain period of time. The block of the Condition can use the kept parameters in any event.To use parameter in the block of the Condition write at the beginning "#", and then the name of the parameter.
To create a parameter add the block to the working area and press it.
In the opened window fill fields:
| PARAMETER | PARAMETER DESCRIPTION | VALUE FORMAT |
|---|---|---|
| Key/value | In the fieldВ KeyВ enter the name of the parameter. In the field value - the value of the parameter | Param/10 |
| Time/value | Enter the amount of time and its unit of measure | 30/min |
To remove the block press the Remove Block button at the bottom of the page.
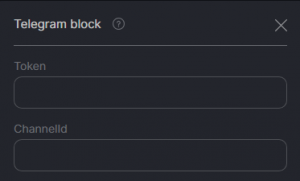
15.Telegram block
The telegram block is used for sending Events to Telegram.
To send the events with time and place, a photo of the violation fille the parameters of the Telegram block.
Specify Token and ChannelID in the settings of the telegram block.
Use the created event in the settings of analytics.
Telegram chat bot creation and connection to vCloud.ai (3 minutes)
- 1. Create a bot:
- 1.1. Open this link from the customer’s mobile phone https://t.me/botfather
- 1.2. In the opened chat window type the following: /newbot
- 1.3. Give it a name ending with _bot. Example: myalert_bot
- 1.4. Copy the token. Example: 1898861525:AAGqZ-L3fowZgwDYQr_9cVAheAYicKrE6t0
- 1.5. Find your bot by its name in Telegram contact search and send it the command: /start
- 2. Get your chat ID
- 2.1. Find @userinfobot and send a /start command
- 2.2. Copy the ID. Example: 346592889
- 2.3. Send us the token and the chat ID. We will add this information to the VCA system so you will start receiving instant alert notifications to your Telegram messenger.
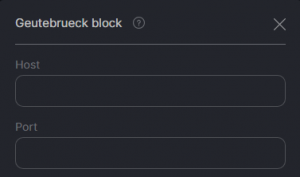
16.Geutebrueck block
The Geutebrueck block is used for sending notifications to the Geutebrueck system.
In the way to send the notifications add the Geutebrueck block in the structure of Event Manager.
Fill Host and Port Fields in a way to receive the notifications to the Geutebrueck system.
17.Begin/end blocks
Blocks of the beginning/end
These blocks are obligatory for the creation of the event.
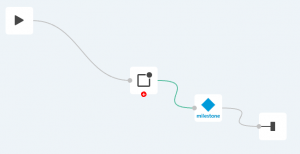
The block of the beginning can be only one and it cannot be removed.
Blocks of the end can be a little, depending on the number of conditions.
Each connection of blocks shall be located between blocks of the beginning and end.
