Difference between revisions of "VCloud.ai Face Recognition VCA"
(Created page with "<strong>Face Recognition Module</strong> == Main functionality <br> == • Face search and facial recognition in real time <br> • View location and movement of a person with instant notification that such person has been found <br> • Face detection and comparison against preloaded database of faces <br> • Face identification with additional characteristics like beard, mustache, glasses, face shield, mask <br> • Creation of lists of people wh...") |
|||
| (One intermediate revision by the same user not shown) | |||
| Line 127: | Line 127: | ||
</td> | </td> | ||
</tr> | </tr> | ||
<tr> | <tr> | ||
<td> | <td> | ||
| Line 136: | Line 136: | ||
</td> | </td> | ||
</tr> | </tr> | ||
<tr> | <tr> | ||
<td> | <td> | ||
| Line 144: | Line 144: | ||
Up to 3 GB per day | Up to 3 GB per day | ||
</td> | </td> | ||
</tr> | </tr> | ||
<tr> | <tr> | ||
<td> | <td> | ||
| Line 152: | Line 151: | ||
</td> | </td> | ||
<td> | <td> | ||
Ubuntu | Ubuntu 20.04 | ||
</td> | </td> | ||
</tr> | </tr> | ||
| Line 1,073: | Line 1,072: | ||
[[File:10FS.png|1000px|none]] | [[File:10FS.png|1000px|none]] | ||
== API == | |||
API Documentation: http://vca2.vcloud.ai:2001/swagger/face | |||
Latest revision as of 10:40, 25 November 2023
Face Recognition Module
Main functionality
   • Face search and facial recognition in real time

   • View location and movement of a person with instant notification that such person has been found

   • Face detection and comparison against preloaded database of faces

   • Face identification with additional characteristics like beard, mustache, glasses, face shield, mask

   • Creation of lists of people whose movement should be controlled

   • White/Black & VIP Lists

   • Support for import (CSV) and export of database (EXCEL/PDF/CSV/JSON)

   • Ability to process statistical data and generate reports

   • Cross-platform and multilingual interface
Recognition conditions
Hardware and software
The algorithm is based on the use of neural network detectors,
so the module requires nVidia video card (GPU) with a computing power index of at least 5.0;
at the same time, the characteristics and performance of the video card must not be lower than nVidia GTX 1050 model.
Faces
Images added to the face database must meet the following requirements:
   • face position - strictly full face, without turns;

   • look - directly into the lens;

   • neutral facial expression;

   • eyes are open and clearly visible;

   • lack of hats and dark glasses;

   • the image is sharp and clear;

   • lack of deep shadows;

   • there should be no scanning artifacts, as well as reshooting from screens;

   • proportions should not be distorted;

   • no side light source (for example, sunlight from a window) is allowed.
Video stream
Optimal resolution for module operation: HD or FullHD.
Frame rate: at least 10 frames per second.
The video stream must not be mirrored (horizontally reflected).
Lighting and image quality
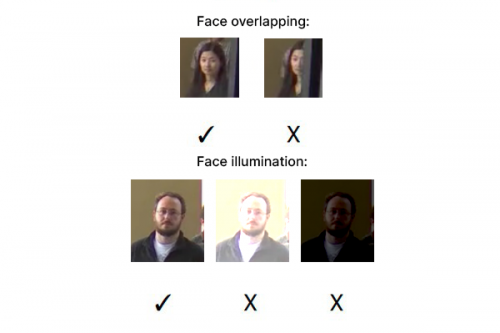
The illumination of faces in the frame should be uniform and constant.
If the camera is installed in front of a bright light source (the sun behind the entrance door, etc.),
then it is necessary to adjust the exposure (or brightness) so that the face in the frame is bright.
In this case, an overexposed background is allowed. The image quality should be at least average.
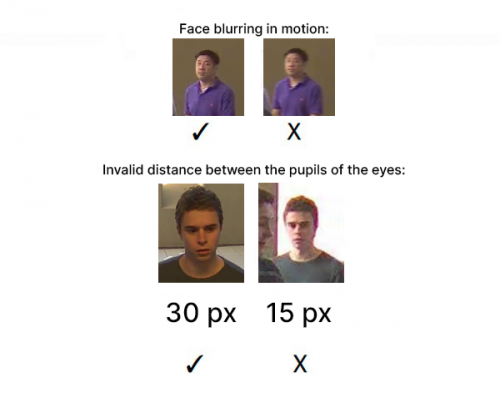
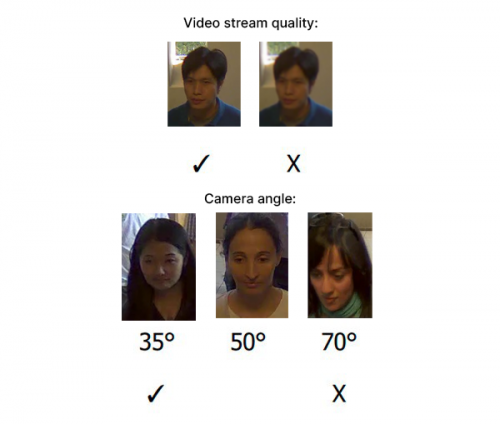
There should be no significant compression artifacts. No blurring of the faces of moving people. The image must be colored.
Scene and camera position
   • People's faces must be fully visible in the frame.

   • There must be no reflective surfaces in the frame: glasses, mirrors, etc.

   • Do not allow a strong side light source (sunlight from a window), due to which one half of the face is overexposed.

   • It is allowed to place the camera above the level of the face, directly in the direction of the recognized people. In this case, the tilt angle of the camera should not exceed 35°.

   • The distance between the pupils of the recognized face in the frame must be at least 30 pixels. The camera should be pointed directly at the faces of the people it recognizes. The angle between the direction of the face and the axis of the lens: should not exceed 30 °.
Examples of requirements violations:
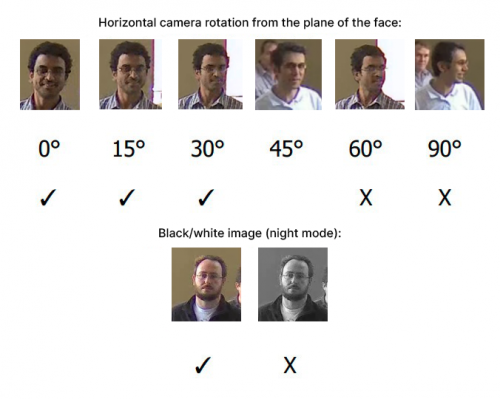
Recommended camera settings
   • Quality: the highest.

   • Bit rate: maximum possible.

   • Profile: the highest possible.

   • Frame interval (GOV): 50.

   • Stream smoothing: off.

   • Exposure and brightness: such that for a given scene the face is clearly visible (if the camera is aimed at a light source, then an overexposed background is allowed).

   • Shutter speed: do not set too slow (more than 1/50), because in this case, the effect of blurring moving objects appears.
Product Description
Face Recognition module can be used for:
   • Preventions of crimes;

   • Abuses and offenses fixation;

   • Optimization of gating systems on production sites, in companies or public and commercial institutions;

   • Security systems creation for schools, kindergartens, educational institutions;

   • Space and events control at stations and airports;

   • Loyalty programs forming in supermarkets and retail networks;

   • Marketing analysis on buyers activity in shops departments;

   • Buyers control in shops.
Basic data used by the Face Recognition module:
   • Face recognition in a flow of people on city streets, in crowd or indoors;

   • Data analysis and frames with faces allocation from the video stream received from surveillance cameras;

   • Photographic materials collecting information about the location of the person, time of fixing, and personal data;

   • Age and sex determination of the recognized person;

   • Obtained data can be verified with "white" or "black" lists.
System Requirements
For installation of the Face Recognition module on GPU for one video stream it is necessary to have at least minimal system requirements given in the table below.
|
Parameter |
Recommended value |
|---|---|
|
CPU |
Intel Core i5-5575 and more |
|
RAM |
3 GB RAM - detection, 5 GB RAM - detection + recognition |
|
GPU |
NVIDIA 1050 |
|
Places for archive |
Up to 3 GB per day |
|
Operating system |
Ubuntu 20.04 |
Analytics
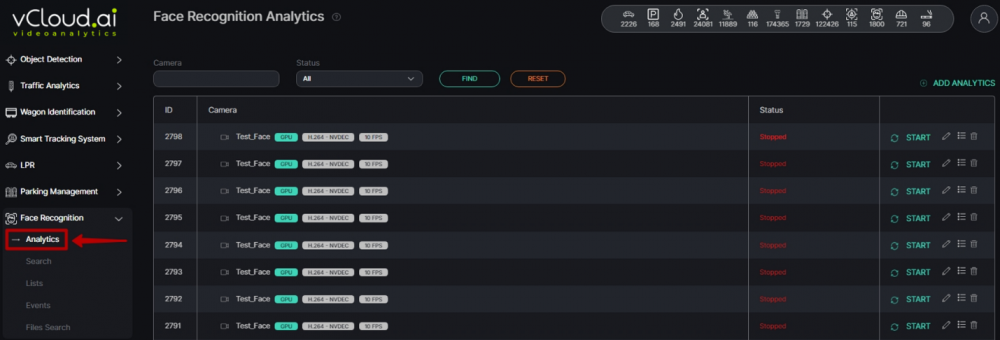
To open the Face Recognition analytics, select Face Recognition in the left menu and pass to the Analytics section.
The page displays a list of analytics with the status and the ability to add, edit, view, or delete face recognition analytics.
There is a search field at the top of the page. Here you can filter analytics by the following parameters:
|
Field name |
Description |
|---|---|
|
Camera |
Analytics name or part of a name can be entered in this field |
|
Status |
Select the Analytics status from the drop-down list - All, Active, or Stopped |
To start the search click on the Search button. To clear the fields click on the Resetbutton.
The list of analytics is shown in the table below.
Analytics Adding
To add new analytics of face recognition, press Add Analytics in the upper right corner of the page.
The Face Recognition analytics setup process consists of 3 Steps.
Step 1 — General
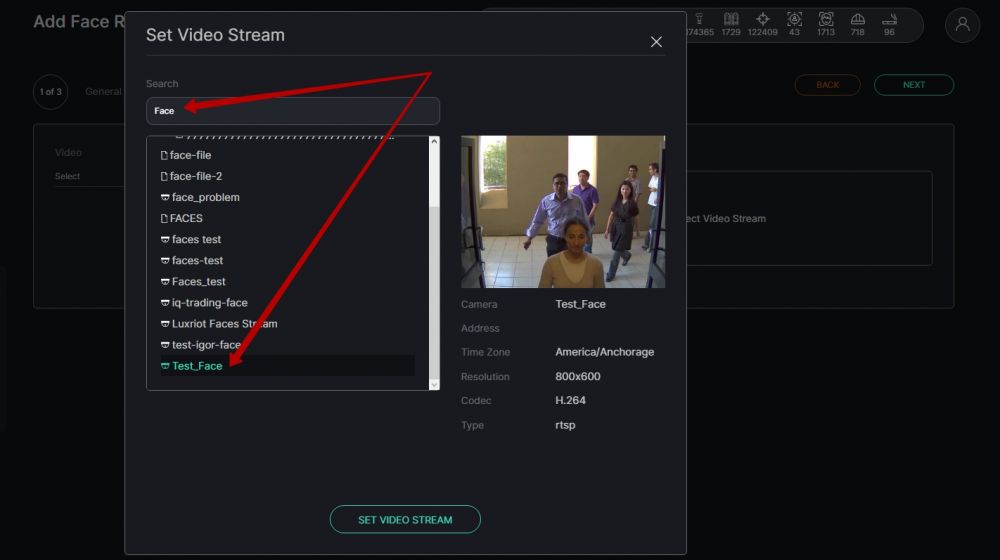
First of all, it is necessary to select a video stream. Click on the Video field and select the camera name from a list.
You can also enter the part of the camera name in the Search field to find the necessary video stream faster.
On the right side of the window, you can see the video stream preview and information about Camera name and Address, Time Zone, Resolution, Codec, and Type.
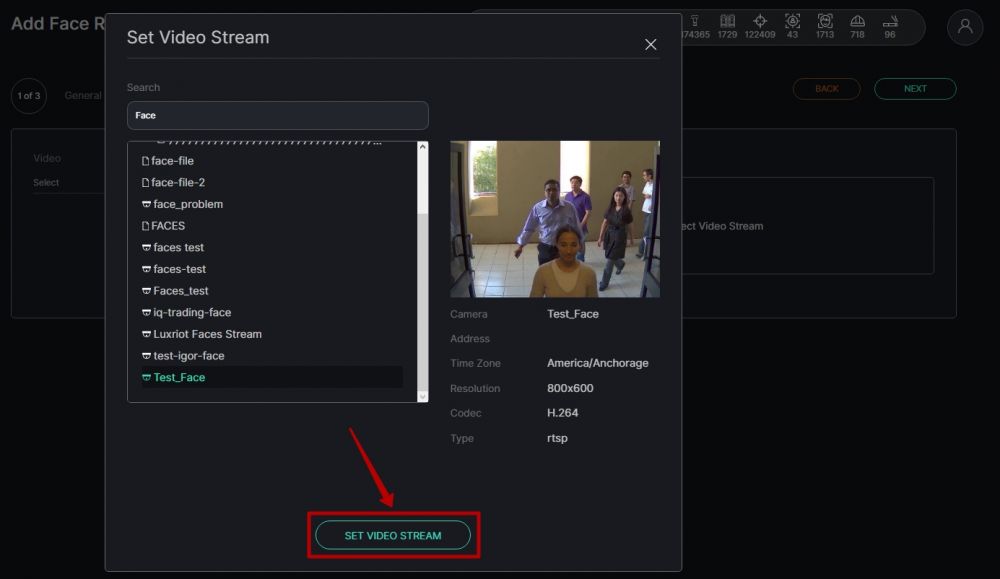
When the video stream is selected press the Set Video Stream button.
By pressing the Update Video Frame button you can see a frame in real-time in the field of frame addition.
It is possible if a video stream was selected.
To add analytics it is necessary to set up the following parameters:
| Field name | Description |
|---|---|
| Minimum Face Height | Establish the minimum size of the face which will be recognized by analytics. The minimum possible value – 80 pixels. |
| Camera Buffer | Enter the number of seconds of a delay. The person, that was recognized, can be recognized through the specified interval again. The possible range is from 1 to 600 sec. |
| Frames to Detect | Enter a number of frames. The higher number of frames, the better the quality of recognition, but at the same time, the person should be in a frame for a longer period of time. The smaller number of frames, the lower the quality of recognition, but detecting happens quicker. The possible range is from 1 to 100. |
| Age Detection | Move the slider to enable/disable the age detection. |
| Gender Detection | Move the slider to enable/disable the gender detection. |
| Mask Detection | Move the slider to enable/disable the mask detection. |
| Liveness | Move the slider to enable/disable the liveness recognition. |
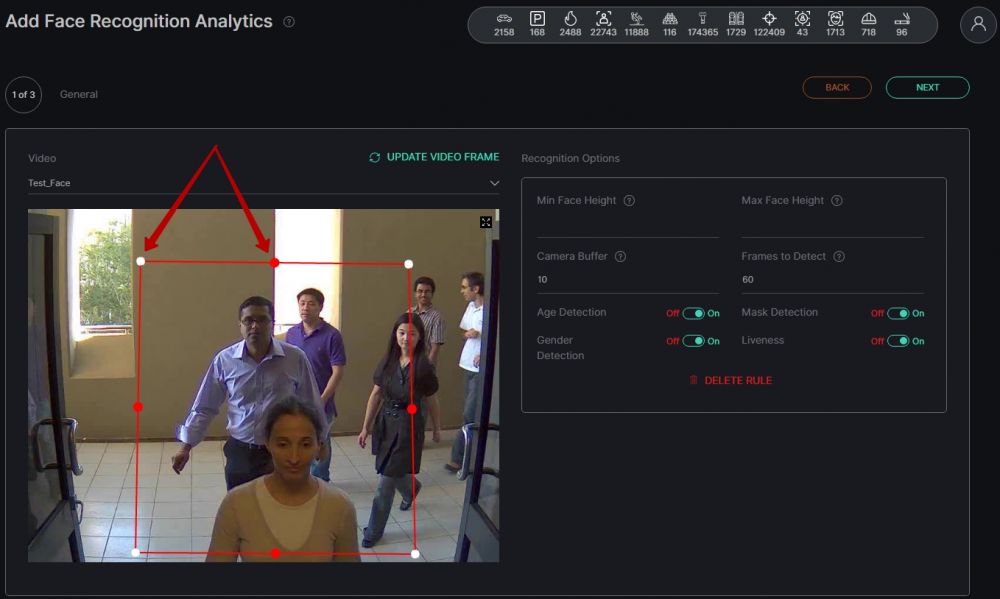
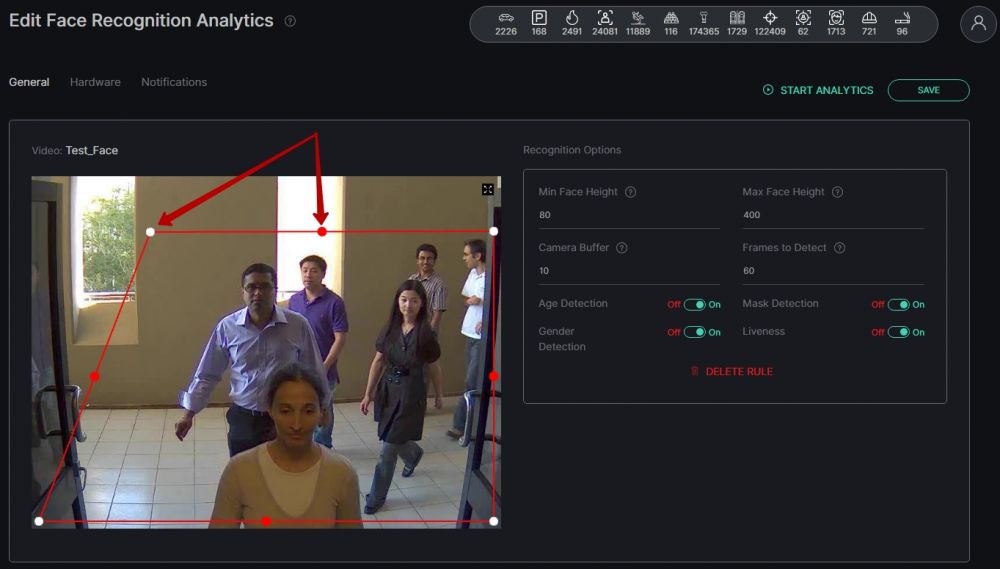
Then it is necessary to place a recognition area.
Move the white and red markers to line up the desired area.
Recognition analytics will be performed only within the boundaries of the selected area.
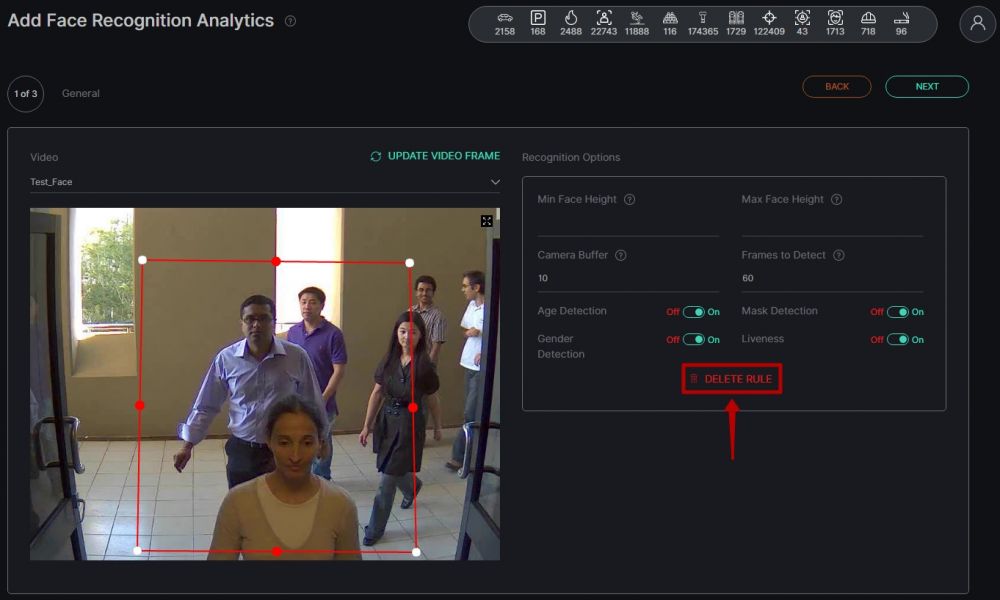
In order to remove the area, click on the Delete Rule button.
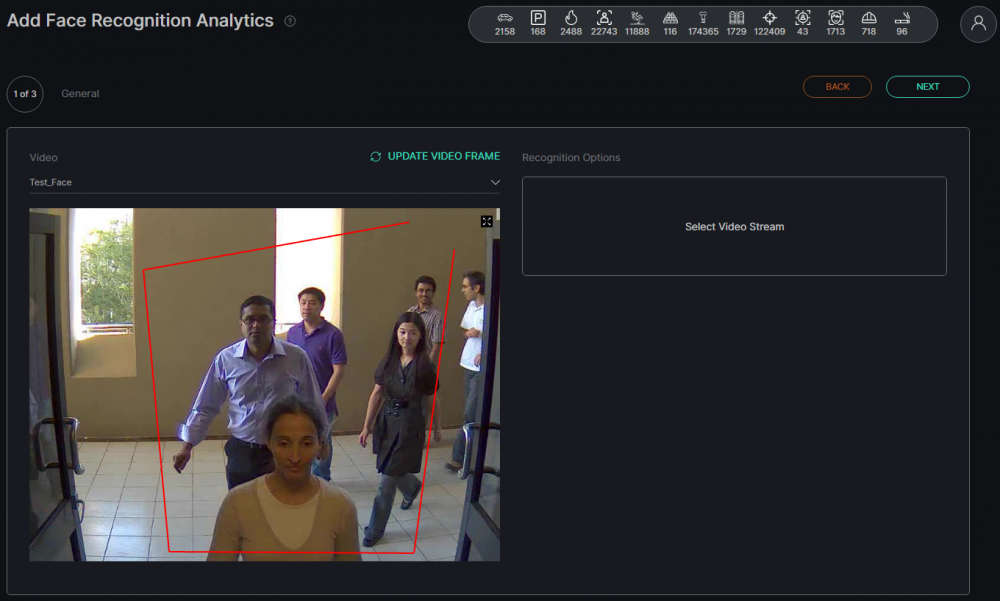
To create a new area from scratch, click somewhere inside the frame. Then move the mouse cursor.
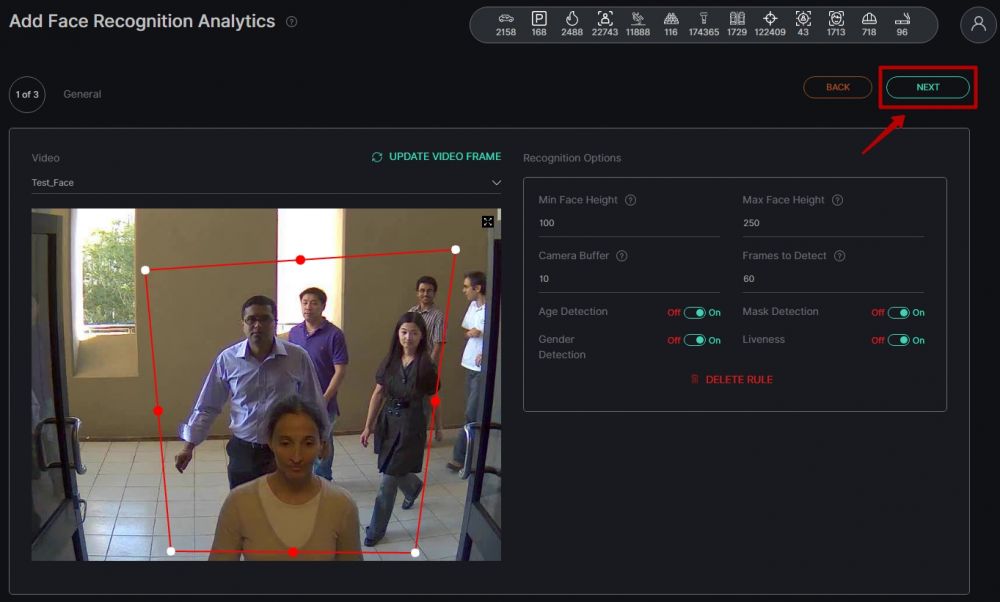
It will be moved with a red line. Put as many points as is necessary to create the borders of the desired area. The last point should be placed at the same place as the first one.
To pass to the next step, click on the Next button in the upper right corner of the page.
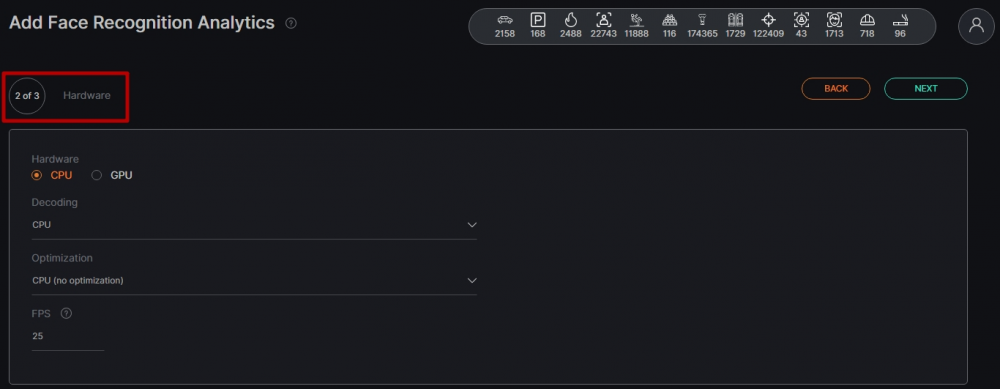
Step 2 — Hardware
Now it is time to customize Hardware options. System users can change the following parameters:
| Parameter | Description |
|---|---|
| Hardware | Select one of the technologies - CPU or GPU acceleration |
| Decoding | Select the hardware decoder from the drop-down list - CPU, Intel, Nvidia |
| Optimization | Select the optimization parameter from the drop-down list (for CPU - CPU (no optimization), Open VINO; for GPU - CUDA (no optimization), cuDNN Half (FP16), Tensor RT) |
| FPS | Enter the desired number of frames per second in the field for detection. The recommended value is 25 |
When all necessary parameters are selected, go forward to the last step by clicking on the Next button in the upper right corner of the page.
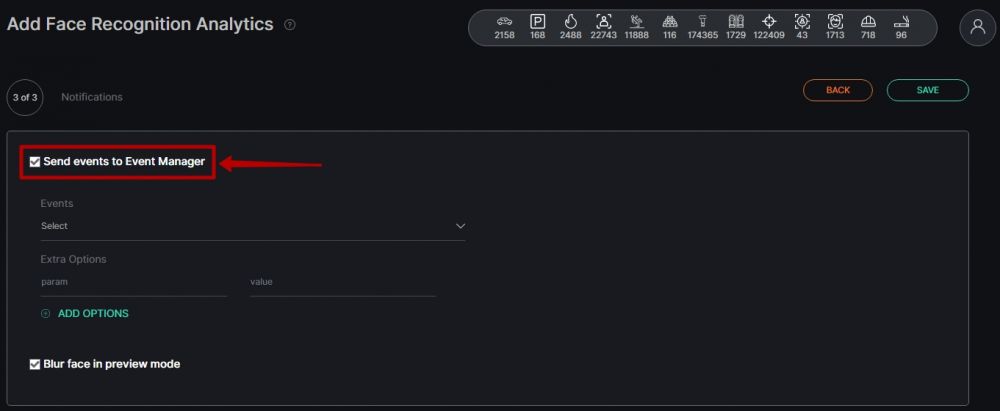
Step 3 — Notifications
Finally, it is possible to customize Notifications.
Check the box next to Blur face in preview mode if it is necessary to blur faces on all detect previews in the module.
Check the box next to Send events to Event Manager. The system will send all notifications to the Event Manager and then to external resources.
Then it is necessary to fill in the following fields:
| Field name | Description |
|---|---|
| Events | Select the event for which notifications will be sent from the drop-down list. |
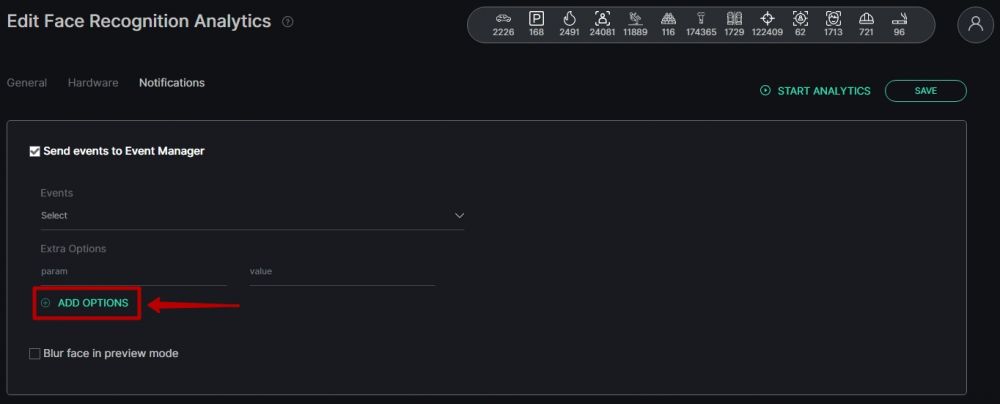
| Extra Options | If necessary, it is possible to add additional parameters for further use when event creating. Fill in the parameter and value fields. |
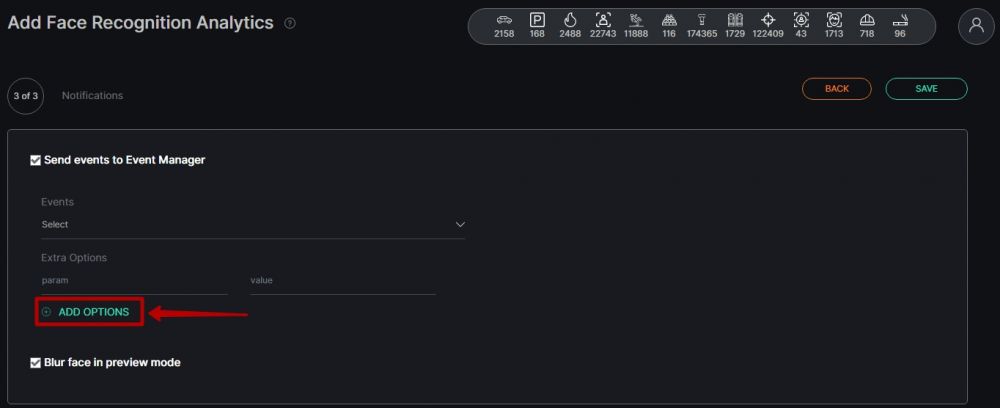
To add more parameters, click on the Add Options button.
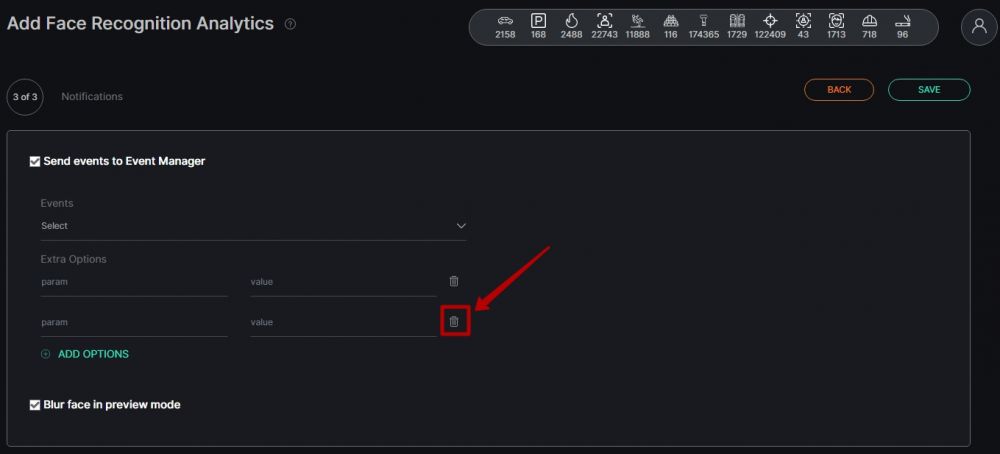
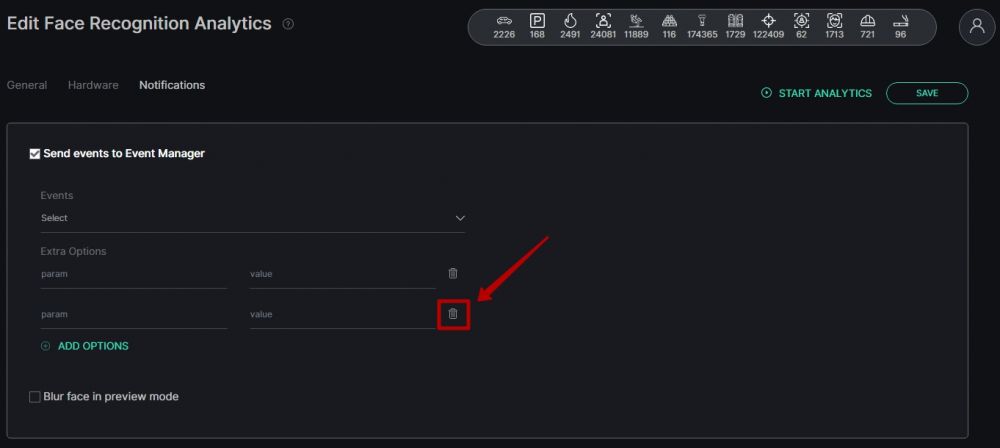
To remove parameters, click on the Delete icon.
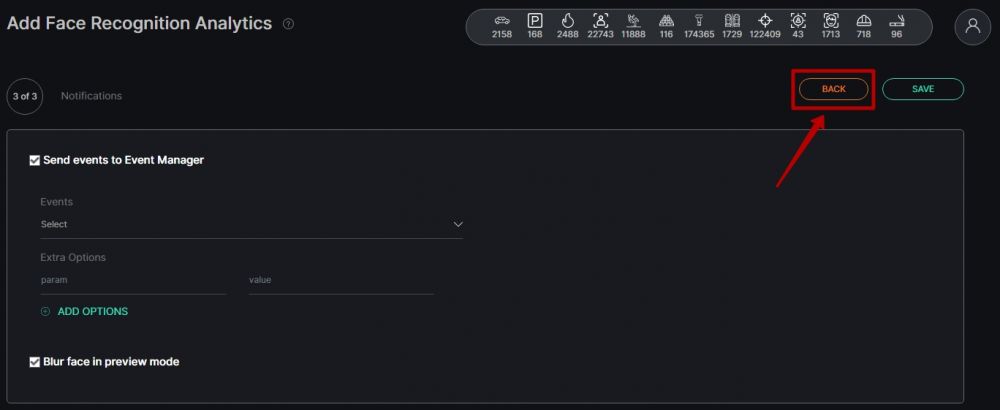
If you want to make changes to previous steps, click on the Back button in the upper right corner of the page.
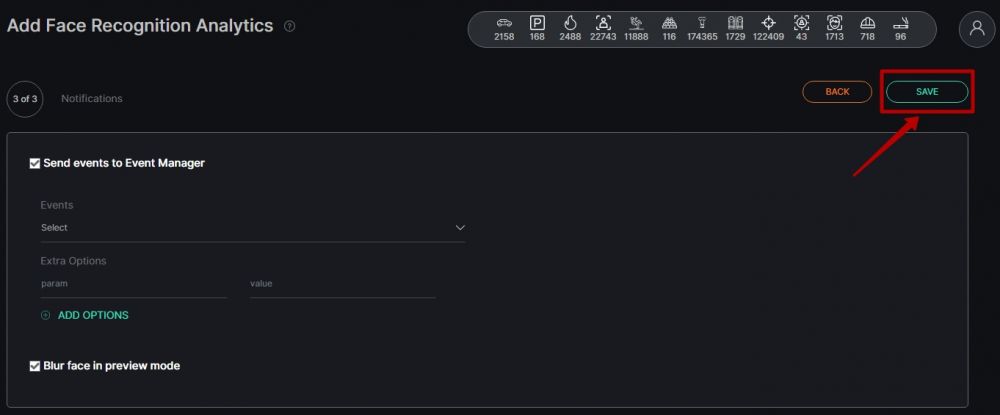
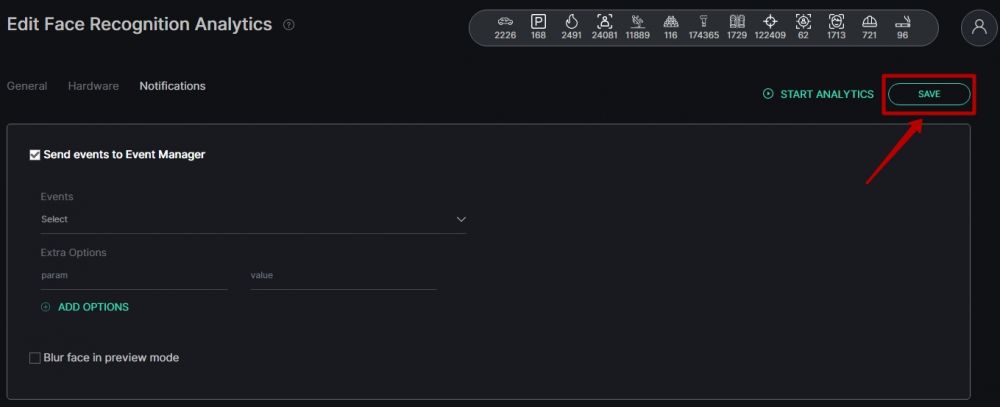
When the analytics setup is complete, click on the Save button in the upper right corner of the page to save changes and create the analytics.
Analytics Editing
To open the Face Recognition analytics editing window, click the Edit button on the right side of the analytics record.
It is possible to edit the analytics if it is not running.
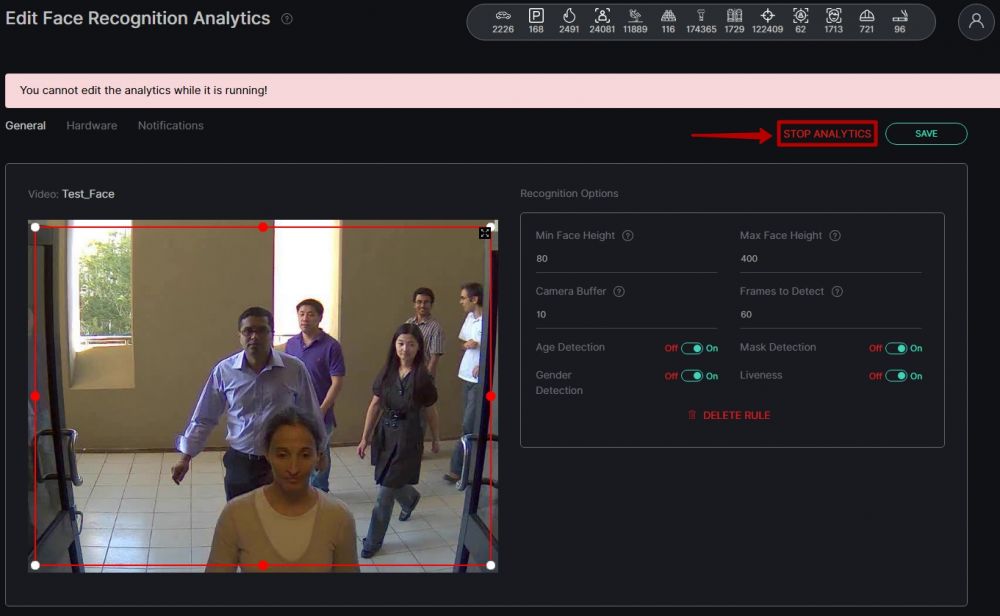
If the analytics is Active at the moment, it is necessary to disable it by clicking on the Stop Analytics button in the upper right corner of the editor page.
When you click on the Stop Analytics button, the Confirmation window opens. Click Yes to confirm the analytics disable or click No to cancel the action.
Now when the analytics is disabled it is possible to make changes to it.
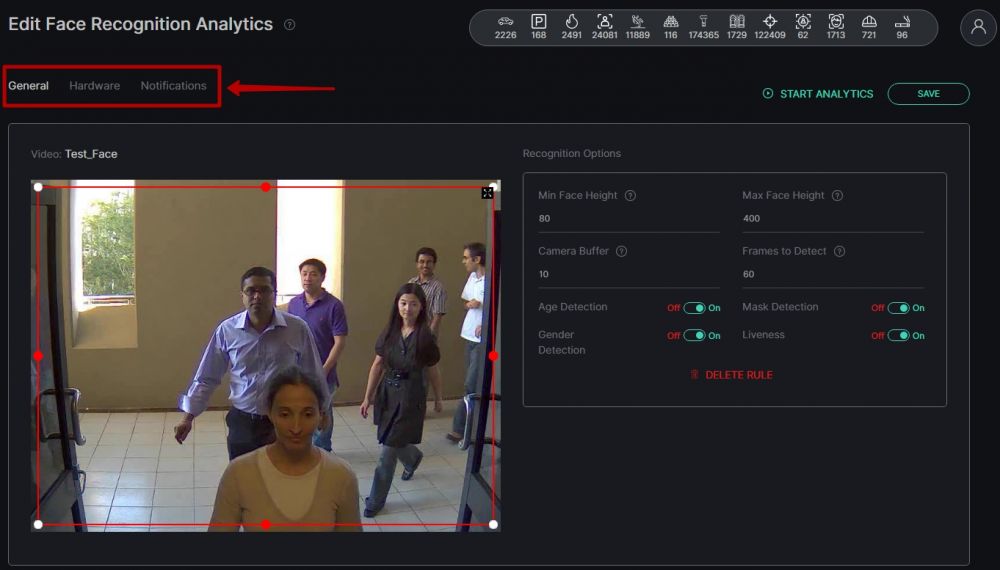
There are 3 tabs of parameters at the top of the page, similar to the steps in creating analytics - General, Hardware, and Notifications. The General tab opens first by default.
The current tab is always highlighted. You can switch among them by clicking on their names.
General Tab
At the General tab it is possible to edit the following parameters:
| Field name | Description |
|---|---|
| Minimum Face Height | Establish the minimum size of the face which will be recognized by analytics. The minimum possible value – 80 pixels. |
| Maximum Face Height | Establish the maximum size in pixels of the face which will be recognized by analytics. |
| Camera Buffer | Enter the number of seconds of a delay. The person, that was recognized, can be recognized through the specified interval again. The possible range is from 1 to 600 sec. |
| Frames to Detect | Enter a number of frames. The higher number of frames, the better the quality of recognition, but at the same time, the person should be in a frame for a longer period of time. The smaller number of frames, the lower the quality of recognition, but detecting happens quicker. The possible range is from 1 to 100. |
| Age Detection | Move the slider to enable/disable the age detection |
| Gender Detection | Move the slider to enable/disable the gender detection |
| Mask Detection | Move the slider to enable/disable the mask detection |
| Liveness | Move the slider to enable/disable the liveness recognition |
Then it is possible to edit a recognition area.
Move the white and red markers to line up the desired area.
Recognition analytics will be performed only within the boundaries of the selected area.
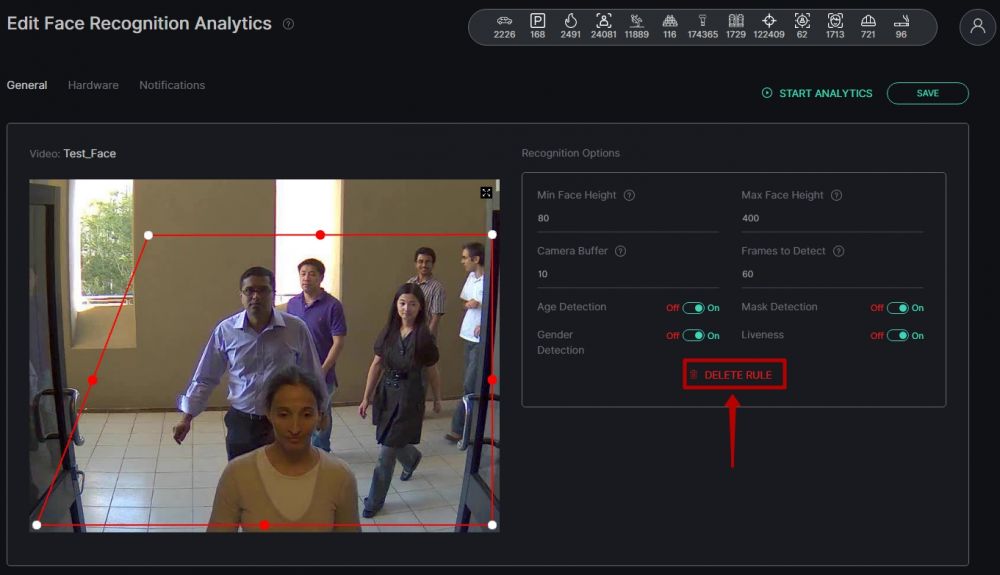
In order to remove the area, click on the Delete Rule button.
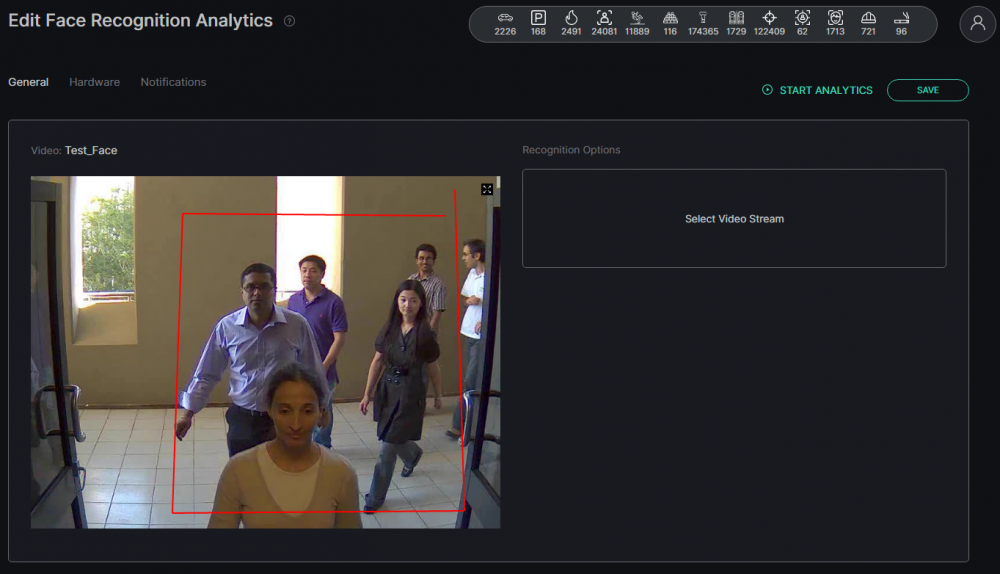
To create a new area from the beginning, click somewhere inside the frame. Then move the mouse cursor.
It will be moved with a red line. Put as many points as is necessary to create the borders of the desired area.
The last point should be placed at the same place as the first one.
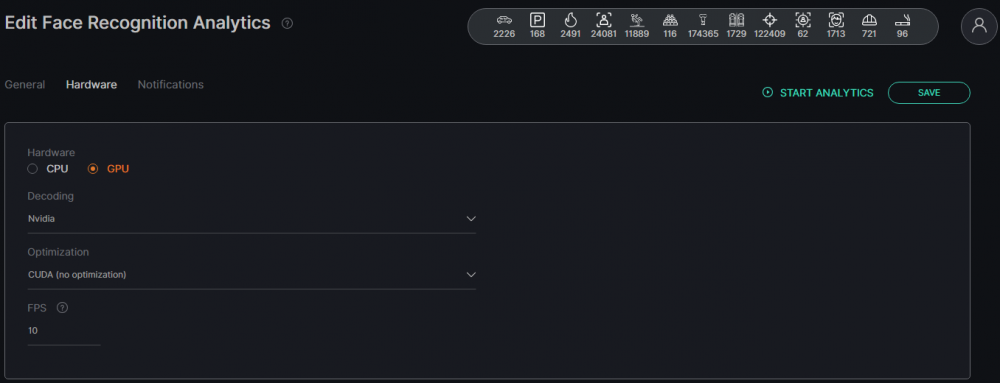
Hardware Tab
At the Hardware tab it is possible to edit the following parameters:
| Parameter | Description |
|---|---|
| Hardware | Select one of the technologies - CPU or GPU acceleration. |
| Decoding | Select the hardware decoder from the drop-down list - CPU, Intel, Nvidia. |
| Optimization | Select the optimization parameter from the drop-down list (for CPU - CPU (no optimization), Open VINO; for GPU - CUDA (no optimization), cuDNN Half (FP16), Tensor RT). |
| FPS |
Notifications Tab
At the Notifications tab it is possible to edit values in the following fields:
| Field name | Description |
|---|---|
| Events | Select the event for which notifications will be sent from the drop-down list. |
| Extra Options | If necessary, it is possible to add additional parameters for further use when event creating. Fill in the parameter and value fields. |
To add parameters, click on the Add Options button.
To remove parameters, click on the Delete icon.
When the analytics editing is complete, click on the Save button in the right upper corner of the editor page to save changes.
Analytics Viewing
To view Face Recognition analytics, press the View icon on the right side of the analytics record.
It is possible to view only Active video streams.
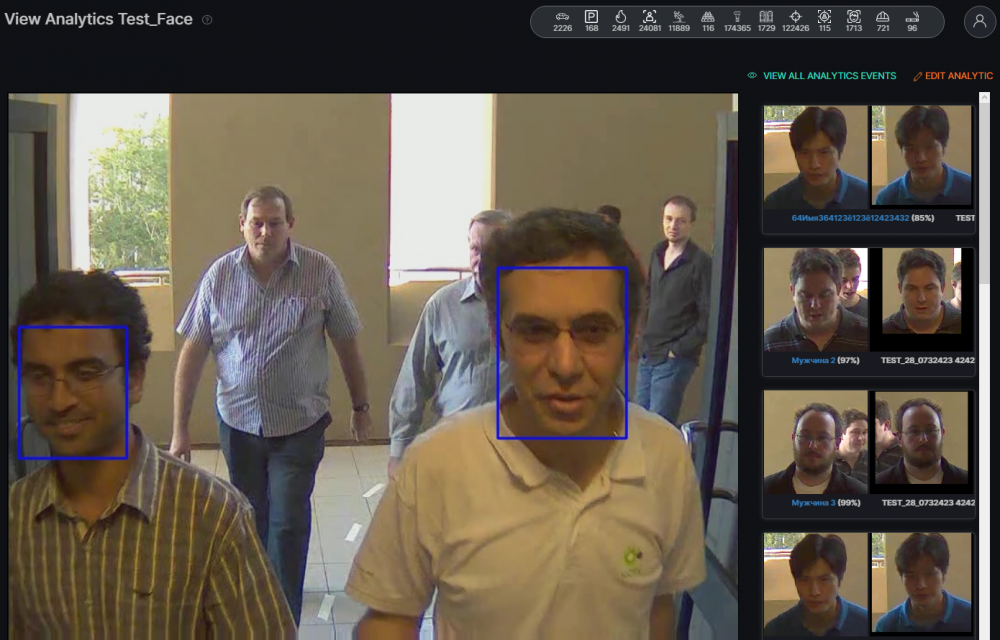
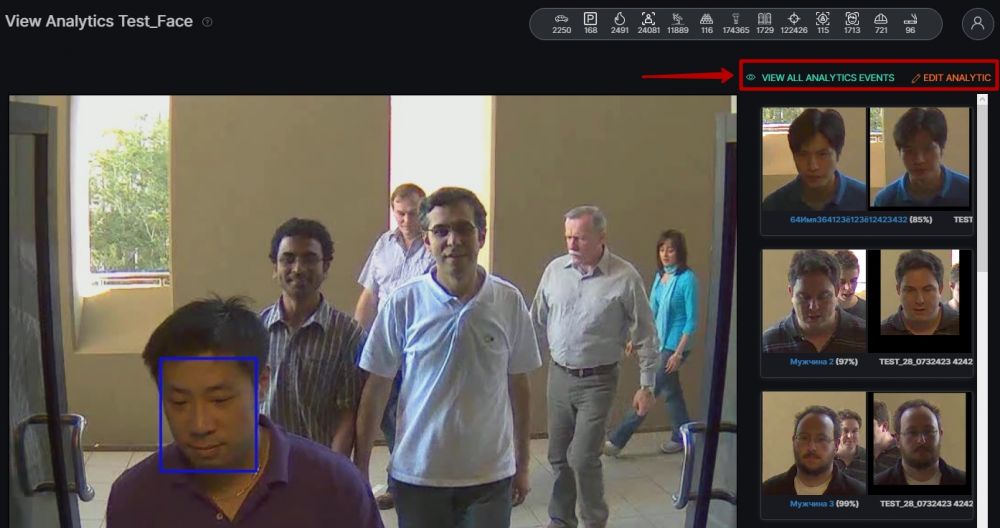
In the opened window you can see the records of the recognized faces in real-time.
It is also possible to Edit the current analytics or view all Events of current analytics. For this purpose click on the button View All Analytics Events to move to the Events page or click on the Edit Analytic button to move to the Editor page.
Analytics Start and Stop
To start the Face Recognition analytics, click on the Start button on the right side of the record. To stop the analytics, click on the Stop button.
When you click on the Stop button, the confirmation window opens. Click Yes to confirm or click No to cancel the action.
Events Viewing
To view events from certain analytics, click on the corresponding icon on the right side of the record.
Analytics Deletion
To delete the Face Recognition analytics, click on the Delete icon on the right side of the record.
In the following window, click Yes to confirm the deletion or No to cancel the deletion.
Search
The Search section is intended for viewing the search results of recognized faces.
Search Parameters
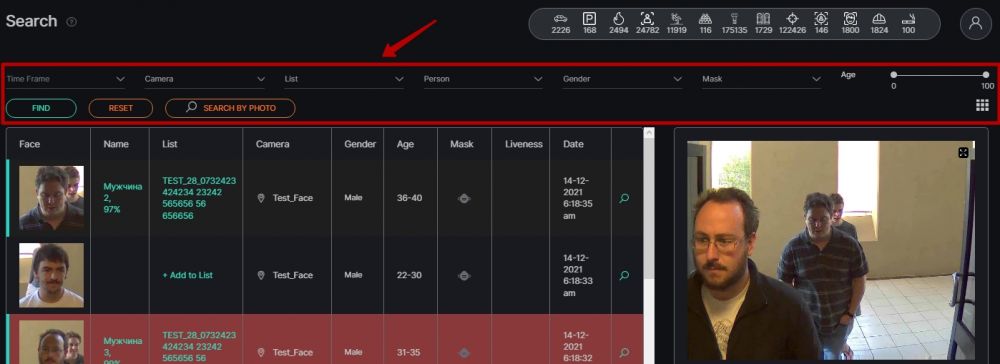
Face search fields are at the top of the page.
| Search field | Parameters |
|---|---|
| Time Frame | Select the time period for which it is necessary to make a search. |
| Camera | Select cameras on which the search should be performed. |
| List | Select a necessary list (or All Lists/Off the List). |
| Person | Select a person from a drop-down list. Available only if a certain List was selected. |
| Gender | Select a specific gender |
| Mask | Set a medical mask presence or absence on a face. |
| Age | Move markers to set an age range |
Press Find to show search results. Press Reset to clean the fields.
Click on the Search by Photo button to perform a search among chosen photos on a device.
Search Results
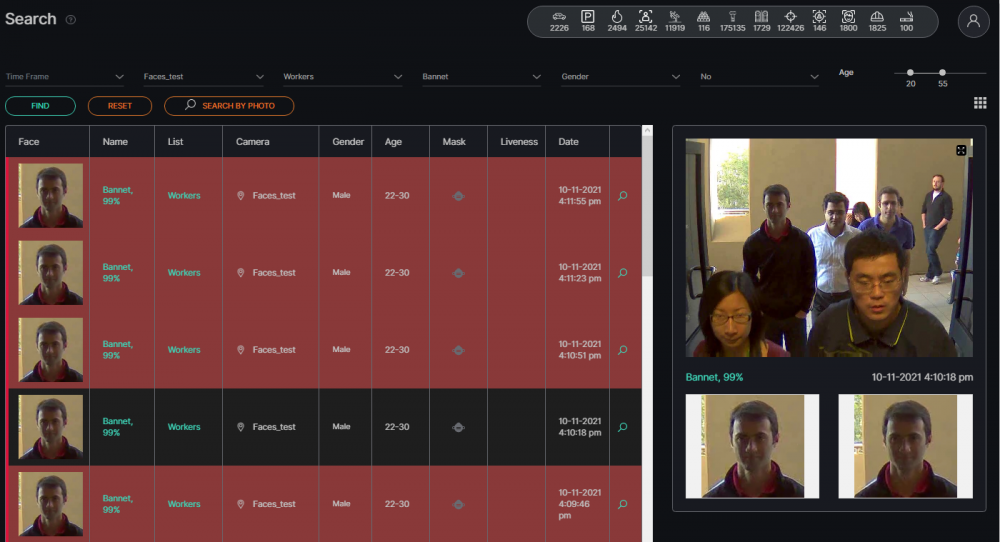
Search results are displayed in the table below.
To go to the Grid View mode click on the corresponding icon in the upper right corner of the page.
To return to the List Viewmode click on the corresponding icon in the upper right corner again.
Records adding and editing
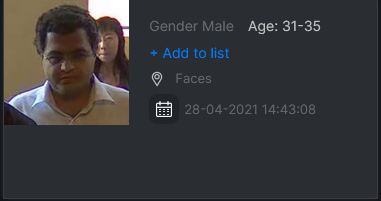
If the person is not in the list, but it is necessary to add the person, press Add to List if the type of the list is used:
or Add to List if the type a net is used:
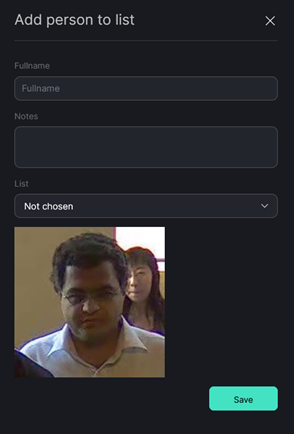
On pressing the button Add to List the form of person addition in the list opens.
To add a person enter a name, surname, note and also select one of the existing lists. For changes saving press the button Save.
To enlarge the picture in recognized face record, press an icon of Zoom
![]()
If desired it is possible to save the image by pressing the corresponding button.
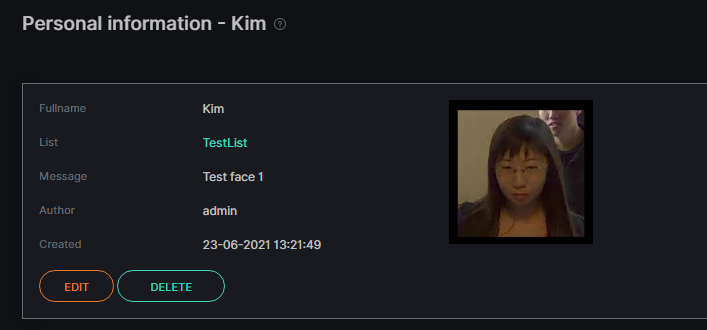
Press the name of the person in the record to pass the page Personal Information.
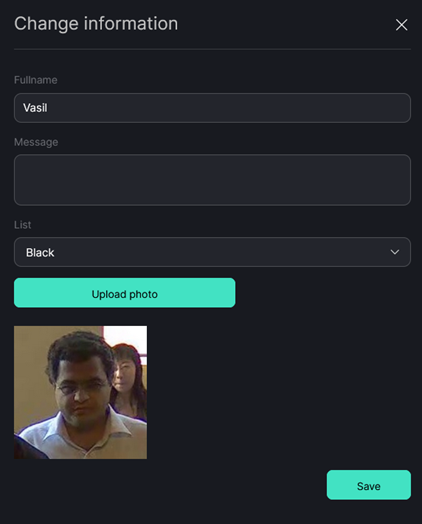
Press the button Edit to change the information on the person.
In the opened window you can change the following fields:
| Field name | Description |
|---|---|
| Full name | Enter a person's name and surname into the field. |
| Message | Enter the message into the field. The message should contain information about the person. |
| List | Select the list to which the person relates. |
Press the button Load a Photo to change a photo of the person.
Press Save to keep changes.
For removal of the person's record from the list press the button Delete.
For viewing the camera location press an icon of camera arrangement in records of the person.
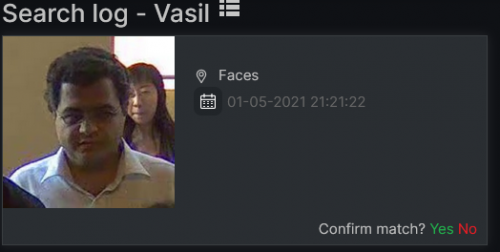
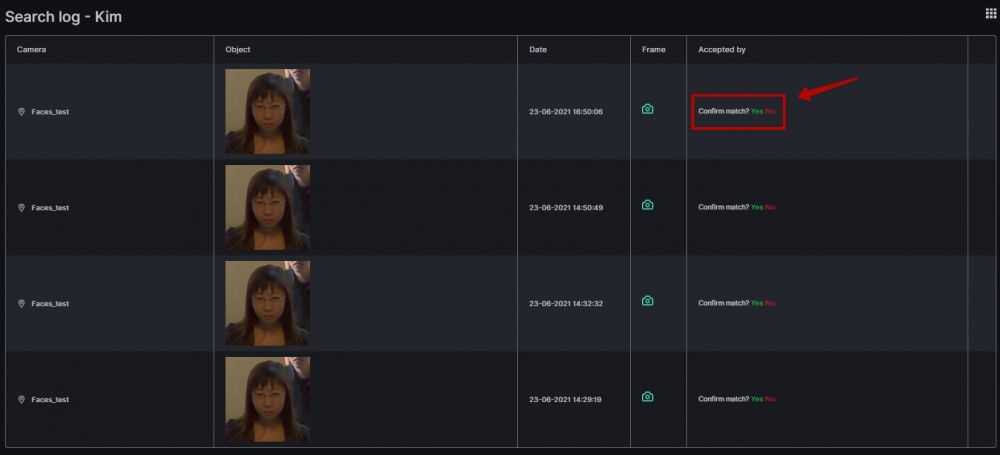
To confirm the coincidence to the person from the list press Yes. To specify that another person is found press No.
This function is available if notifications on the list in which there is a record of the person are enabled.
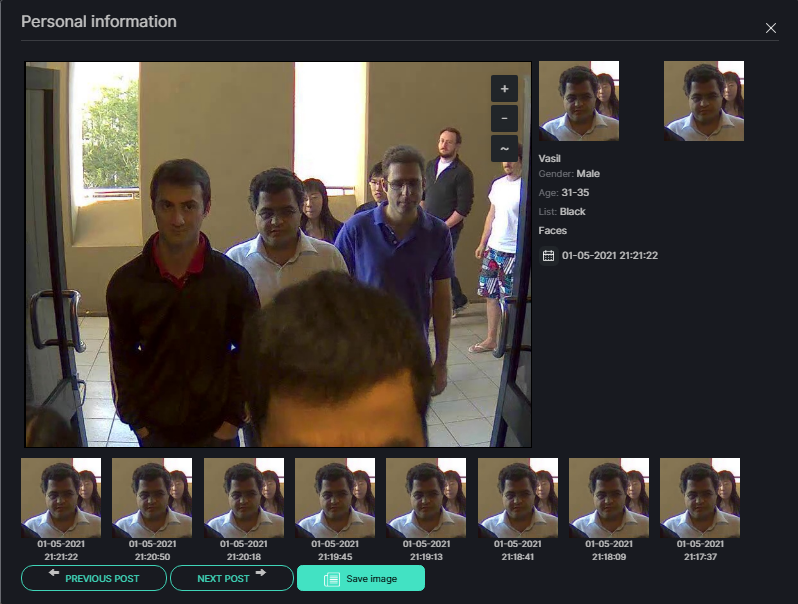
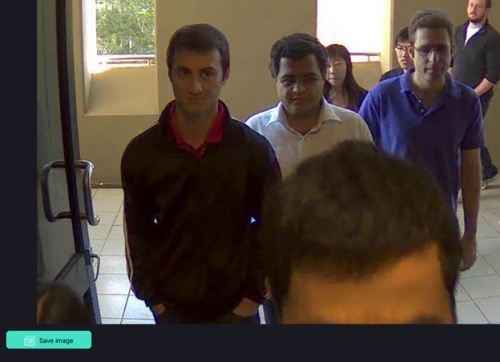
To see a frame from the camera press an icon in the upper right corner of a person frame:
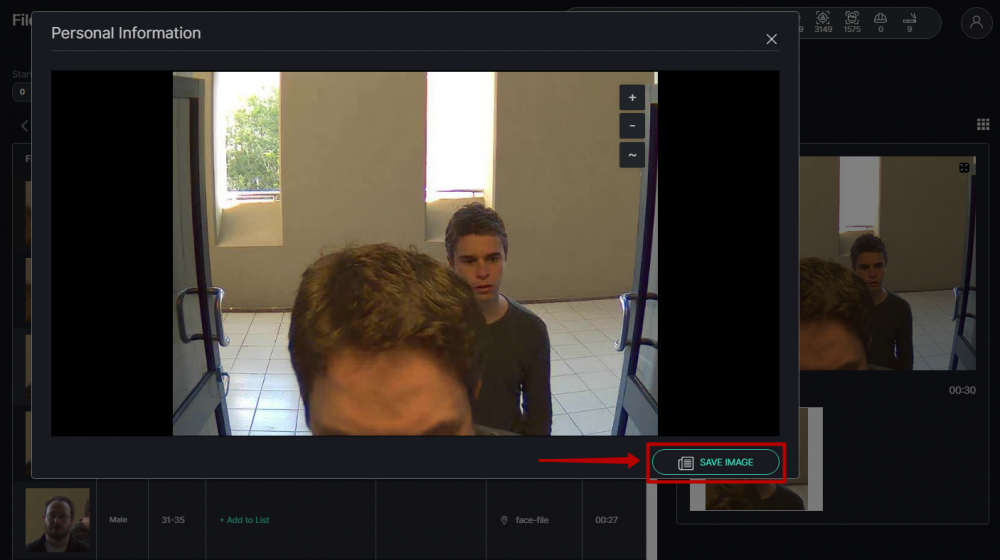
In the opened window press the button Save Image to download a frame with the person.
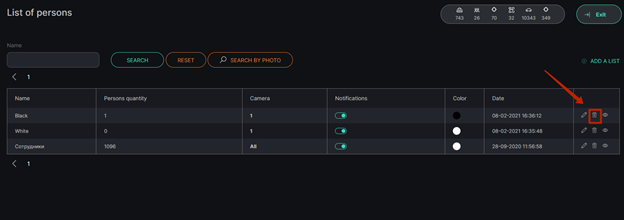
Lists
To create a face database for their subsequent recognition select Face recognition in the menu at the left and pass to the section Lists.
Lists search
The search field is at the top of the screen.
To find the necessary list enter its name in the field of search.
Press Search to show the results. Press Reset to clear record fields.
It is possible to perform the search in available photos on the device. For this purpose, press Search by Photo and select the necessary photo.
Search by name
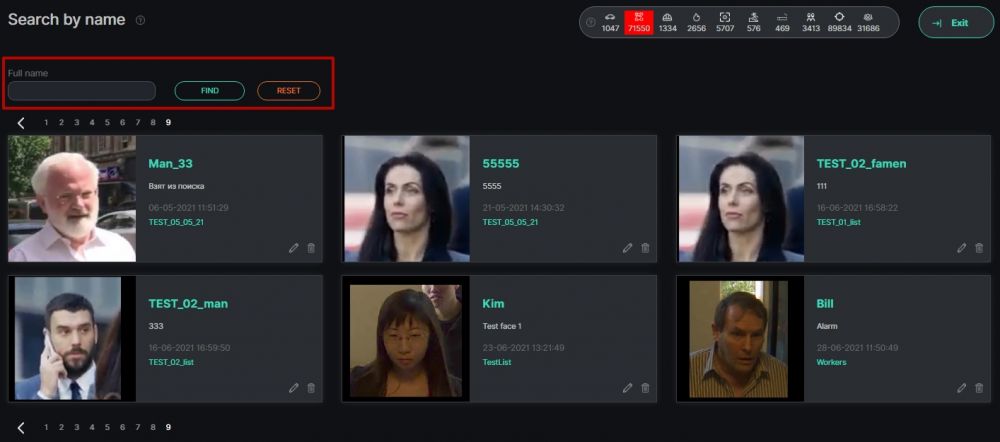
To search for a person by name, click on the SEARCH BY NAME button.
There is a search field at the top of the page.
Enter the full person's name in the Full name field and press Find. To remove a name from the search field press Reset.
Search results are displayed in the net format below.
Each record consists of the detected person's face Image and such lines as a Person's name, record Description, Time and date of creating a record, and List to which the person's card was added.
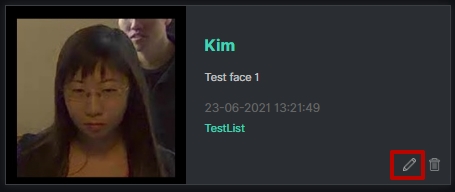
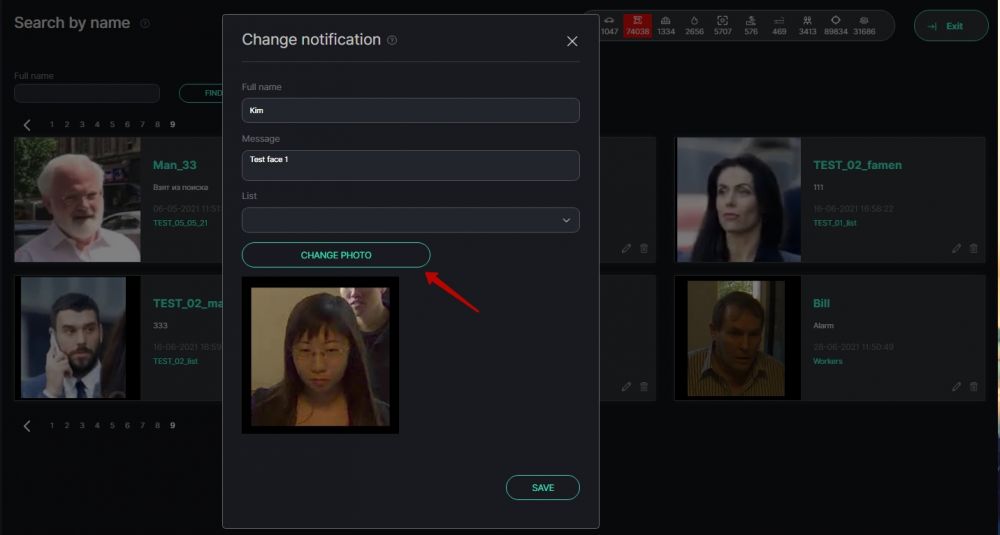
Change information
To edit record information click on the Edit button.
In the opened window you can change next fields:
| Field name | Description |
|---|---|
| Full name | In this field, you can change a person's name. |
| Message | In this field, you can change the purpose of the created record. |
| List | You can choose another list from the drop-down list |
It is also possible to upload another person's photo for recognition. For this purpose click on the CHANGE PHOTO button.
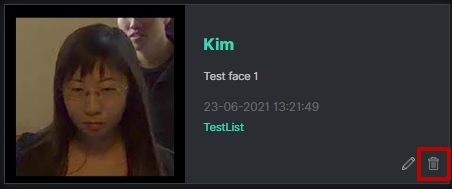
Delete a record
To delete a record click on the Delete icon.
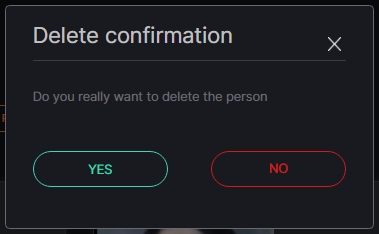
Press Yes to delete a person, press No to cancel the deletion.
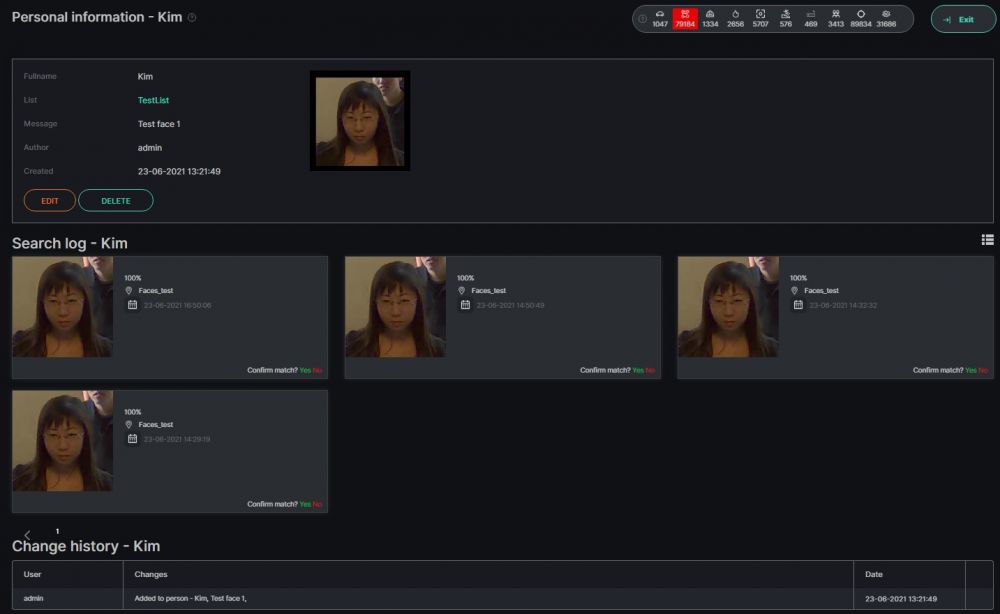
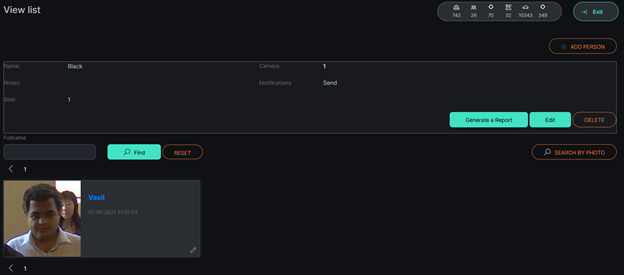
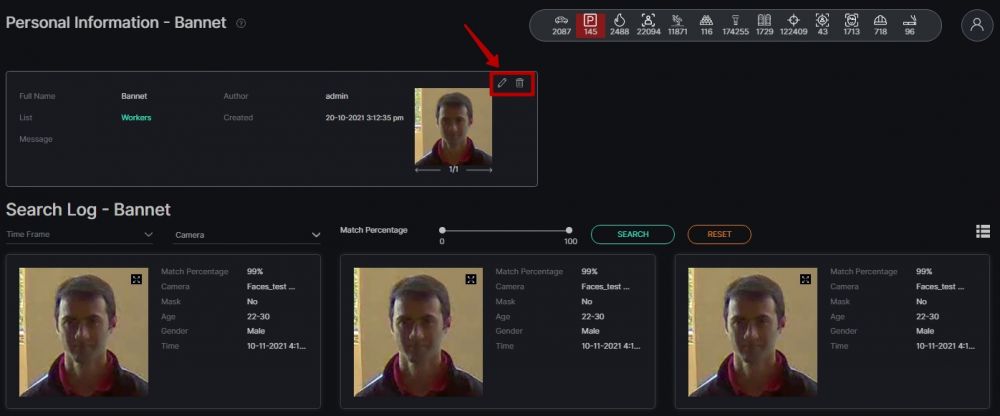
View person's card
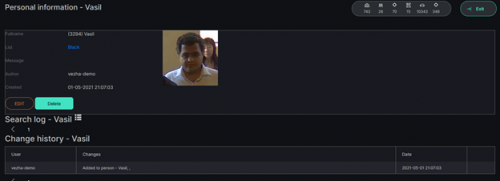
To view information about a person, click on the person's name.
The first block consists of the detected person's face Image and such lines as a Person's name, record Description, Time and date of creating a record, and List to which the person's card was added.
Here you can also edit and delete a person's card using the corresponding buttons.
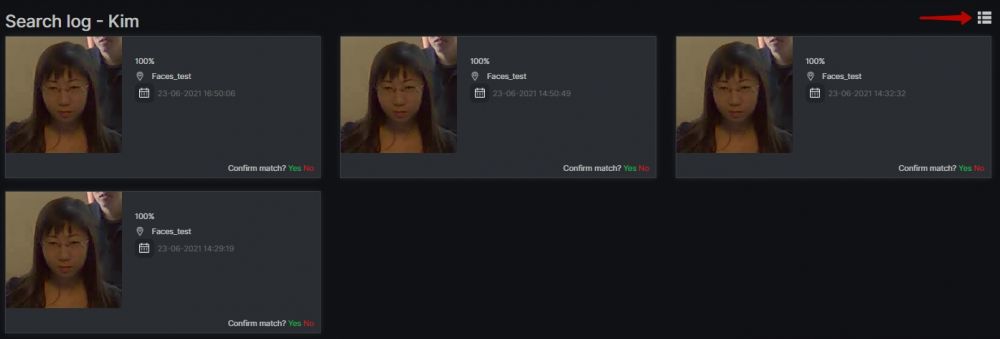
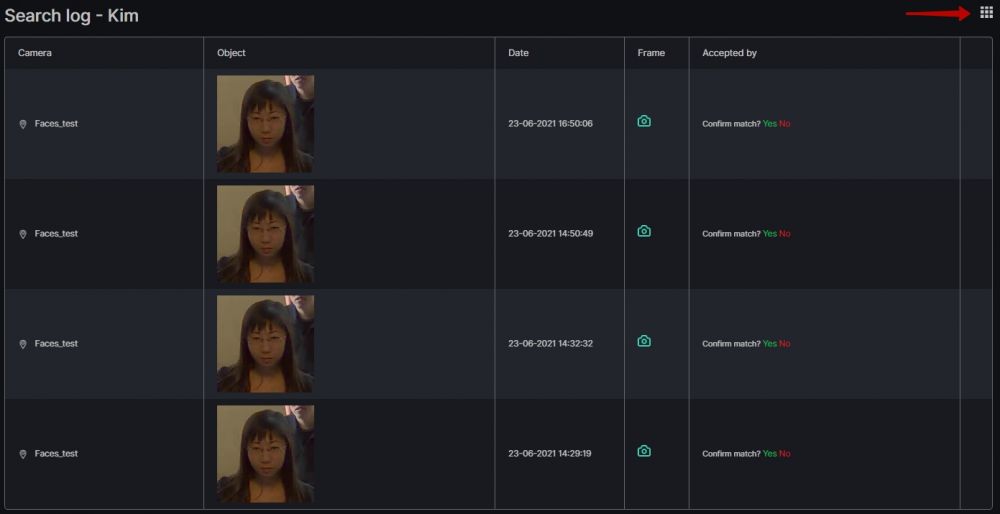
The second block consists of search results, where the person's face was recognized by a camera.
To pass to a tabular format of records press an icon in the upper right corner.
To return to a net format, press an icon in the upper right corner.
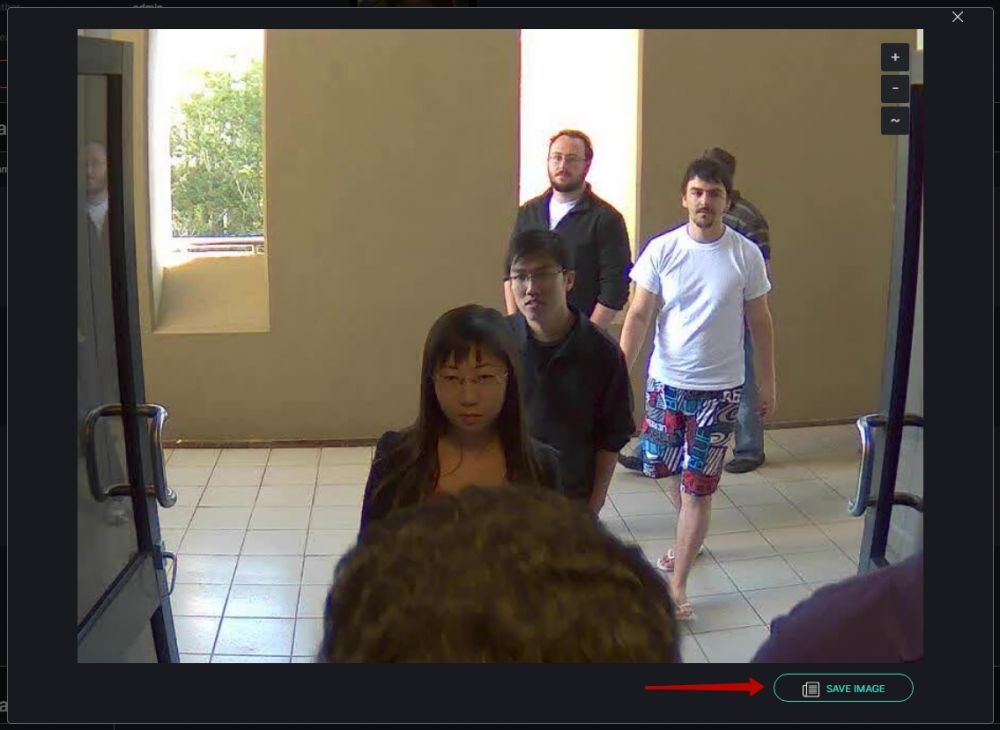
To enlarge the picture in a recognized face record, press a frame icon.
If desired it is possible to save the image by pressing the Save image button.
It is also possible to confirm or refuse the match. For this purpose press Yes to confirm or No to refuse the recognized face matching.
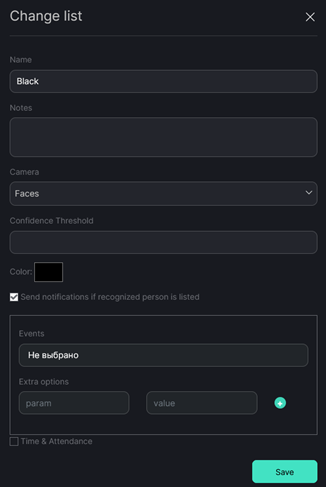
Adding a list
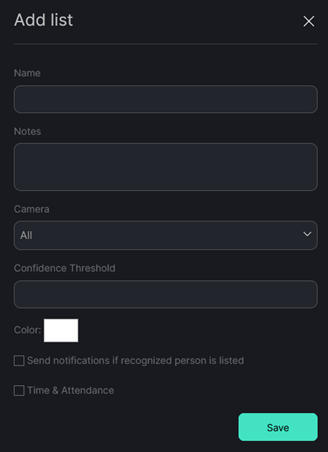
To add a new record, press Add List in the screen upper right corner.
Fill the fields in the opened window:
| Field name | Description |
|---|---|
| Name | Enter the name of the record into the field. This field will be displayed in all components of the program that use this record. |
| Note | This field is intended for the description of the purpose of the created record. |
| Camera | Press in the field and select cameras from a drop-down list. The search of person will be performed on the chosen cameras. |
| Send notification if the recognized face is on the list. | For sending notifications of the found persons for external resources check the field of choice. After that, a field will appear where it is necessary to select an event and to set parameters for notifications sending. |
| Confidence threshold | Establish the confidence threshold of the recognized person to real. Persons with a smaller confidence threshold will not be registered in notifications. |
| Events | Select an event on which parameters notifications will come from a drop-down list. |
| Additional parameters | If necessary you can add additional parameters for their further use during event creation. Fill in the fields of parameters. To add parameters press the button ”+ “. To remove parameters press "-". |
List color selection
For the choice of the color press in the field Color
The chosen color of the list will be displayed at records appearing which belong to this list.
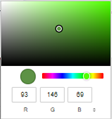
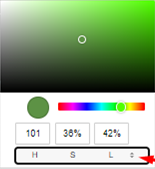
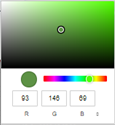
In the opened window select color which you want to appropriate to the list. For the choice of color press the area with color gradation. There will be in the field an index.
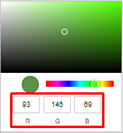
Also, you can select a necessary color using entry fields of color parameters.
To change a format, for the input of parameters of color, use the button of formats switching that is to the right of the format name.
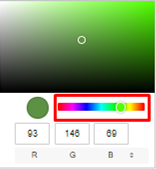
Also, you can select a color using a range of colors that is under a zone of color addition. There is an index in a range. Move the index to the necessary place.
Changes will be displayed in the colors adding zone.
To keep the color close a color choice window, pressing the area of the screen outside the window of color selection.
To close a window of color choice, press to any place of the screen outside a window of color addition of the list.
In order to create a record, press Save.
List editing
For record editing press an editing icon to the right of the record name.
Fill the field in the opened window:
| Field name | Description |
|---|---|
| Name | Enter the name of the record into the field. This field will be displayed in all components of the program that use this record. |
| Note | This field is intended for the description of created record purpose. |
| Camera | Press in the field and select cameras from a drop-down list. A search of face images is performed on the chosen cameras. |
| Confidence threshold | Establish percent of recognized faces confidence threshold to real. Faces with smaller confidence threshold are not registered in notifications. |
| Send notification if the recognized face is in the list | For sending notification of the found persons for external resources, check the field of the choice. After that, there will be a field where it is necessary to select an event and to set parameters for notifications sending. |
| Events | Select an event from a drop-down list in which parameters the notifications will be sent. |
| Additional parameters | If necessary you can add additional parameters for their further use during event creation. Fill in the fields of parameters. For parameters addition press the button “+”. To remove parameters press "-". |
List color selection editing
For color selection press in the field Color
The selected color of the list is displayed at records belonging to this list.
In the opened window select color which you want to appropriate to the list. For color selection press area with color gradation. The index will be in this field.
Also, you can select the necessary color using color parameters entry fields.
To change a format, for color parameters input use the button of formats switching that is to the right of the format name.
Also, you can select a color using a range of colors that is under a zone of color addition. There is an index in the range. Move the index to the necessary place. Changes will be displayed in the color adding zone.
To save the color close a window of the color selection, by pressing the screen area outside the window of color selection.
To close a window of color selection, press to any place of the screen outside a window of list color addition.
To accept the changes press Save.
List deletion
For record removal press a basket icon in the right part of the screen.
In the opened window press Yes, to confirm the removal. Press No to cancel the removal.
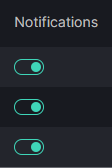
For notification activation or stop put the status slider in the relevant provision:
List viewing
By pressing the list name or a viewing icon ![]() you will pass into the section for viewing of information on this list.
you will pass into the section for viewing of information on this list.
In list viewing it is possible to perform the search by surname and name of the person or by photo.
To find the person from the list by surname and name, enter in whole or in part the information which you want to find in the field Surname and Name.
To find the person by photo press the button Search by Photo and load the photo according to which the search is performed.
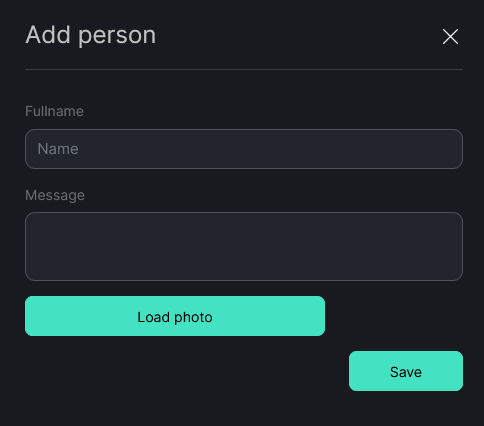
Adding a person to the list
To add a new record, press Add Person in the screen upper right corner.
Fill the fields in the opened window:
| Field name | Description |
|---|---|
| Full name | Enter a person's name and surname into the field. |
| Message | Enter the message into the field. The message should contain information about the person. |
Press the button Load a Photo to add a photo of the person.
To create a record, press Save.
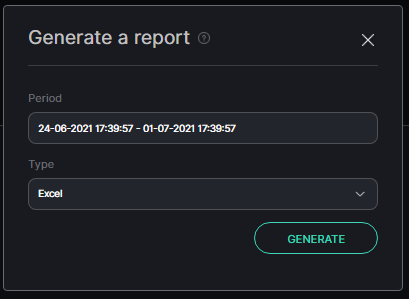
Generate a report
If the Time&Attendance function was activated for a list, you have the ability to generate an attendance report.
For this purpose click on the Generate a report button.
The following window will be opened.
| Field name | Description |
|---|---|
| Period | Select date and time range. |
| Type | Select report export file type Excel or JSON. |
Click on the GENERATE button to download a report.
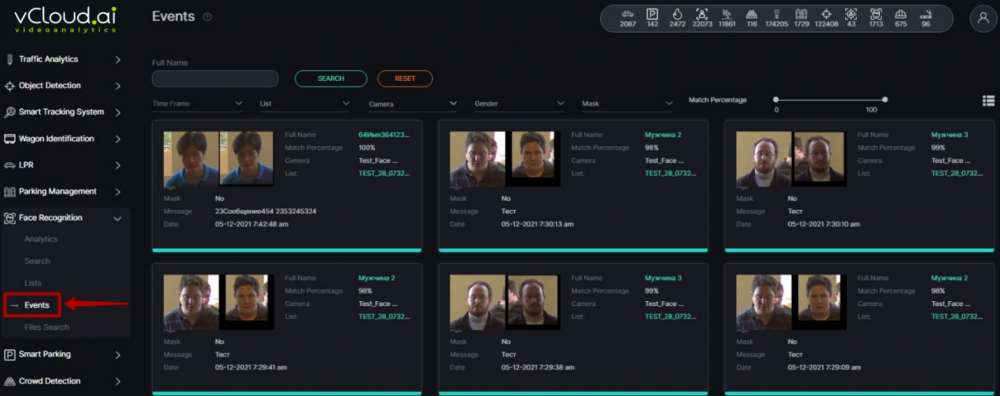
Events
To view the history of recognized faces, select Face Recognition in the left menu and pass to the Events section.
Events Search
The search field is at the top of the page.
| Search field | Parameters |
|---|---|
| Full Name | Enter wanted person's full name or a part of it. |
| Time Frame | Click on the field and select the necessary time period. |
| List | Select the necessary list (or All Lists/Off the List). |
| Camera | Select the camera on which you want to see notifications. |
| Gender | Select a specific gender. |
| Mask | Click on the field and set if a medical mask should be present on the face. |
| Match Percentage | Move the markers along the scale to set the range of coincidence in percent |
Press Search to display the search results. Press Reset to clear the entry fields.
Events View
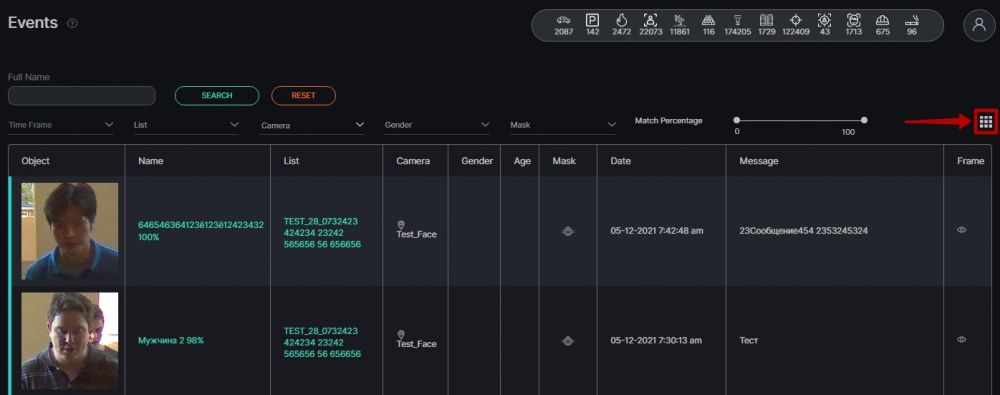
To go to the list view mode, press the corresponding icon in the upper-right corner.
To return to the grid view mode, press the corresponding icon in the upper-right corner again.
Each event contains a frame preview, information about Name, List, Camera, Gender, Age, Mask, Date, and Message.
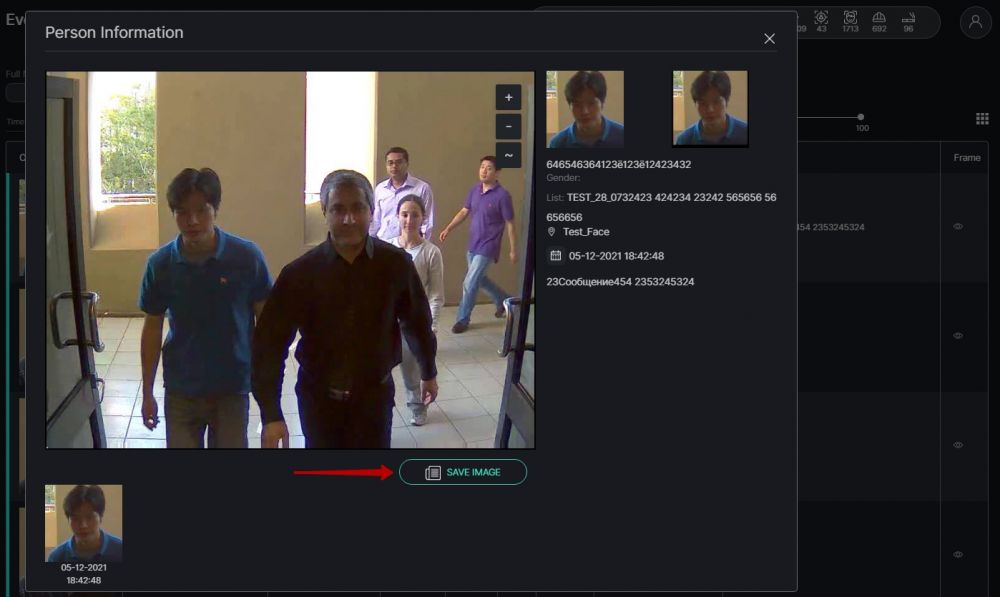
To view a full-size frame of the desired event, click on the View button in the Frame column if you use a list view mode,
or click on the frame preview if you use a grid view mode.
Press "+" to Zoom in or "-" to Zoom out the frame. Press "~" to return the frame to the default size.
If desired, it is possible to save the image by pressing the Save Image button.
Personal Information
To view more complex personal information about a specific person, click on the person's name.
To Edit or Delete personal data, click on the corresponding icon.
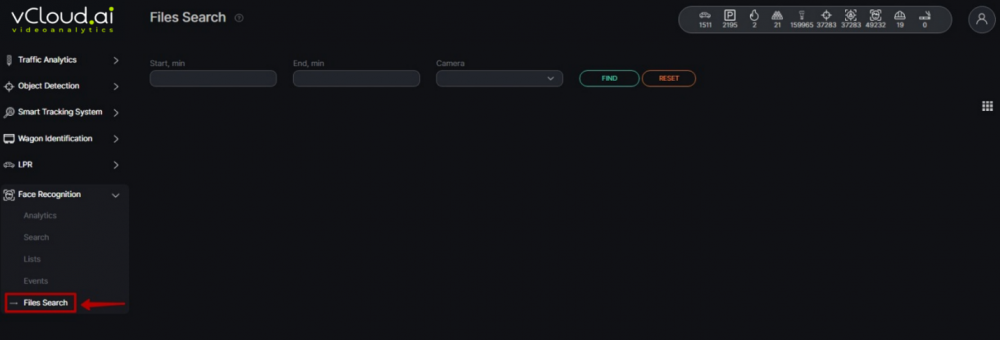
Files Search
If you have run analytics with a video file instead of the video stream, you can view the search results in the Files Search section of the Face Recognition module.
Filter
Filter fields are located at the top of the screen.
| Filter fields | Parameter |
|---|---|
| Start, min | Fill in the start point of a video stream in minutes. |
| End, min | Fill in the endpoint of a video stream in minutes. |
| Cameras | You can choose the required file name from the drop-down list. |
Enter required parameters and press Find to show search results. Press Reset to clean the entry fields.
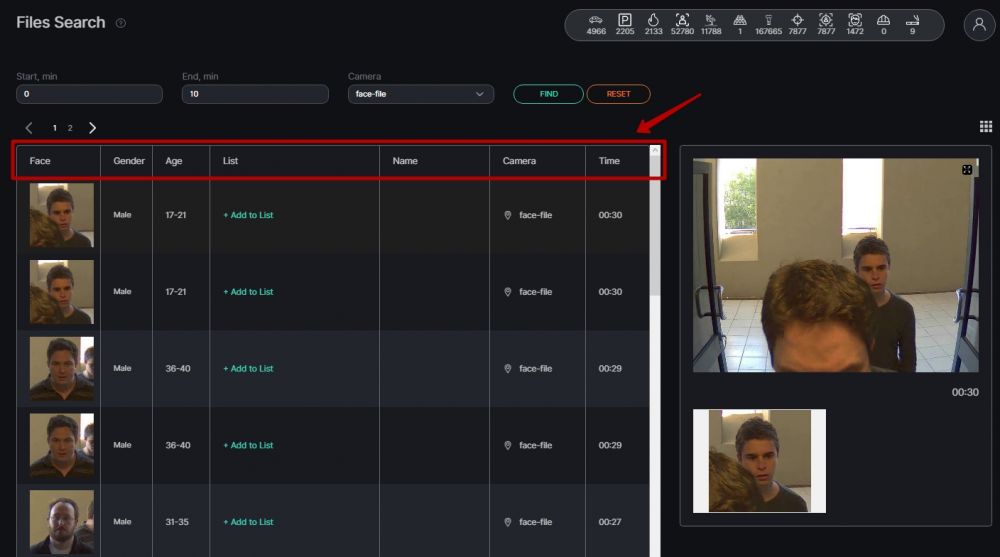
Search Results
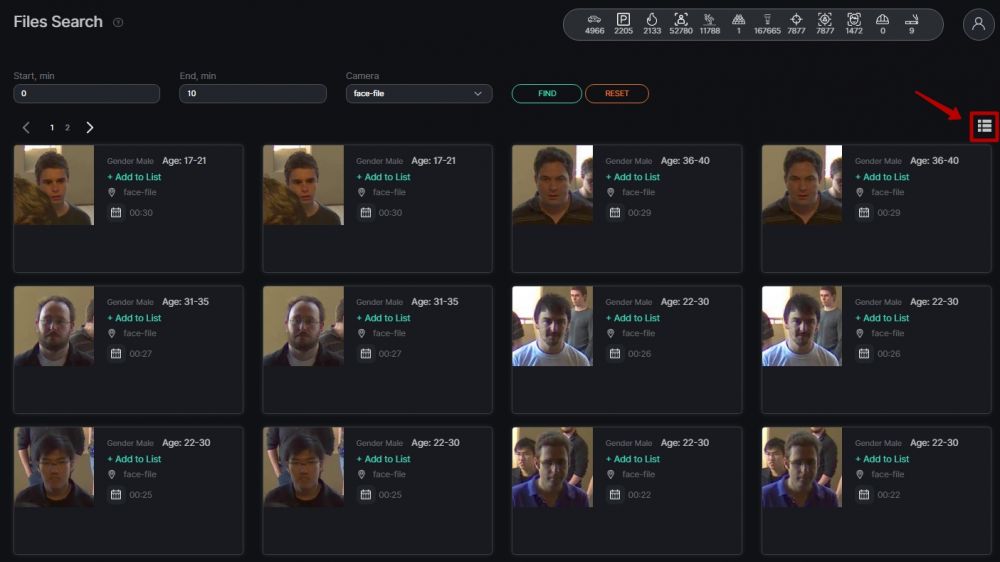
Search results are displayed in the table below.
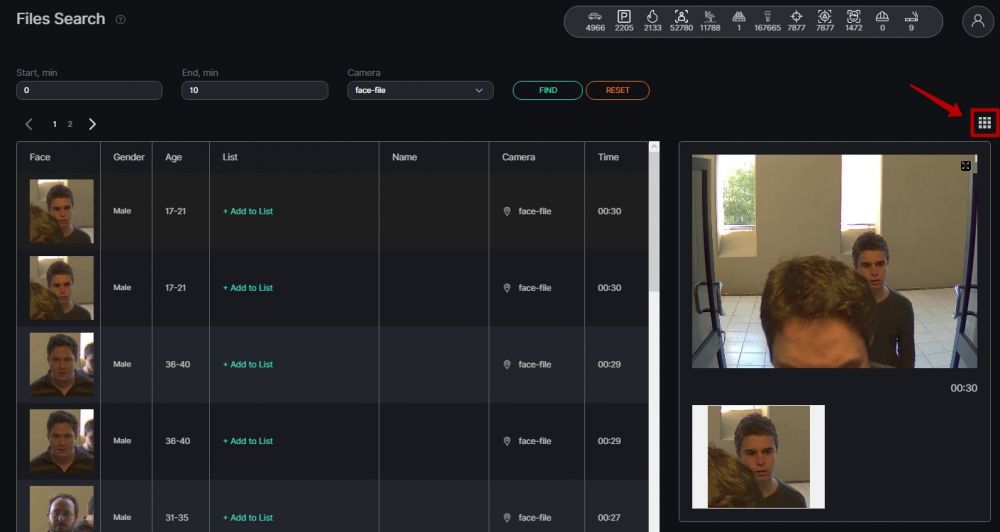
If you want the results displayed in a grid mode click on the icon in the upper right corner of the page.
To return to list view mode click the appropriate icon in the upper right corner again.
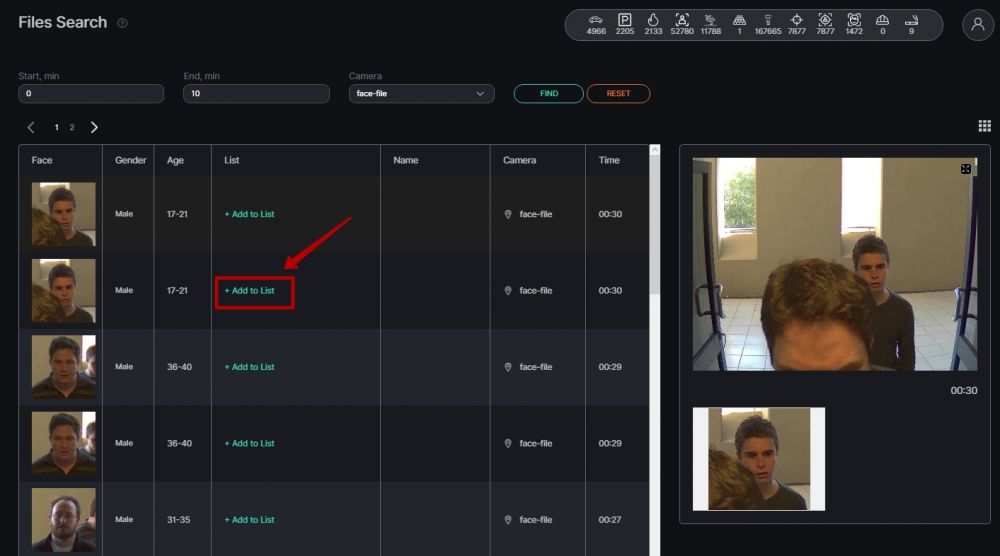
Adding Person to List
If the person is not on the list, but it is necessary to add the person, press the Add to List button.
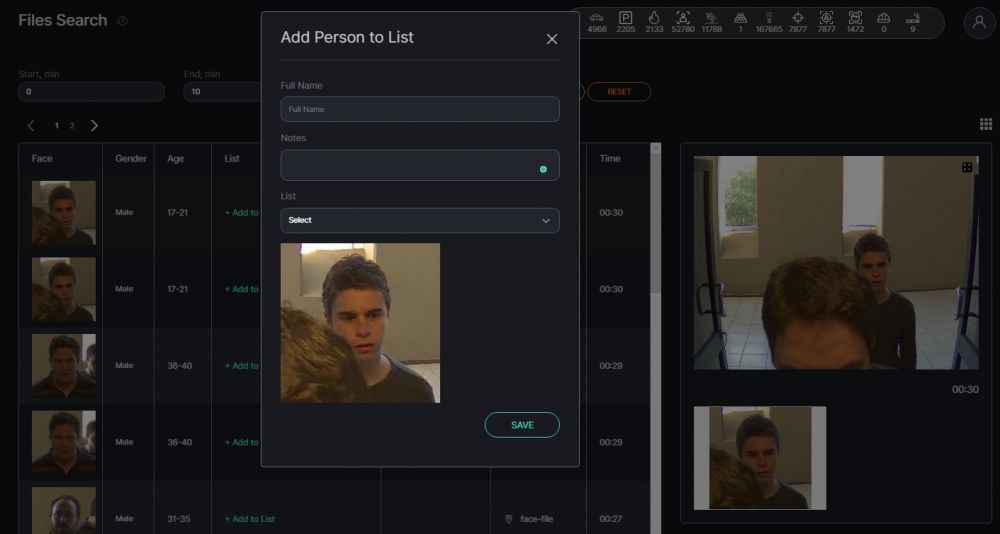
The following window will be opened.
To add a person enter a full name, notes and also select one of the existing lists. When fields are filled in click on the Save button to add a person to the list.
Frame View
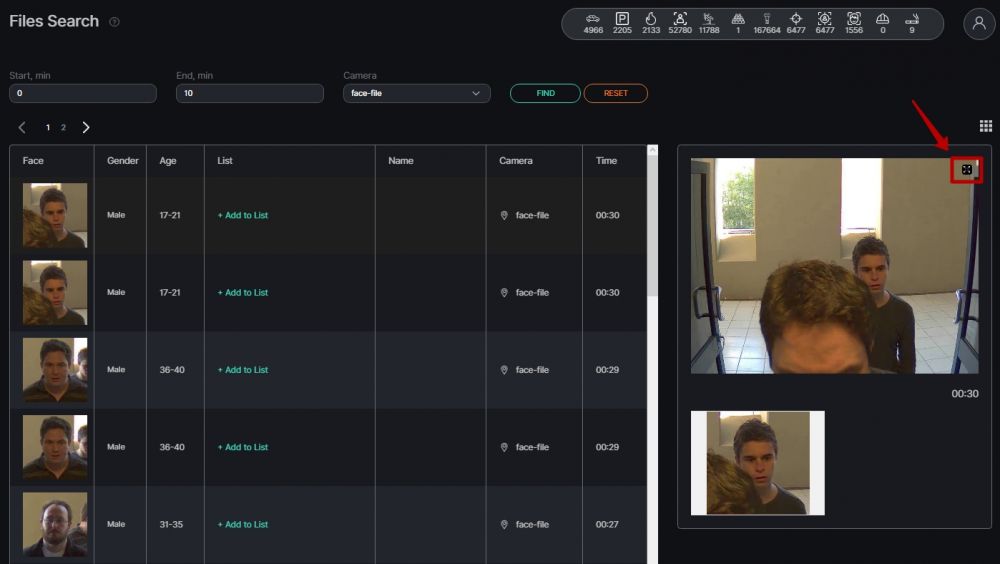
To enlarge the picture in recognized face record, press an icon of Zoom ![]()
It is possible to save an image with a recognized face by clicking on the Save Image button.
API
API Documentation: http://vca2.vcloud.ai:2001/swagger/face
