Difference between revisions of "VCloud.ai Age and Gender Determination Module"
| Line 30: | Line 30: | ||
|- | |- | ||
|Operating system | |Operating system | ||
|Ubuntu | |Ubuntu 20.04 | ||
|} | |} | ||
Latest revision as of 19:32, 13 November 2023
Main functionality
· Determines the gender of person
· Determines the age of person in the age range
· Generation of the reports by gender and age with export to PDF, Excel
Product Description
The Age & Gender module is designed for statistics viewing and generating on the number of persons of a certain gender and age in the field of view of selected video surveillance cameras.
System Requirements
It is necessary to have the minimum system requirements for one video stream for Age & Gender module installation on GPU as in the table below.
| Parameter | Recommended value |
| CPU | Intel Core i5-5575 or higher |
| RAM | 3 GB RAM |
| GPU | NVIDIA 1030 |
| Places for archive | up to 3 GB per day (~4.5 k detections) |
| Operating system | Ubuntu 20.04 |
Analytics
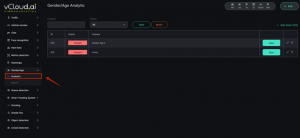
In order to set up analytics select the Age & Gender Analytics from the sidebar menu.
Analytics Adding
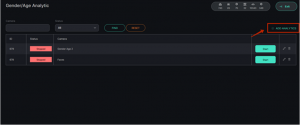
The page displays a list of analytics with the status and the ability to edit, add, or delete analytics. In order to add new analytics, press Add Analytics in the upper-right corner of the screen.
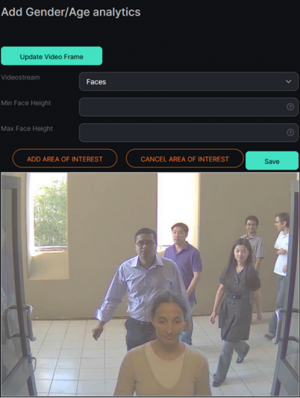
When pressing Add Analytics the form of analytics adding is opened.
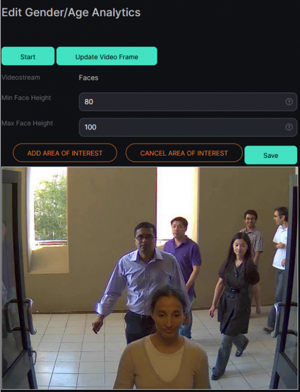
By pressing the Update Video Frame button you can see a frame in real-time in the field of frame addition. It is possible if a video stream was selected.
For adding analytics it is necessary to fill the following fields:
| Field name | Description |
| Video stream | Press in the field and select the camera name from a drop-down list. Videostream will be used to create analytics. |
| Minimum face height | Establish the minimum size of the face which will be recognized by analytics. The minimum possible value is 80 pixels. |
| Maximum face height | Establish the maximum size of the face which will be recognized by analytics. |
Adding an Area of Interest
-Add a camera to Video stream
-A video from the added camera will appear below the Video stream field.
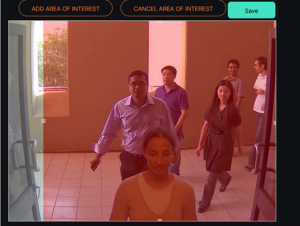
Add an area of interest.
a) Press Add Area of Interest. The red area appears.
b) Using the tools at area edges, reduce and set the area to the desired location for definition.
The displayed area will be used for face recognition and identification of their gender and age.
In order to cancel the area of interest, press Cancel Area of Interest.
To create the analytics, press Save.
Analytics Editing
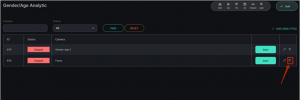
To open the edit window, press the edit icon on the right side of the analytics record.
When you press the edit icon, the analytics editing form is opened.
It is possible to change the analytic if the analytic is not started.
In order to run analytics, press Start. To stop analytics, press Stop.
By pressing the Update Video Frame button you can see a frame in real-time in the field of frame addition.
System user can change the following fields:
| Field name | Description |
| Minimum face height | Establish the minimum size of the face which will be recognized by analytics. The minimum possible value is 80 pixels. |
| Maximum face height | Establish the maximum size of the face which will be recognized by analytics. |
Changing the Area of Interest
a) Press Add Area of Interest. The red area appears.
Using the tools at area edges, reduce and set the area to the desired location for definition.
The displayed area will be used for face recognition and identification of their gender and age.
In order to cancel the area of interest, press Cancel Area of Interest.
To create the analytics, press Save.
Analytics Search
The search field is located at the top of the Analytics page.
To find the necessary analytics, enter the name or status of analytics.
To start the search press the Search button. To clear the settings, press Reset.
| Search field | Parameters |
| Camera | It is possible to enter video stream name or part of the name in this field |
| Status | Select the Analytics status from the drop-down list |
Analytics Start and Stop
To run the analytics, press the Start button on the right side with the analytics name field. To stop analytics, press the Stop button.
Analytics Deletion
To delete analytics, click the delete icon on the right side of the analytics field.
In opened window click Yes to confirm the deletion or No to cancel the deletion.
Analytics Viewing
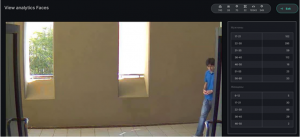
To view Analytics, press the icon on the right side of the screen.
It is possible to view only active video streams.
Statistics
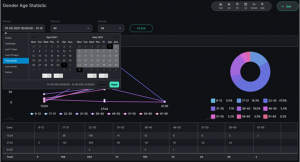
In order to view heat map statistics select Age & Gender in the left menu and pass into section Statistics.
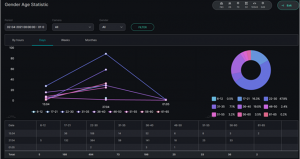
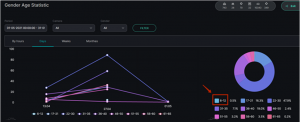
Gender/Age Statistics is intended for reports generation and creation on the number of persons of a certain gender and age for a specified period.
In order to filter statistics it is necessary to perform the following actions:
-Select the time period for which statistics will be generated.
To select a period, enter one of the following values: today, yesterday, last 7 days, last 30 days, this month, previous month, manually selected period (using calendar specify a range of days and times).
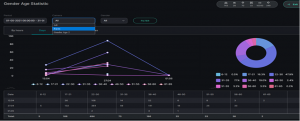
-Select camera. It is possible to select All cameras, or specific camera.
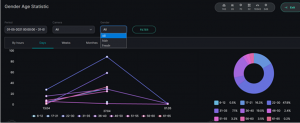
-Select the desired gender. It is possible to select All, or specific gender.
-Press Filter
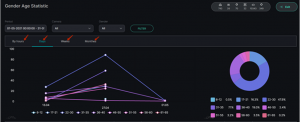
To view statistics by hours, days, weeks, and months, select the appropriate tab.
In Days, Weeks, and Months tabs, it is possible to remove unnecessary items from the chart by clicking on the item name under the chart or pie chart.
Camera Installation Requirements
The solution is compatible with all cameras, that return the RTSP stream.
· Quality: the highest
· Bit rate: maximum possible
· Profile: the highest possible
· Stream smoothing: off
· Exposure and brightness: such that for a given scene the face is clearly visible (if the camera is aimed at a light source, then an overexposed background is allowed)
· Shutter speed: don't set too slow (more than 1/50), because in this case, the effect of blurring moving objects appears
· Standard camera placement - ensure constant and steady illumination of recognized faces at the entrance or in the doors at face level or at a slight angle
· Camera position: the face in the frame should be directed as straight as possible into the lens (optimal - at head level; means not from above, below, or from the side)
· There should be no strong light sources from the side, above and below, creating harsh shadows and changes in light in different parts of the face
· The camera should be well fixed and not shaking
· Prevent refocusing and image sharpness changes
· There should be no overexposures and glare in the frame
