VCloud.ai Pose Estimation VCA
Pose Estimation - Module of Pose Estimation
Main functionality
   • Recognition of the lying down person

   • Recognition of stand up behavior

   • Recognition of sit down behavior

   • Recognition of a standing person

   • Recognition of a sitting person
Product Description
The Pose Estimation module helps to identify a person in different states: sitting down, standing, walking, falling, getting up, as well as sending a notification in connection with the rule of human behavior.
System Requirements
It is necessary to have the minimum system requirements for one video stream for the Pose Estimation recognition module installation on GPU as in the table below.
| CPU | Intel Core i5-8250U @ 1.60GHz or with higher performance | |
| Memory, RAM | 8 GB RAM | |
| GPU | Any from the list below or higher with better performance: GTX 1660 6GB or |
|
| Bandwidth | 5 Mb/s per 1 video analytics or higher* | |
| Response time(local network) | 200 ms or faster | |
| Operating system | Ubuntu 18.04 or Windows 7 / Windows Server 2008 R2 |
Analytics
In order to open the Pose Estimation analytics, select Pose Estimation in the left menu and pass to the Analytics section.
In the Analytics section, you can customize analytics. The page displays a list of analytics with the status and the ability to add, edit, view, or delete analytics.
There is a search field at the top of the page. Here you can filter analytics by the following parameters:
| Field name | Description |
|---|---|
| Camera | Analytics name or part of a name can be entered in this field |
| Status | Select the Analytics status from the drop-down list - All, Active, or Stopped<t/d> |
To start the search click on the Search button. To clear the fields click on the Reset button.
Analytics Adding
In order to add new Pose Estimation analytics, press Add Analytics in the upper right corner of the page.
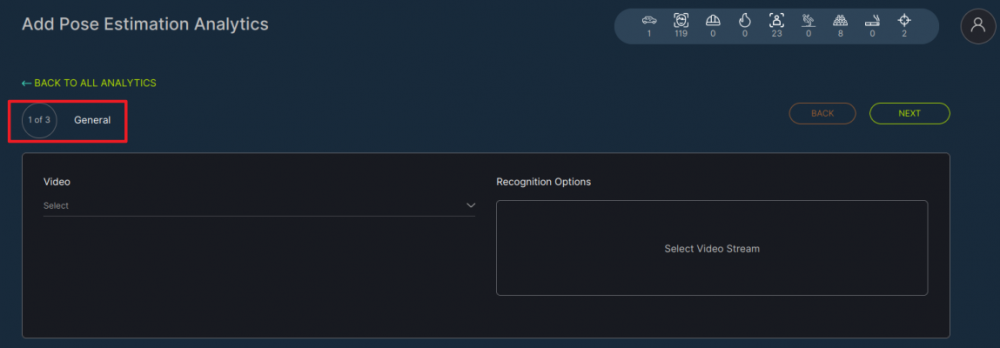
The Pose Estimation analytics setup process consists of 3 Steps.
Step 1 - General
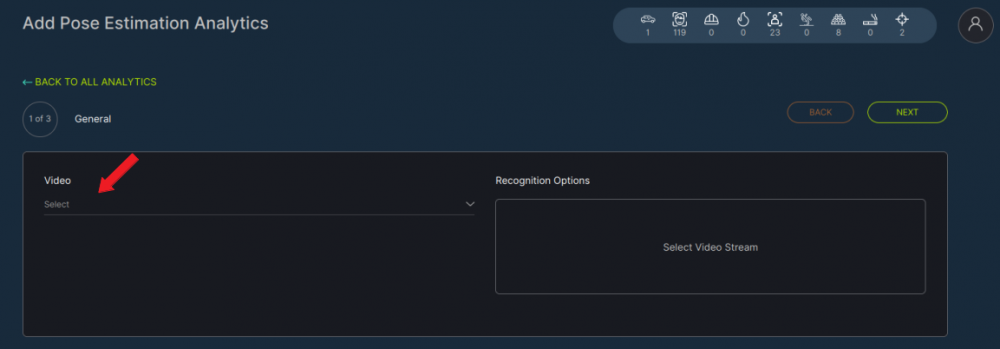
First of all, it is necessary to select a video stream. Click on the Video field and select the camera name from a list.
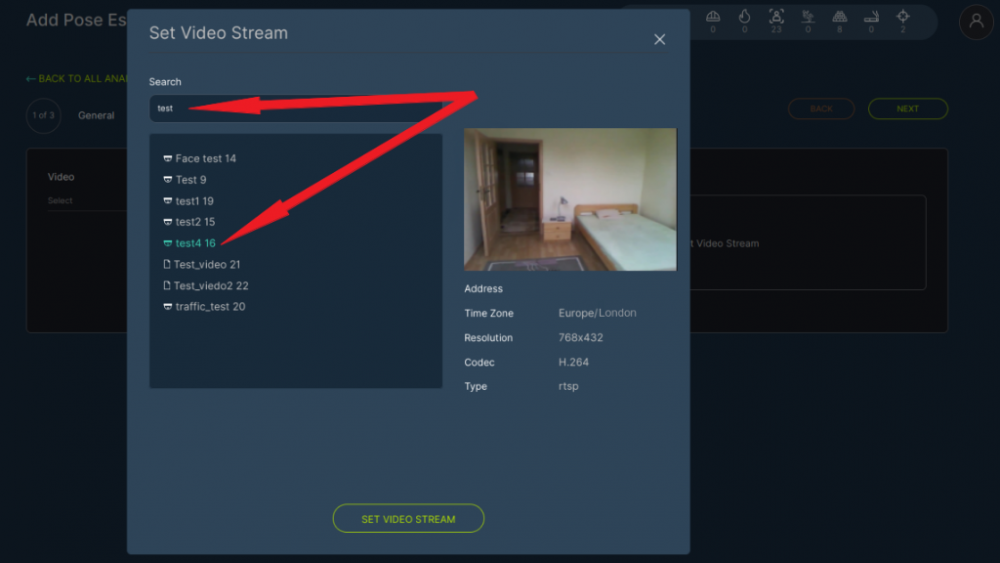
You can also enter the part of the camera name in the Search field to find the necessary video stream faster.
On the right side of the window, you can see the video stream preview and information about Camera name and Address, Time Zone, Resolution, Codec, and Type.
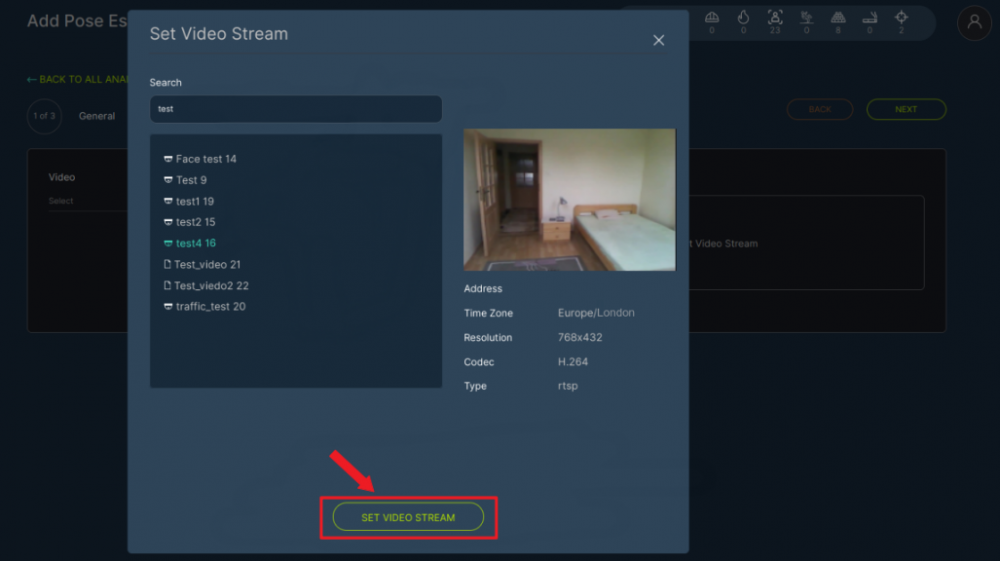
When the video stream is selected press the Set Video Stream button.
By pressing the Update Video Frame button you can see a frame in real-time in the field of frame addition.
It is possible if a video stream was selected.
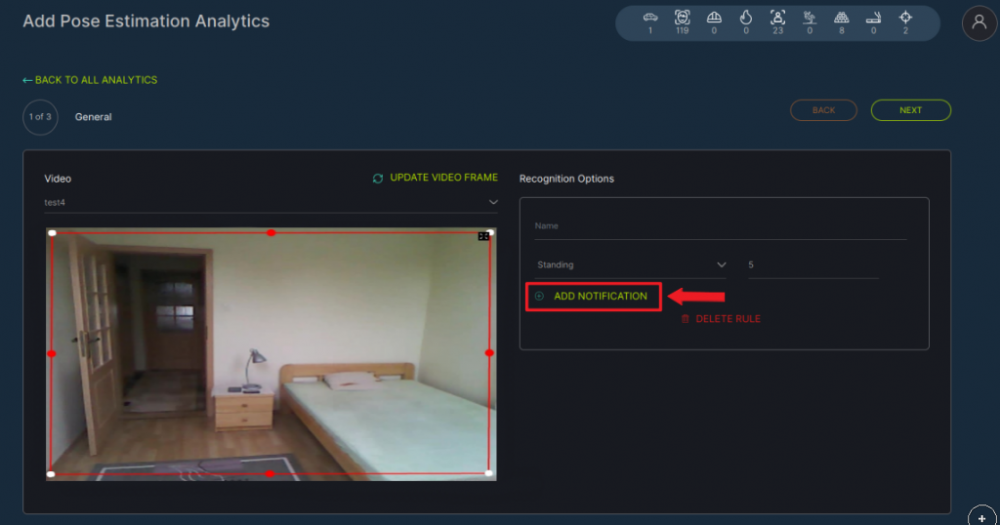
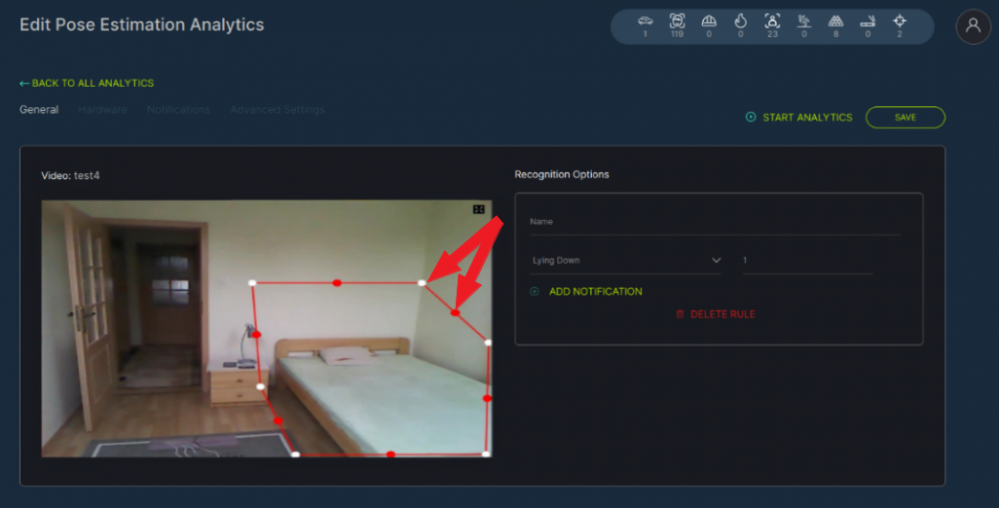
To add analytics it is necessary to set up the following parameters:
| Parameter | Description |
|---|---|
| Name | Enter the name of the detection area |
| Type | Select a pose type for detection |
| Detection Time | Set the time in seconds during which the object can be in a certain pose without detection. |
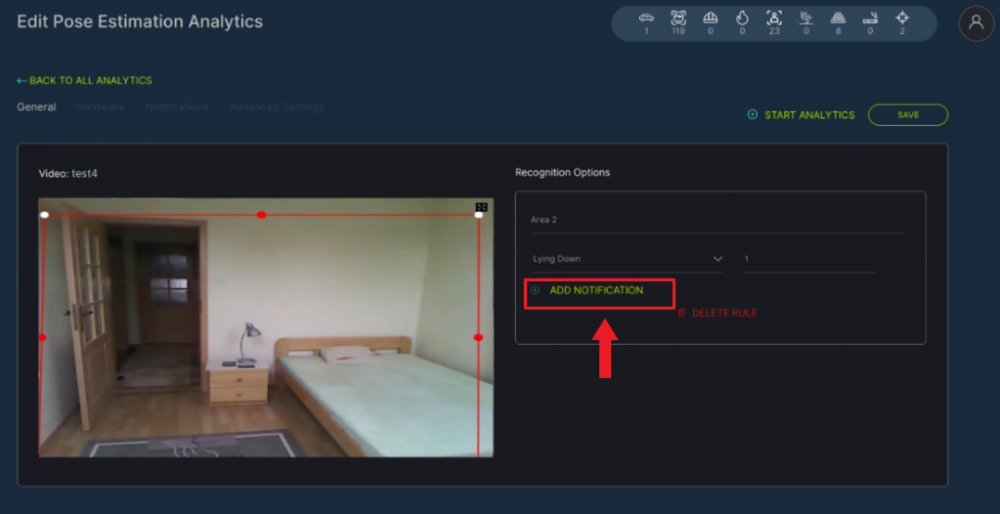
To add more types of pose estimation click on the Add Notification button.
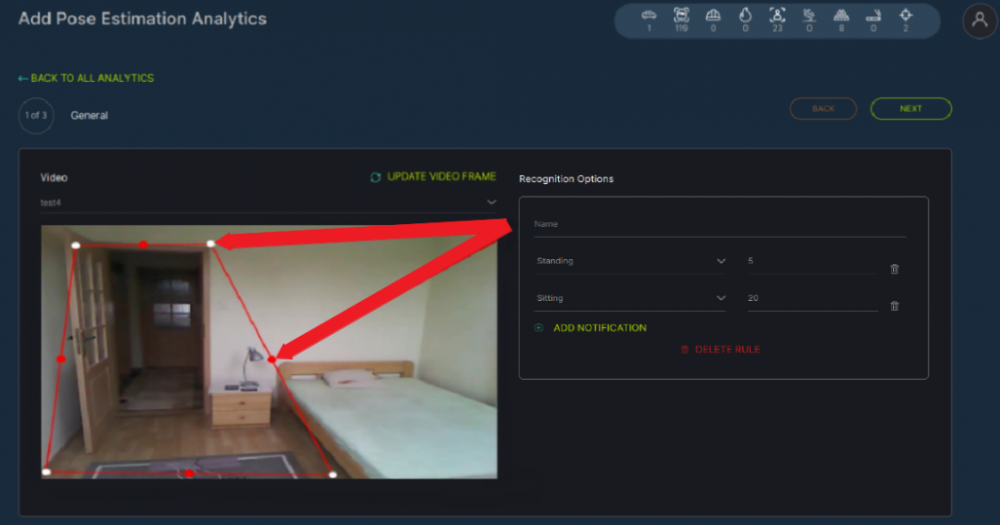
Then it is necessary to place a detection area.
Move the white and red markers to line up the desired area.
Detection analytics will be performed only within the boundaries of the selected area.
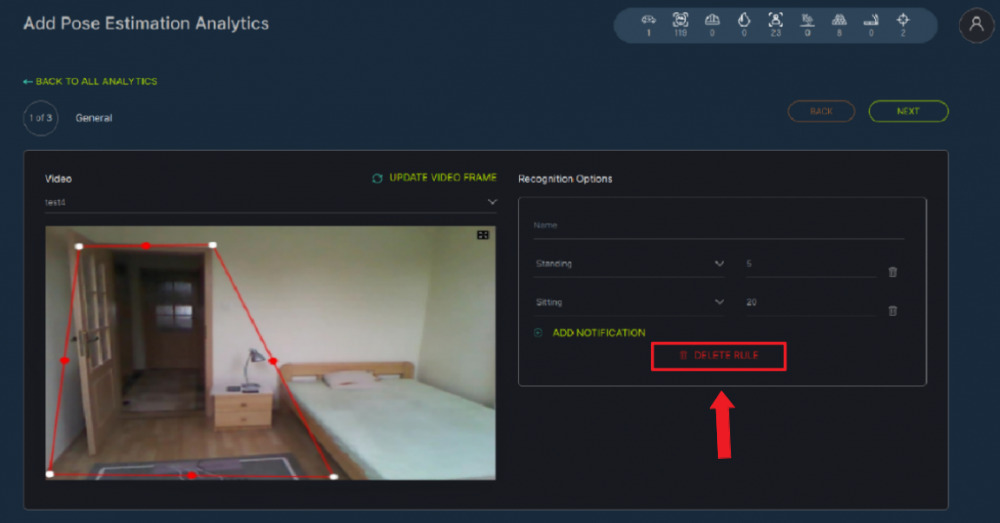
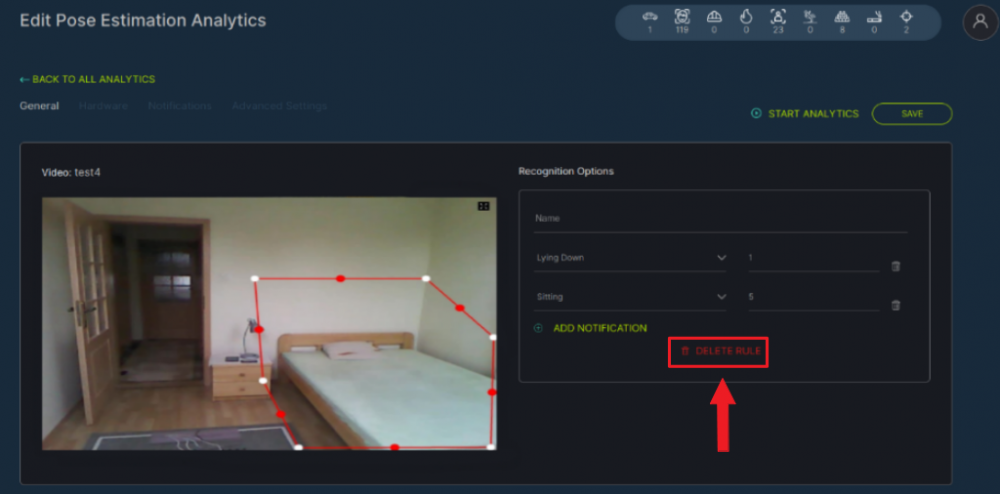
In order to remove the area, click on the Delete Rule button.
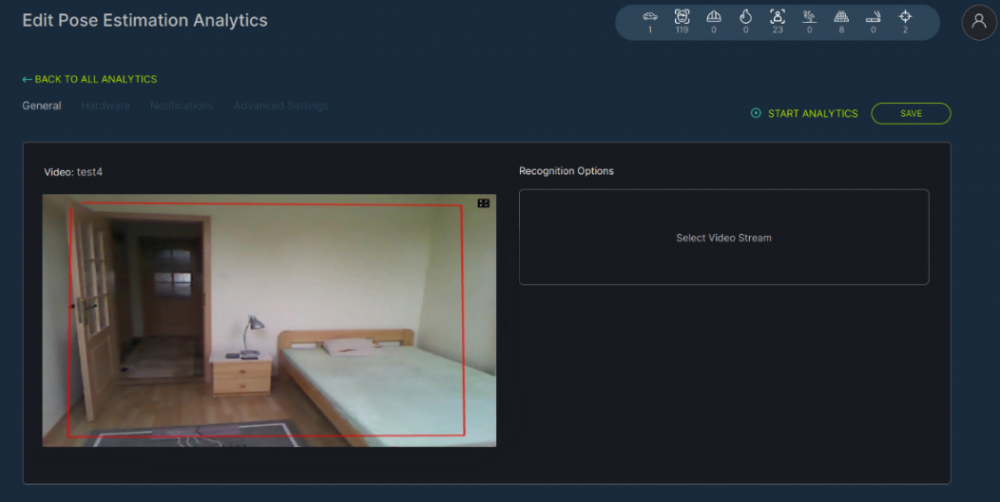
To create a new area from scratch, click somewhere inside the frame. Then move the mouse cursor. It will be moved with a red line. Put as many points as is necessary to create the borders of the desired area. The last point should be placed at the same place as the first one.
Pic
To pass to the next step, click on the Next button in the upper right corner of the page.
Pic
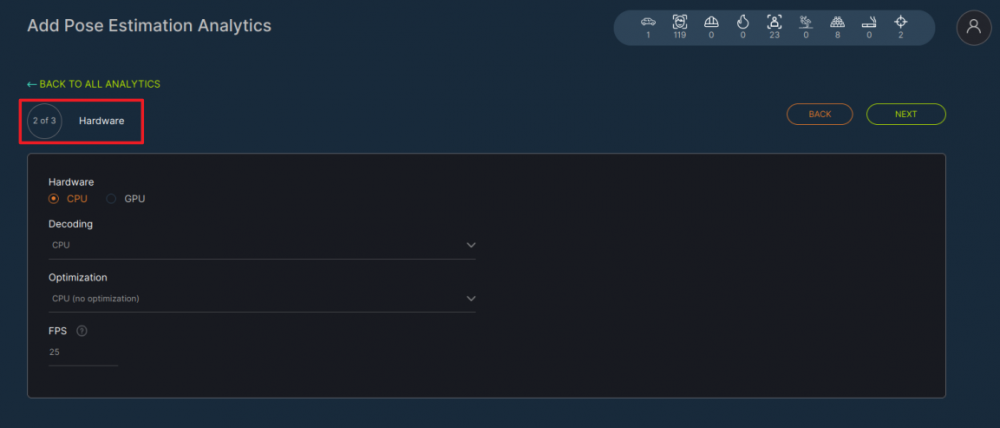
Step 2 - Hardware
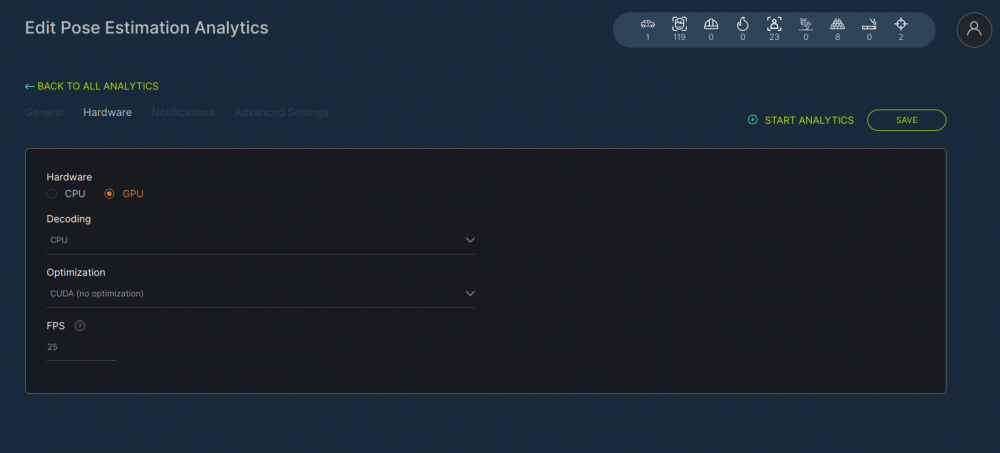
Now it is time to customize Hardware options. System users can change the following parameters:
| Parameter | Description |
|---|---|
| Hardware | Select one of the technologies - CPU or GPU acceleration |
| Decoding | Select the hardware decoder from the drop-down list - CPU, Intel, Nvidia |
| Optimization | Select the optimization parameter from the drop-down list (for CPU - CPU (no optimization), Open VINO; for GPU - CUDA (no optimization), cuDNN Half (FP16), Tensor RT) |
| FPS | Enter the desired number of frames per second in the field for detection. The recommended value is 25 |
When all necessary parameters are selected, go forward to the last step by clicking on the Next button in the upper right corner of the page.
Step 3 - Notifications
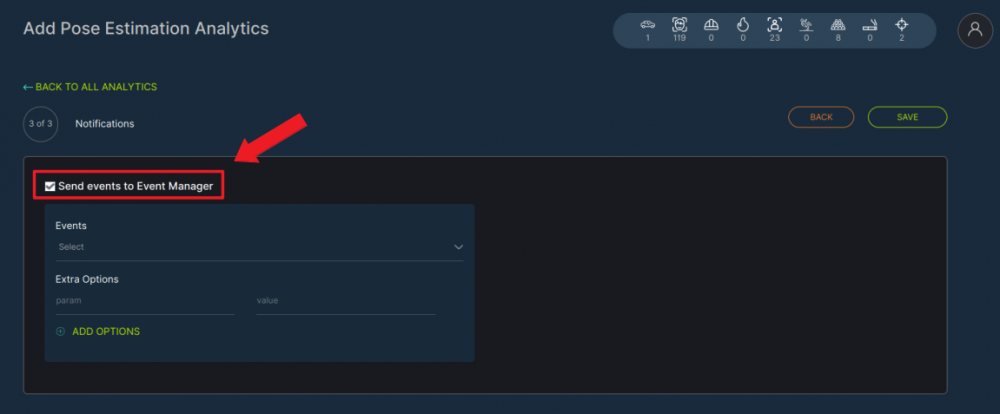
Finally, it is possible to customize Notifications.
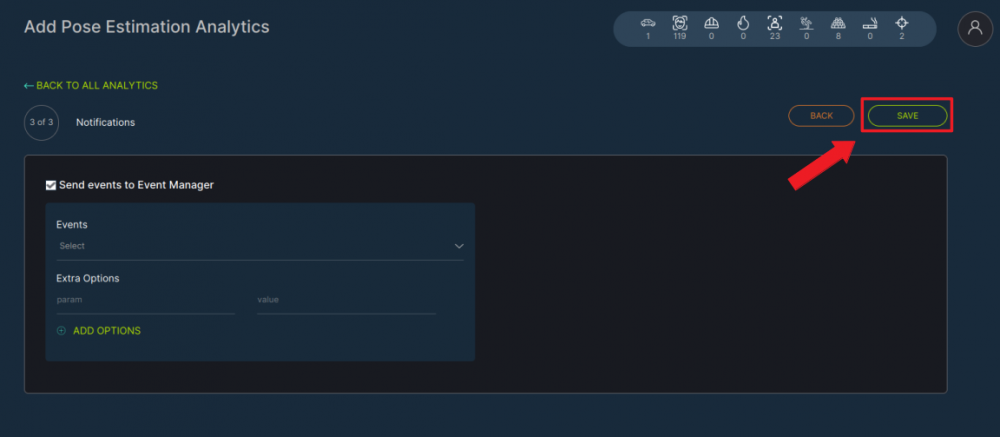
For this purpose check the box next to Send events to Event Manager. The system will send all notifications to the Event Manager and then to external resources.
Then it is necessary to fill in the following fields:
| Field name | Description |
|---|---|
| Events | Select the event for which notifications will be sent from the drop-down list. |
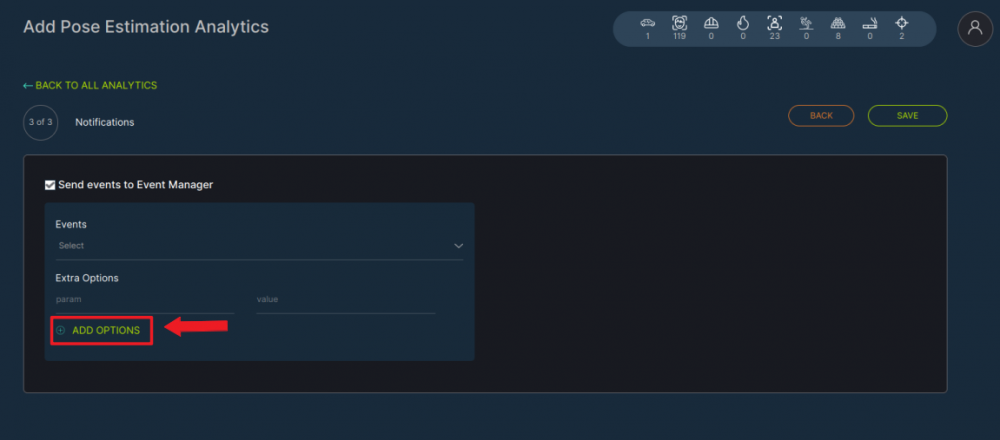
| Extra Options | If necessary, it is possible to add additional parameters for further use when event creating. Fill in the parameter and value fields. |
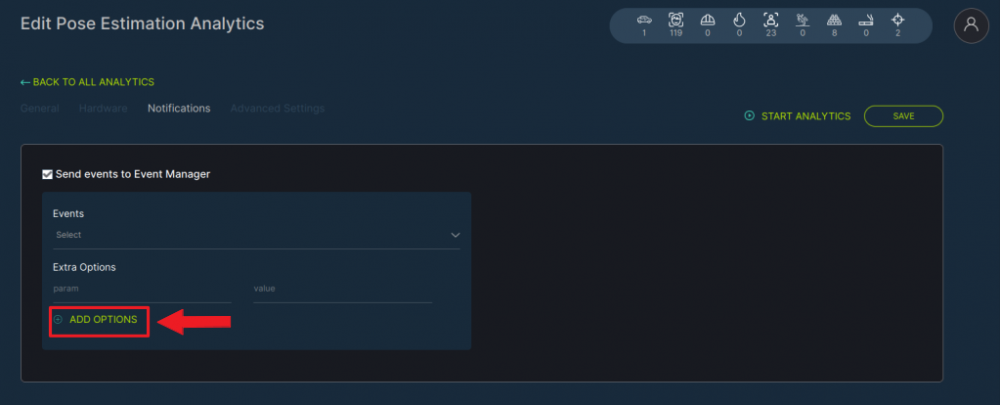
To add more parameters, click on the Add Options button.
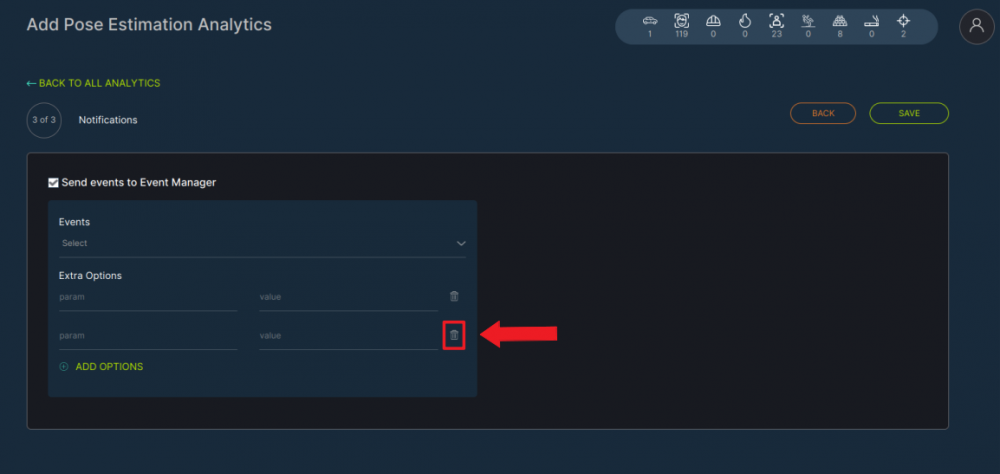
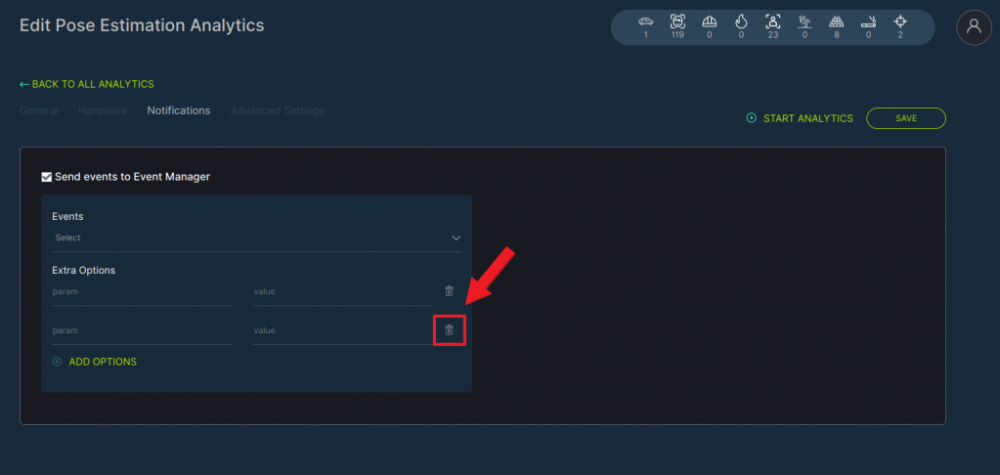
To remove parameters, click on the Delete icon.
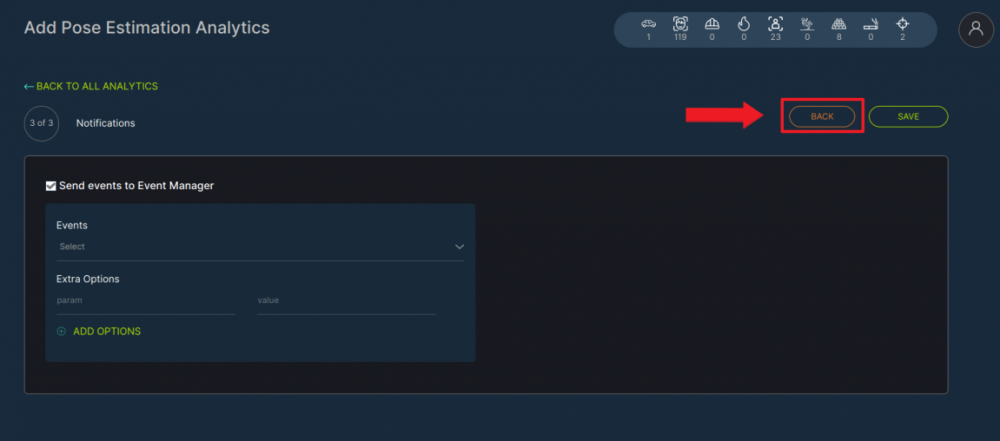
If you want to make changes to previous steps, click on the Back button in the upper right corner of the page.
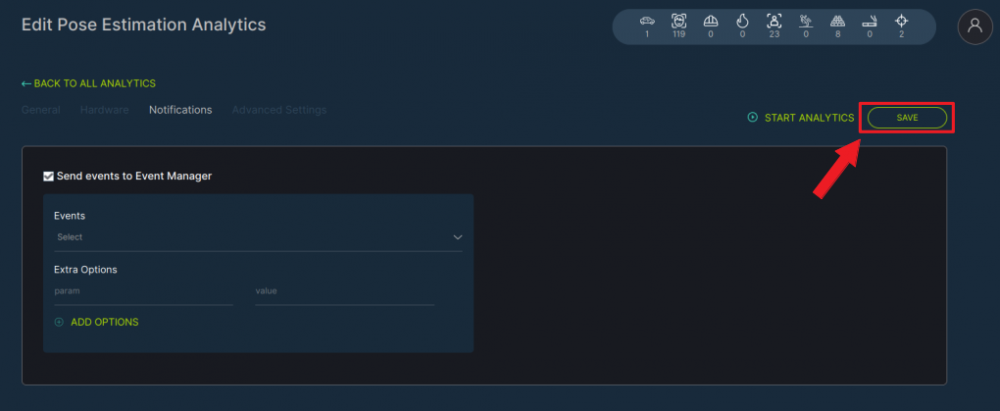
When the analytics setup is complete, click on the Save button in the upper right corner of the page to save changes and create the analytics.
Analytics Editing
To open the Pose Estimation analytics editing window, click the Edit button on the right side of the analytics record.
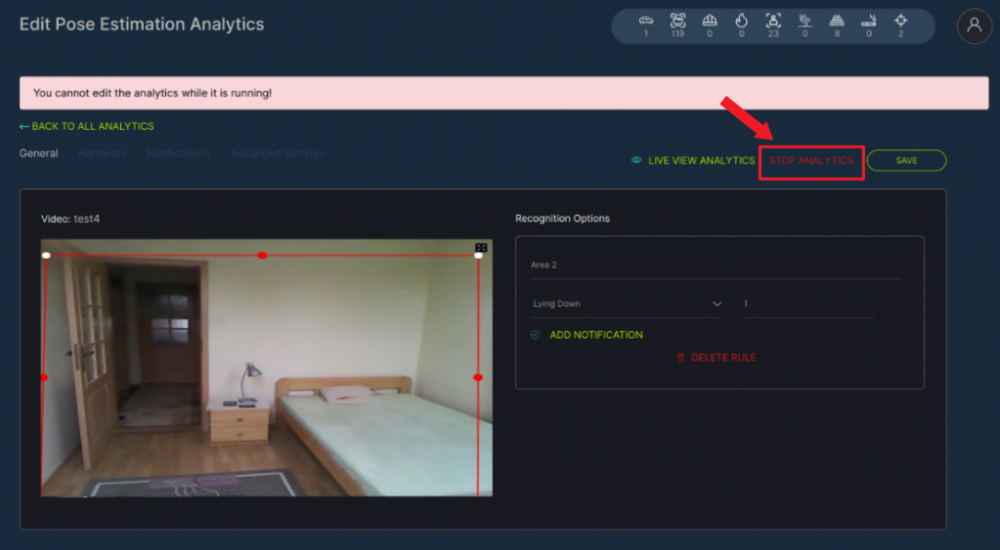
It is possible to edit the analytics if it is not running.
If the analytics is Active at the moment, it is necessary to disable it by clicking on the Stop Analytics button in the upper right corner of the editor page.
When you click on the Stop Analytics button, the Confirmation window opens. Click Yes to confirm the analytics disable or click No to cancel the action.
Now when the analytics is disabled it is possible to make changes to it.
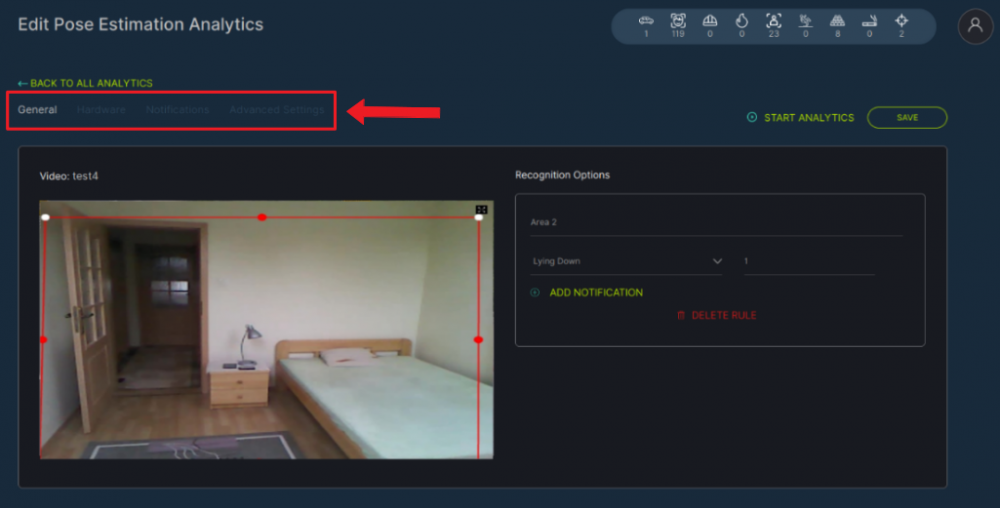
There are 3 tabs of parameters at the top of the page, similar to the steps in creating analytics - General, Hardware, and Notifications. The General tab opens first by default.
The current tab is always highlighted. You can switch among them by clicking on their names.
General Tab
At the General tab it is possible to edit the following parameters:
To add analytics it is necessary to set up the following parameters:
| Parameter | Description |
|---|---|
| Name | Change the name of the detection area |
| Type | Select a pose type for detection |
| Detection Time | Set the time in seconds during which the object can be in a certain pose without detection |
To add more types of pose estimation click on the Add Notification button.
Then it is possible to edit a detection area.
Move the white and red markers to line up the desired area.
Detection analytics will be performed only within the boundaries of the selected area.
In order to remove the area, click on the Delete Rule button.
To create a new area from scratch, click somewhere inside the frame. Then move the mouse cursor. It will be moved with a red line. Put as many points as is necessary to create the borders of the desired area. The last point should be placed at the same place as the first one.
Hardware Tab
At the Hardware tab it is possible to edit the following parameters:
| Parameter | Description |
|---|---|
| Hardware | Select one of the technologies - CPU or GPU acceleration |
| Decoding | Select the hardware decoder from the drop-down list - CPU, Intel, Nvidia |
| Optimization | Select the optimization parameter from the drop-down list (for CPU - CPU (no optimization), Open VINO; for GPU - CUDA (no optimization), cuDNN Half (FP16), Tensor RT) |
| FPS | Enter the desired number of frames per second in the field for detection. The recommended value is 25 |
Notifications Tab
At the Notifications tab it is possible to edit values in the following fields:
| Field name | Description |
|---|---|
| Events | Select the event for which notifications will be sent from the drop-down list. |
| Extra Options | If necessary, it is possible to add additional parameters for further use when event creating. Fill in the parameter and value fields. |
To add parameters, click on the Add Options button.
To remove parameters, click on the Delete icon.
When the analytics editing is complete, click on the Save button in the right upper Picorner of the editor page to save changes.
Analytics Viewing
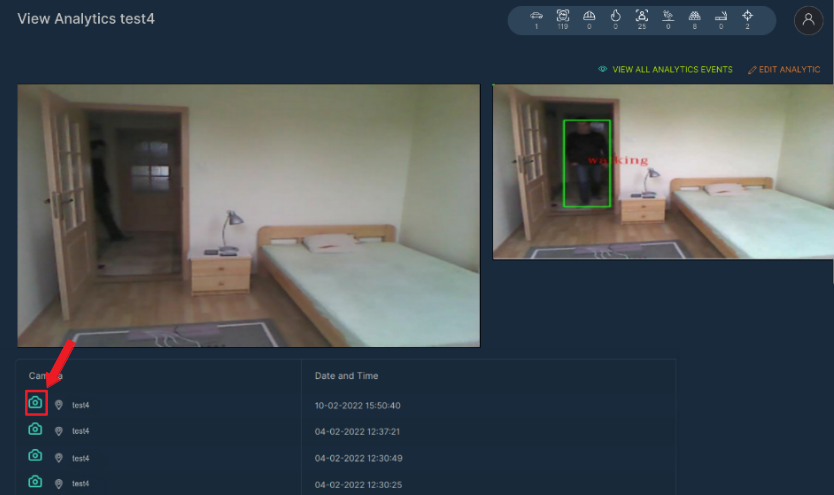
To view Pose Estimation analytics, press the View icon on the right side of the videostream field.
It is possible to view only active video streams.
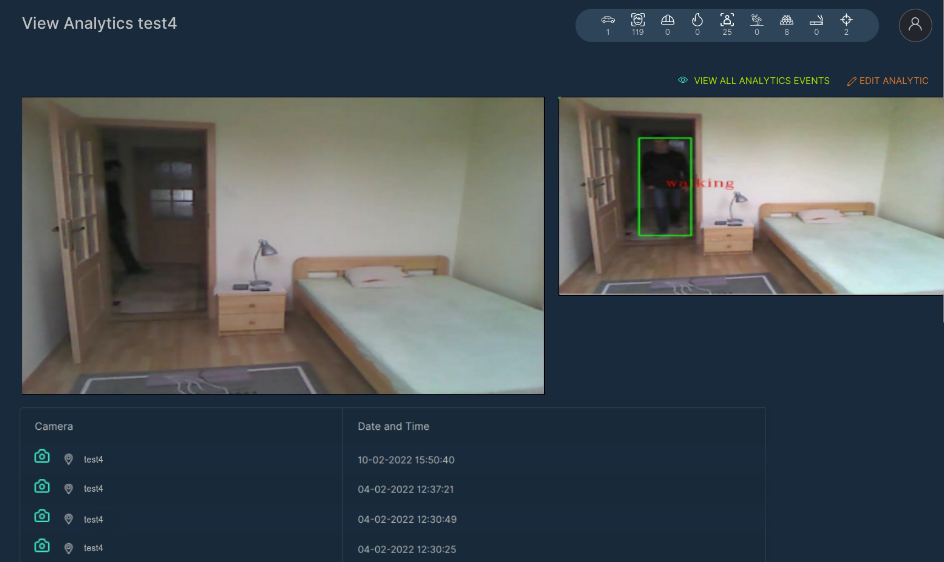
In the opened window you can view the video from the camera in real-time.
There are records of recognized people's poses in the table below, which includes Camera and Date and Time columns.
| Column name | Description |
|---|---|
| Camera | Here you can look at the camera location and a frame of a recognized person's poses |
| Date and Time | The exact date and time the camera recognizes people's poses |
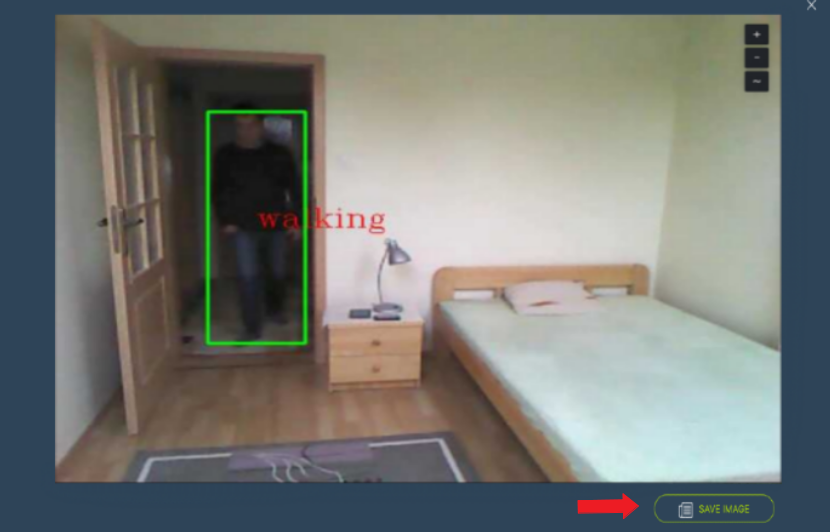
Press on the Frame icon to look closer at the recognized person's pose.
To download an image of a recognized person's pose, press the Save image button.
Analytics Start and Stop
To start analytics, press the Start button on the right side with the analytics name field. To stop analytics, press the Stop button.
When you click on the Stop button, the confirmation window opens. Click Yes to confirm or click No to cancel the action.
Analytics Deletion
To delete analytics, press the Delete icon on the right side of the analytics field.
In opened window press Yes to confirm the deletion or No to cancel the deletion.
Events
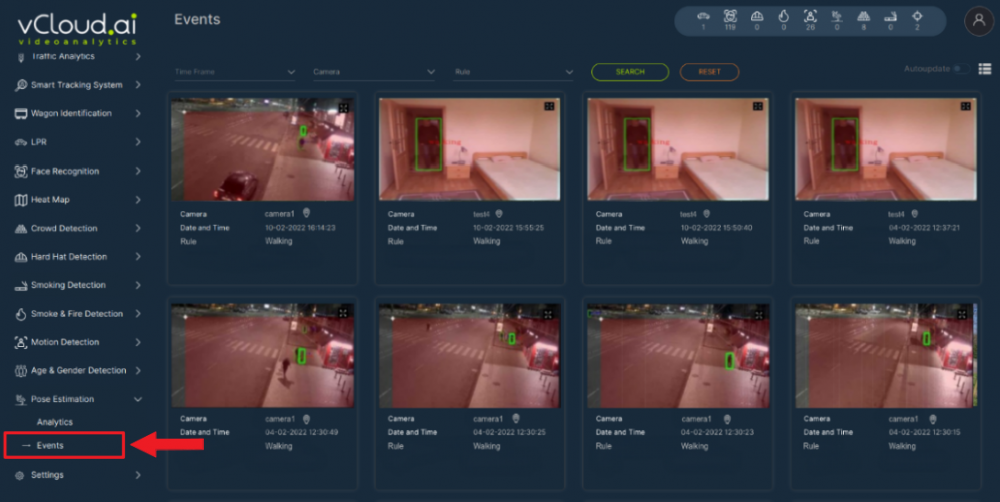
To view the Pose Estimation events, select Pose Estimation in the left menu and pass into the Events section.
The Events section is intended for viewing the history of notifications about a recognized person's pose - Standing, Walking, Sitting, Lying down, Stand up, Sit down.
Events Search
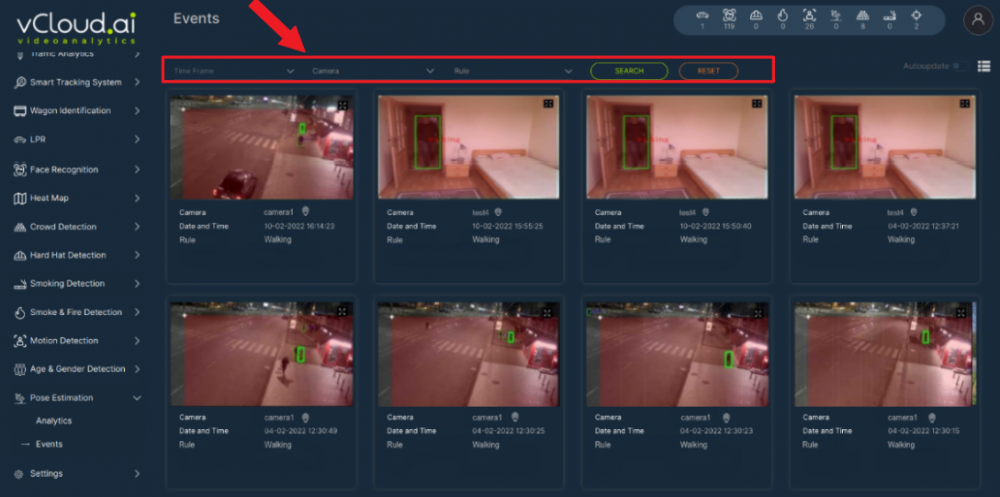
There is an event search field at the top of the screen.
| Search field | Parameters |
|---|---|
| Time Frame | Press on the field and select the desired time frame |
| Camera | Press on the field and select the camera you want to receive notifications for from the drop-down list |
| Rule | Press on the field and select the desired pose type - Standing, Walking, Sitting, Lying down, Stand up, Sit down |
Press Search to display the search results. Press Reset to clear the input fields.
To enable the auto update function, in the upper right corner of the page click on the Autoupdate toggle. Click once again to disable.
When it is enabled, the events on the page are updated automatically.
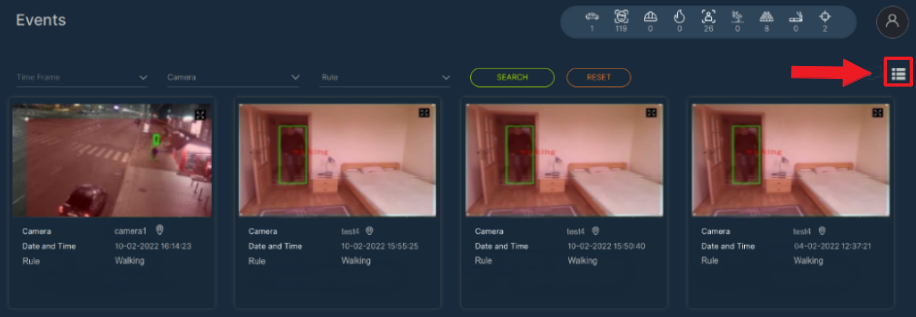
Events View
To go to the table view format, press the corresponding icon in the upper-right corner.
To return to the grid format, press the icon corresponding icon in the upper-right corner again.
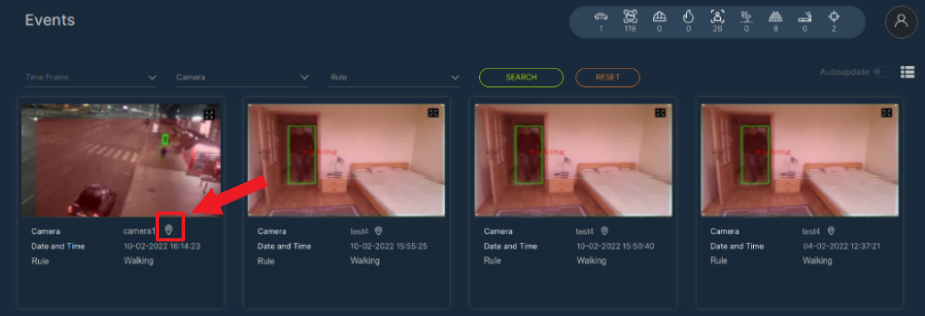
To view the location and direction of the camera, press the Location icon.
Frame View
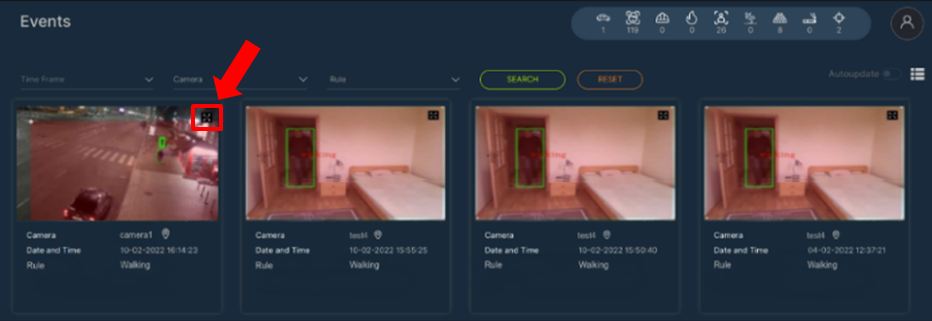
To enlarge a frame with a person's state, press the enlargement icon on the photo of interest.
Press "+" to Zoom in or "-" to Zoom out the frame. Press "~" to return the frame to the default size.
To save the image, press Save Image.


