Adding and working with video stream
Video streams
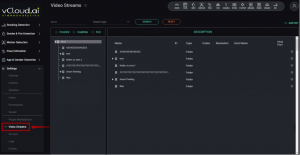
In order to add and work with video streams open the Settings section and pass to the Video Streams subsection.
On the Video Streams page, it is possible to add, edit, delete video streams and video files and collect them into folders for ease of use.
There is a search field at the top of the page.
Here you can apply the following filters:
| FILTER NAME | DESCRIPTION |
| Name | Enter the stream name or part of the name |
| Stream Type | Select a specific video source type from the drop-down list |
To apply filters, click on the Search button. To clear the fields, click on the Reset button.
Folder Management
Before adding a video stream, it is possible to create new folders to conveniently sort files and streams. For this purpose, click on the Folder button in the upper part of the Folders block.
In the following pop-up, enter the Name of a new folder and select the Parent folder. Then press Save.
When the Folders block is empty it is possible to create a new folder only in the Root. Further, you can add folders inside the created ones.
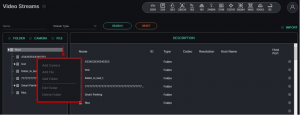
A right-click on the created folder opens a drop-down list with the following options:
Adding Camera
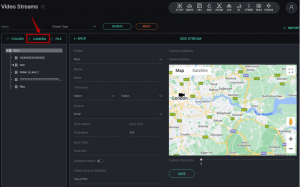
When you click on the Add Camera option an Add Stream block opens.The same option is available by clicking on the Camera button in the upper part of the Folders block.
To add a video stream it is necessary to fill in the following fields:
| FIELD NAME | DESCRIPTION |
| Folder | Select the folder where you want to place the video stream |
| Name | Enter the name of the video stream into the field. This name will be displayed in all components of the system that is used by video streams. |
| Time zone | Select your relative location and time zone |
| Source | This field defines the source type of the video stream.
Press in the field and choose one of seven available sources from the drop-down list: RTSP, FTP, HTTP. Each source type has its own additional fields to fill in: RTSP - Host Name, Host Port, Host Path, Authentication - Login and Password (optionally), Video Source Address FTP - Host Name, Host Port, Host Path, Events and Extra Options (optionally), Video Source Address HTTP - Host Name, Host Port, Host Path, Authentication - Login and Password (optionally), Video Source Address |
| Camera Address | Enter the address in the field or choose the necessary point on the map below |
| Camera Direction | Move the slider to change the direction of the camera. The camera direction helps with the vehicle movement direction determination |
When all necessary fields are filled in, click on the Save button.
To return to the Description block click on the Back button.
A new camera will appear inside the selected Folder.
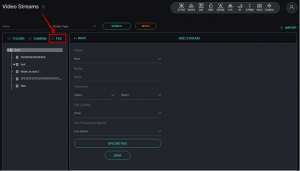
Adding File
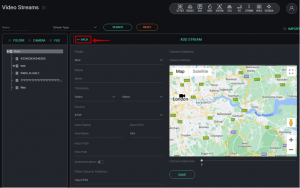
When you click on the Add File option, another Add Stream block opens.
The same option is available by clicking on the File button in the upper part of the Folders block.
To add a video file, it is necessary to fill in the following fields:
| FIELD NAME | DESCRIPTION |
| Folder | Select the folder where you want to place the video file |
| Name | Enter the name of the video file into the field. This name will be displayed in all components of the system that is used by video streams. |
| Time zone | Select your relative location and time zone |
| File Cycling | Select Once if a video file should only be played once for video analytic, or select Cycling if the video file playback should be cycled during the analytic process |
| File Processing Speed | Select the processing speed mode from a drop-down list |
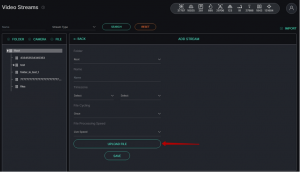
Then click on the Upload File button and select a video file on your device.
Finally, press Save to add a video file to the system.To return to the Description block click on the Back button.A new file will appear inside the selected Folder.
Adding/Editing/Deleting Folder
To add a new folder, click on the Add Folder option.
In the opened pop-up enter the Name of a new folder. The Parent folder's name sets automatically as the selected one, but it is possible to select another Parent folder from a drop-down list. Then press Save.
When you click on the Edit Folder option, the same pop-up opens.
Here you can enter another Name for the selected folder. To move it inside any other created folder, select another Parent folder from the drop-down list. Then press Save to accept changes.
When you click on the Delete Folder option, the confirmation pop-up opens.
Press Yes to confirm the deletion or press No to cancel.
Delete Stream and Delete File options work the same way.
Video Stream Management
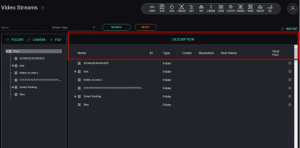
All added folders, cameras, and files with their extended description and additional options are located in the Description block.
Here you can view such parameters as Name, ID, Type, Codec, Resolution, Host Name, Host Port.
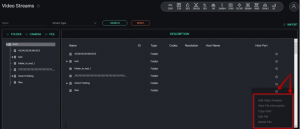
It is also possible to move the mouse cursor to the Options button on the right side of each Folder/Camera/File to view more options.
All folders here have the same additional options as in the Folders block.
Stream Options
When you move the mouse cursor to the camera's or file's Options button, it opens a drop-down list with the following options:
Adding Video Analytic
This option is similar for cameras and files.
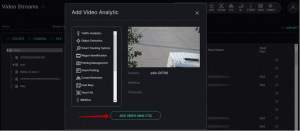
It is possible to move to Add Analytics page right from the Video Streams section. For this purpose, select Add Video Analytic option.
In the opened pop-up select the desired analytic module from the list and click on the Add Video Analytic button.
The selected camera or file will be set as a video stream automatically on the Add Analytics page of the selected module.
Viewing Camera/File Information
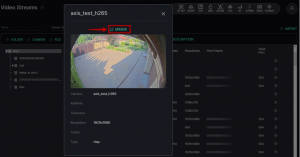
This option allows you to view the video stream preview and information about Camera name and Address, Time zone, Resolution, Codec, and Type.
For cameras, it is also possible to update a video stream preview by clicking on the Update button.
Copying path option is intended to copy the path to the video stream or video file to the clipboard for further use.
Editing File/Stream
When you click on the Edit Stream option the Stream Editor block for camera editing opens.It is possible to edit the same parameters here as you have set during Camera Adding or File Adding.
When all necessary fields are edited, click on the Save (for cameras) or Save File Stream (for files) button to accept changes.
If you want to undo all changes just click on the Back button.
