VCloud.ai License Plate Recognition VCA
Vehicle License Plates Recognition Module
Main functionality
- License plates recognition accuracy up to 99%.
- ANPR system can read license plates of vehicles traveling at speed up to 250 km/h.
- Recognition of vehicle brands, models, and colors with accuracy 95%.
- More than 60 countries supported.
- Support for one- and two-line, regular, reverse, and special types of license plates.
- Real-time notifications based on alarms from recognized license plates.
- Notifications in Telegram, by SMS or email.
- Restricted access to notifications for a pre-defined group of users.
- Unified database of registered vehicles.
- Ability to build reports on an hourly, daily, weekly, or monthly basis.
- Support for import (CSV) and export of vehicle databases (EXCEL, PDF, CSV, JSON).
Camera Installation Guidelines
The detection rate and accuracy of an ALPR system strongly depend on the quality of the images captured by the camera. Main condition is that the camera should capture images of license plates with close to perfect sharpness and contrast, day and night and in different weather conditions. This manual describes the key requirements for license plate recognition including hardware, installation, and configuration.
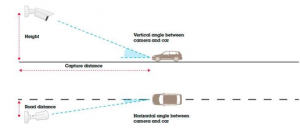
It is recommended to minimize the angle between the camera and the travel direction of the car, as shown in Picture 1. Ideally, you should place the camera right above the vehicles, or not too high. It is, however, a good idea to place the camera higher than the car headlights, to avoid blinding the camera with strong light.
Picture 1
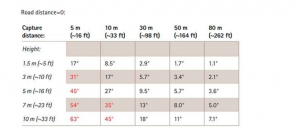
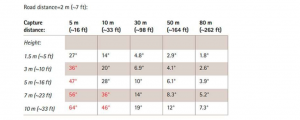
The total angle between the camera and the travel direction of the car can be estimated from Tables 1 and 2. We recommend keeping the total angle below 30°.
Table 1.
Table 2.
Camera alignment
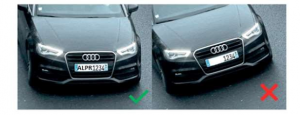
The camera should be pointed at the road so that the relevant lanes are centered in the image. It should be zoomed in to cover the required number of lanes. The roll angle of the camera should be adjusted so that the license plate is parallel to the edges of the image, see Picture 2. Picture 2.
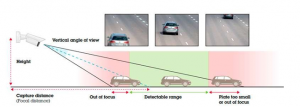
The distance between the camera and the road part that it captures is called the capture distance, shown in Picture 1. The capture distance should be chosen carefully since it will influence, in several ways, the possibility to detect license plates. We will show different parameters that affect the choice of capture distance.
The camera needs to be well focused so the captured license plates would be well readable. The image is, however, sharp not only at one specific distance but in a range of distances around the focal plane, as illustrated in Picture 3. The size of this range is called the depth of field (DOF). The DOF is normally larger for a longer capture distance. The DOF can be increased by reducing the size of the iris aperture. This is only necessary for short capture distances, below 10 m when the DOF is small. Reducing the iris aperture should be done carefully since it limits the low-light performance of the camera.
Picture 3.
Detectable range
The detectable range is the range of distances along the road where the license plate is visible and readable in the image, see Picture 4. Ideally, the detectable range is the full field of view of the camera, but this is not always the case. The detectable range can be limited by the depth of field of the camera, and vehicles that are far away are sometimes too small for processing by the image sensor.
Picture 4.
Weather conditions such as snow, rain, and fog can severely limit the visibility at long capture distances and hence limit the detectable range.
In the daytime and in good weather conditions, the detectable range increases with longer capture distance. For vehicles moving at high speed, it is necessary to use a long capture distance, to have enough time to read the license plate before the car exits the field of view.
Recommended capture distance
Table 3 shows the recommended minimum capture distance depending on the speed of the vehicles. The numbers are based on an estimated detection time of 0.2 s, which means that the ALPR analytics software can analyze five frames per second. Note that the number of analyzed frames per second can vary in different processors, and also depends on the resolution of the images. The table is just an example.
Table 3.
At night, the maximum possible capture distance is often limited by IR reach. The IR reach can be improved by using more powerful external IR sources.
IR light
Capturing license plates at night requires artificial lighting. Normally, infrared (IR) light is used since it is invisible to the eye and will not blind the drivers. Most license plates are IR reflective, and IR light will increase the visibility and contrast of the plate in darkness or cloudy weather. The IR light can come from LEDs built into the camera, or from IR sources that are external to the camera.
The intensity of light decreases with the distance, squared, to the light source. For a reflective object, such as a license plate, this leads to the fact that each doubling of the distance between the light source and the object will require a fourfold increase in IR power, in order for the object to keep the same visibility.
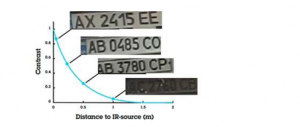
If the IR reach is not enough with the built-in LEDs, or if a camera does not have built-in IR LEDs, external IR can be used. The light cone of the IR source should match the field of view of the camera, at the relevant zoom level. License plates are made from retro-reflecting material, which means that they reflect light straight back where it came from, no matter at which angle the light hits the plate. When using an external IR source, the reflected IR light will come back towards the source, as illustrated in Picture 5.
Picture 5.
External IR sources need to be placed close to the camera so the reflected light hits the camera. Picture 5 shows the relative contrast of a license plate 10 m away, as a function of the distance between the camera and the external IR source.
The IR source should be aligned parallel to the camera, ensuring that the light shines on the part of the road that is in the camera’s field of view.
Camera settings
Specialized license plate cameras are built with suitable default settings and require a minimum of tuning. For other cameras, the following settings might need to be applied.
Max shutter speed
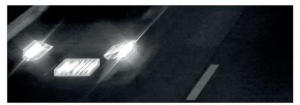
Vehicles that are moving fast may cause motion blur, as shown in the Picture 6 if the shutter speed of the camera is too high. The maximum shutter speed depends on the alignment of the camera as well as the speed of the vehicles.
Picture 6.
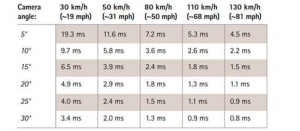
Car that is approaching the camera will get larger as it approaches. But once there is an angle between the camera and the direction of movement, the car will move laterally in the image at a speed that depends on the angle. Lateral movement will result in motion blur at a normal shutter speed of about 1/30 sec., so the max shutter speed needs to be limited. Table 4 shows the recommended maximum shutter speed depending on the angle between the camera and the direction of travel of the vehicle, as well as the speed of the vehicles. The camera angle can be estimated from tables 1 and 2.
Table 4.
1 ms = 1/1000s
Note that the camera will collect more light at a faster shutter speed, which increases the IR range. For example, by setting the camera at a 5 ° angle instead of a 20 ° angle, the shutter speed can be increased four times, which will double the IR range.
Max gain
Since the license plate is made of reflective material, it will glow brightly when exposed to intense infrared light. Objects around will be much darker as they reflect much less light. As a result, license plate gets overexposed and impossible to read.
The simplest way to avoid overexposing the license plate is to limit the max gain of the camera, as shown in Picture 7.
Picture 7.
Maximum gain set up depends on the available IR intensity, distance to vehicles and camera sensitivity. Anywhere between 9dB and 21dB gives reasonable results when using built-in IR.
WDR
Wide dynamic range (WDR) includes various methods for increasing the dynamic range of an image. WDR is very useful for highlighting details that might otherwise be hidden in shadows, or for preventing strong light from “blinding” the camera.
But WDR can cause motion artifacts in images of moving vehicles, depending on how WDR is implemented in a particular camera. We recommend to switch WDR off for license plate capture.
Product Description
ANPR module is designed to collect and store data about vehicles as well as automatic recognition of license plates in the traffic conditions and parking.
Basic data used by module:
- Date and time of vehicle presence at certain section;
- Frame with the vehicle as evidence (photo fixation);
- Recognition of the model and color of the vehicle;
- Direction of vehicle movement and route determination.
All information about vehicle is stored in the database: date and time, frame with the car, license plate and vehicle model, color, the direction of movement, route.
ANPR module can be used for:
- Searching in the database of wanted vehicles;
- Automatic detection of vehicles belonging to employees of the company;
- Gate automation scenario;
- As part of traffic rule violation detection system.
System requirements
Below are minimum system requirements for license plate recognition based on GPU for 1 video stream.
| Parameter | Recommended value |
| CPU | Intel Core i5-5575 or higher |
| RAM | 2 GB RAM (+1GB make and model recognition) |
| GPU | NVIDIA 1050 |
| Places for archive | up to 5 GB per day |
| Operating system | Ubuntu 20.04 |
Analytics
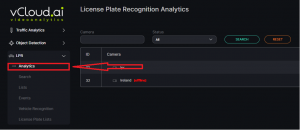
To get started with ANPR analytics, click LPR in the left menu and then click analytics.
Adding analytics
The page displays a list of cameras with the status and the ability to edit, add, or delete analytics. In order to add a new license plate analytics, press Add Analytics in the upper-right corner of the screen.
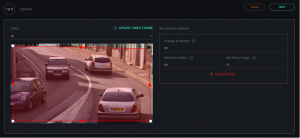
When you click on the "Add analytics" button, the form for adding analytics opens.
| Field name | Description |
| Video | Select the camera name from a drop-down list. Video stream will be used to create analytics. |
| Detection zone | License plates will be recognized in the red zone. You can reduce enlarge or move recognition zone |
| Frames to detect | The minimum number of frames for license plate recognition. Possible range from 1 to 100 |
| Min plate width | The minimum license plate width for recognition is 60 pixels |
| Min plate height | The minimum license plate height for recognition is 15 pixels |
| Field name | Description |
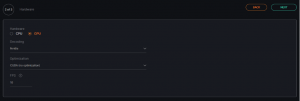
| Hardware | For hardware acceleration, select CPU or GPU |
| Decoding | Select the hardware decoder from the drop-down list - CPU, Intel, Nvidia |
| Optimization | For hardware acceleration, select one of the technologies. |
| Frames to detect | The minimum number of frames for license plate recognition. Possible range from 1 to 100 |
| Field name | Description |
| Send events to event manager | Fill in the checkbox "Send events to event manager " to create your own event for notifications sending. If necessary, it is possible to add additional parameters for further use when event is being created. Fill in the parameter fields. To add parameters, press the "+" button |
| Vehicle without number | Send notification upon detection of vehicle without license plate |
| Blur plate number in preview mode | Send notification to preview image if plate number blurred |
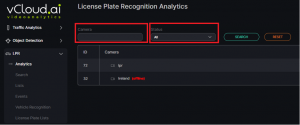
Camera search
Search field is located at the top of the Analytics page. To find the required camera enter the name or/and status of camera.
Starting and stopping analytics
To start analytics, press Start button on the right side with the analytics name field. To stop analytics, press Stop.
Editing analytics
To open the license plate analytics editing window, press the Editor button on the right side of the license plate analytics page.
By clicking the Editor icon, the page for license plate analytics editing will load.
If analytics is already running before editing it is required to stop the analytics.
Viewing analytics
To view analytics, press the view icon on the right side.
It is possible to view only active video streams. In the opened window you can view the video from the camera in real-time mode.
There are records of recognized vehicles in the lower part of the window, which include license plate, model, and date of event.
Click on the vehicle number in the table to view information about that vehicle.
To view a different record, click Previous post or Next post.
To download an image of a recognized vehicle, press Save image.
Deleting analytics
To delete one of the cameras, click on the delete icon on the right side of the analytics field.
Search
Search Parameters
In order to perform a vehicle search, select LPR in the left menu and click on Search.
There are recognized vehicle search parameters available at the top of the screen.
| Search field | Parameters |
| License plate number | Enter vehicle license plate number in the field to search for detected license plates |
| Time frame | Select time period you want to search for |
| Camera | Select the cameras you want to search for, or check the Select by radius box. In the window that opens, set the area. The search will be performed by cameras in the selected area. |
| Color | Select the desired vehicle color in the field |
| Make | Select the vehicle brand |
| Model | Select the vehicle model |
| Country | Select the country of recognized license plate number |
| Direction | Select the direction of movement of the car |
Click on Search to display search results. Click on Reset to clear the input fields.
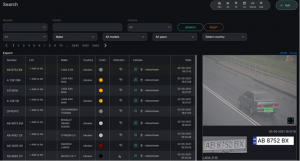
Search Results
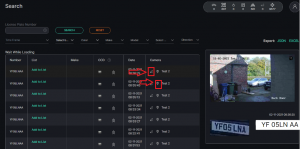
Search results are shown in the picture below. The list consists of the following fields: number, list, make, CCD (country, color, direction), date, camera.
List
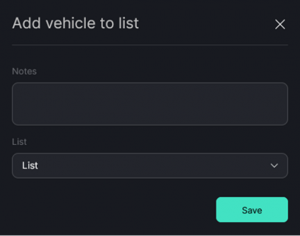
In the list field, when you click on Add to the list, small window opens up where you can add recognized license plate to the one of existing lists.
| Field Name | Description |
| Notes | Enter the text of notification that will be sent when the vehicle is detected |
| List | Select specific list where you want to add the number |
Camera
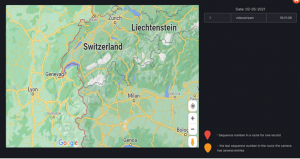
When you click on Route icon, a window will open up with the statistics of vehicle movement. When you click on the Map icon, a window will open up showing the camera location.
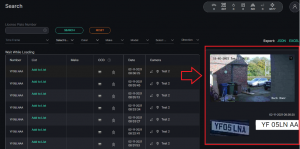
Photo of the car with recognized license plate
On a right side of your screen, you can see picture of the car captured by camera along with the recognized license plate.
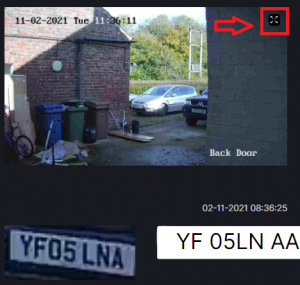
When you click on Enlarge icon window will open up.
In this enlarged window you will find option to export this captured image in PDF or JPG formats.
Export Results
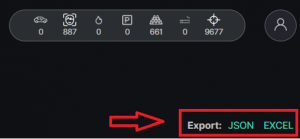
Records can be exported in JSON or Excel format. To perform export, click on JSON or Excel.
Lists
To create a database of license plate numbers to be recognized, select LPR in the menu on the left and click on Lists.
By clicking on the list name, page with the license plates added to this list opens up.
Lists Search
There is a search field at the top of the screen. To find required list, enter the name or part of it in the Name field.
Click on Search to display the search results. Click on Reset to clear the input fields. Search by number opens up list of all license plate numbers in the system and allows to perform search by license plate number.
Adding List
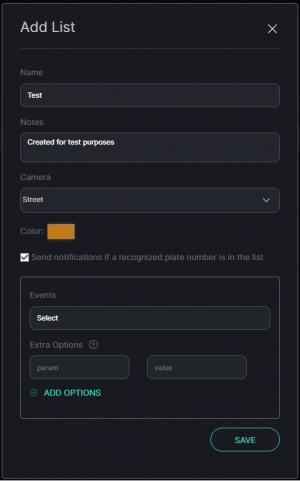
In order to add a new list, click on Add List in the upper-right corner of the screen.
Fill in the fields in the opened window:
| Field name | Description |
| Name | List name |
| Note | Description of the purpose for the record to be created |
| Camera | Select the camera from a drop-down list. The selected cameras will be used to search for the vehicle with the specified number |
| Send notifications if a recognized plate number is in the list | Send notifications on recognized license plates to external sources (Telegram, Email, etc.), check the box in the selected field. |
| Events | From the drop-down list, select the event for which notifications will be sent. |
| Additional parameters | If necessary, it is possible to add additional parameters for further use when event being created. Fill in the parameter fields. To add parameters, press the "+" button. To remove parameters, press " -". |
Editing list
To edit list, click on edit icon in the right side.
Deleting list
To delete the list, click trash bin icon on the right side of the screen.
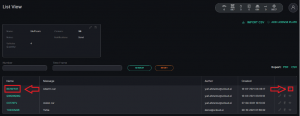
Viewing list
To view the list content, click on eye icon.
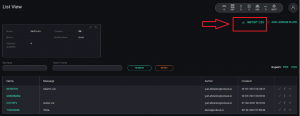
Click Import CSV to upload a CSV file with a list of license plate numbers.
Adding license late to the list manually
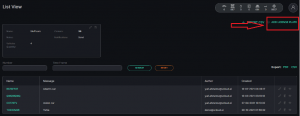
In order to add a new record, click on Add License Plate in the upper-right corner of the screen.
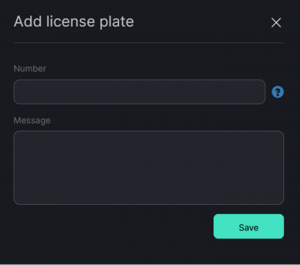
As a result, small window will be opened.
| Field Name | Description |
| Number | Enter the license plate number of the vehicle you want to find in the field. Search will be performed by the cameras that were selected when creating the list.
In addition to the full format number, you can enter the number using additional characters: % - 0 or more characters omitted $ - 1 character omitted @ - 1 letter omitted _ - 1 symbol omitted |
| Message | Enter the text of the notification that will be sent when the vehicle is detected. |
Viewing license plate number
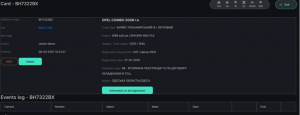
To view information about license plate number, click on its name or on the view icon.
Once you click on it window opens up with the information about this particular record.
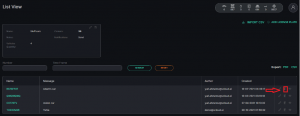
Deleting license plate number from the list
Clicking the Delete button opens a form with a suggestion to delete the license plate number from the list s. To confirm this operation, press Yes, and to cancel press No.
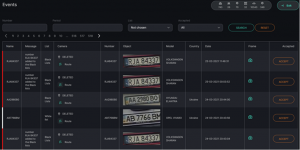
Events
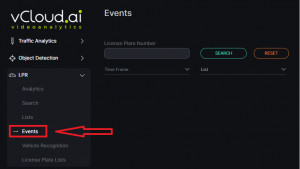
To view information about received events, select LPR in the menu on the left and click on Events.
After the camera set up for LPR detection and events start
After set up for LPR detections is done and camera stared to capture license plates, information about such events will be displayed in the Events section.
Event search
There is a search field at the top of the screen.
| Field name | Description |
| Number | Enter the vehicle number in the field
In addition to the full format number, you can enter the number using additional characters: % - 0 or more characters omitted $ - 1 character omitted @ - 1 letter omitted _ - 1 symbol omitted |
| Period | Click on the field and select the desired time period. |
| List | Click on the field and select the necessary list. |
| Accepted | Click on the field and select the user who received notifications. |
Click on Search to display the search results. Click on Reset to clear the input fields.
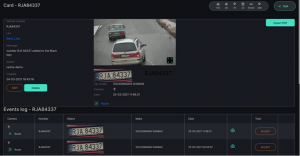
Viewing vehicle license plate number
Click on the list name in the Events page to view information about records related to this specific list.
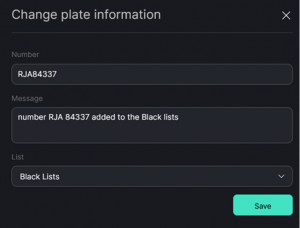
Click Edit to change the data.
In the opened window you can change the following fields:
| Field name | Description |
| Number | Enter the vehicle number in the field |
| Message | Enter a message in the field. The message should contain information about the vehicle |
| List | Press on the field and select the list with the number |
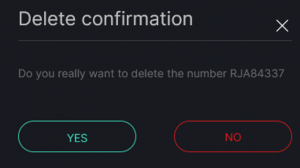
Clicking the Delete button opens a form with a suggestion to delete the number from the list of vehicles. To confirm the deletion, press Yes, and to cancel press No.
If you press Yes, the number will be removed from the list of vehicles.
Vehicle Number Export
To export the card of this vehicle number in PDF format, click Export PDF.
Frame
To view a frame from a record, click the frame icon on the right side of the record.
When you press on the frame icon, a window is opened with the image of the found vehicle.
Camera
To view the camera location, press the camera location icon.
Accept Notification
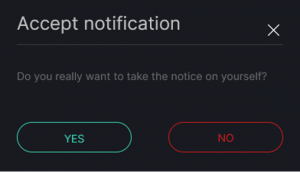
To accept a notification for yourself, press Accept in the right part of the record.
After clicking, a confirmation window will appear. Press Yes to accept the notification, press No to cancel accepting.
Recognition Statistics
To view vehicle recognition statistics, select LPR and go to the Recognition Statistics section.
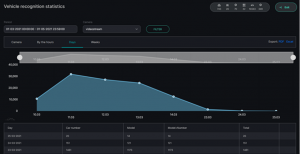
Vehicle recognition statistics are used for reports viewing and creating for specific periods.
Recognition Statistics Filter
In order to filter out the statistics for vehicles detection it is necessary to do the following:
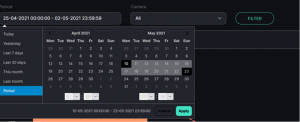
Select the time period for which statistics will be generated.
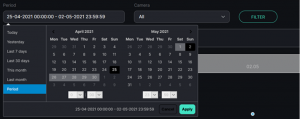
To select a period, enter one of the following values: today, yesterday, last 7 days, last 30 days, this month, previous month, manually selected period (using calendar specify a range of days and times).
Select the camera from which the video stream is being played. It is possible to select All cameras or a specific camera.
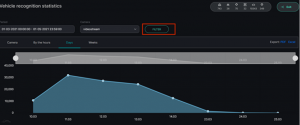
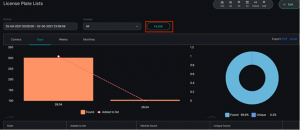
Press Filter.
Reports Export
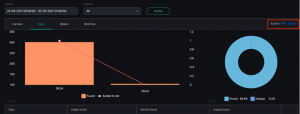
To upload the reports, it is necessary to use the option of report downloading.
Statistics Viewing
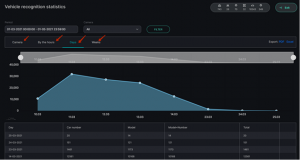
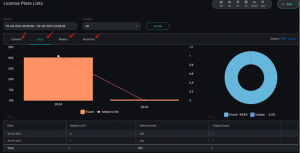
To view camera statistics by hours, days, weeks, and months, select the appropriate tab.
Camera
In the Camera tab, you can see quantitative indicators of vehicle recognition by a camera.
Hours
In the tab By the hours, you can see quantitative recognition indicators relative to the days of the week with hourly detail.
Days
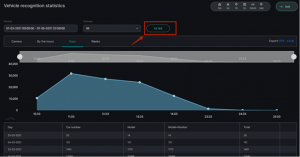
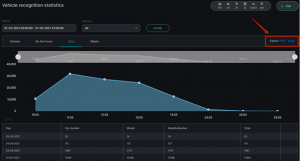
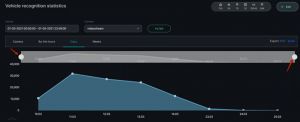
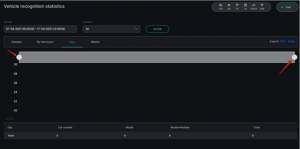
In the tab Days there is the possibility to detail the vehicle recognition schedule. To do this, it is possible to use side scrolls to reduce the display width of the main chart on the upper indicator chart. It is possible to move along the main chart by moving the truncated zone horizontally.
To normalize the display, press the button to disable zoom.
Weeks
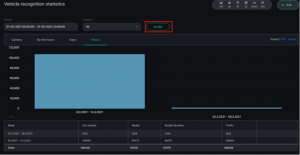
In the tab Weeks, it is possible to see quantitative recognition indicators for weeks in the selected range.
Lists Statistics
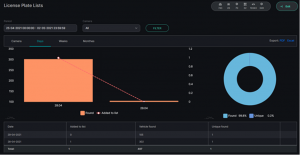
Statistics for vehicles that are in the corresponding lists are intended for reports viewing and creating for certain periods.
Lists Statistics Filter
In order to filter statistics it is necessary to perform the following actions:
Select the time period for which statistics will be generated.
To select a period, enter one of the following values: today, yesterday, last 7 days, last 30 days, this month, previous month, manually selected period (using calendar specify a range of days and times).
Select the camera from which the video stream is being played. It is possible to select All cameras or a specific camera.
Press Filter
Report Export
To upload the reports, it is necessary to use the option of report downloading.
Statistics Viewing
To view camera statistics by hours, days, weeks, and months, select the appropriate tab.
Camera Installation Requirements
· Camera installation height requirements: recommended - 3 m or 5 m (Minimum - 1.5 m; Maximum - 10 m)
· License plate image of moving vehicle should have no high-speed "blurring" effect visible to the eye
· Symbols of license plate number must be applied in font and size in full accordance with the standard adopted in the country that issued this number
· License plate numbers must meet the requirements for cleanliness and legibility: all symbols must be clearly visible and not obstructed by anything
· License plate images should be of sufficient contrast; the difference in contrast between characters of the number and background must be visible by eye
· The size of a single-line number on the image must be at least 100 * 20 (width * height) pixels on FullHD
Sensor Resolution Requirements for Cameras
1 lane (~ 4 m) - 1 MP (HD, 720p)
2 lanes (~ 8 m) - 2 MP (Full HD, 1080p)
3 lanes (~ 12 m) - 5MP
